To restore foggy headlights, you’ll need to remove the oxidized layer using progressive-grit sandpaper (start with 1000-grit, advance to 3000-grit) or a commercial restoration kit, which typically takes 15-20 minutes per light and improves brightness by 30%. After sanding, polish with rubbing compound using circular motions and a microfiber cloth. Critical step: apply UV-protective sealant within 24 hours to prevent re-oxidation. For minor haze, non-gel toothpaste works temporarily. Below, we’ll explore specific techniques and long-term protection strategies to maintain peak visibility.
Understanding Why Headlights Become Foggy and Yellowed
Headlight degradation occurs through five primary mechanisms that compromise both appearance and functionality. UV exposure breaks down polycarbonate’s molecular structure, creating yellow tint and cloudiness as protective coatings wear away. Oxidation reactions with oxygen form hazy films once these coatings erode, exposing plastic to air and moisture damage. Temperature effects cause expansion and contraction cycles that create cracks, allowing water penetration and internal condensation between cold exteriors and warm interiors. Road debris generates micro-abrasions and surface pitting, where abrasive particles accumulate in scratches and chemical pollutants react with plastic. Dirt and chemical buildup creates a layer that diminishes headlight brightness and reduces overall visibility. Environmental factors accelerate all processes—humid coastal areas intensify corrosion through salty air, while freezing temperatures produce micro-cracks that trap contaminants. These combined mechanisms progressively reduce headlight illumination effectiveness. If condensation persists inside the headlight housing after cleaning, this may indicate housing cracks requiring replacement. Without proper protection through UV-resistant clear coat, headlights will continue to deteriorate rapidly after any cleaning attempt.
Restoring Clarity With Commercial Headlight Kits
Commercial headlight restoration kits offer a practical solution once you’ve identified oxidation and UV damage as the primary causes of lens degradation. These commercial kit options utilize progressive-grit sanding compounds followed by polishing agents to remove oxidized layers effectively. Meguiar’s kits excel with heavy oxidation, while Turtlewax two-in-one products handle mild haze efficiently at lower cost points. Reputable brands such as Sylvania, Cerakote, 3M, and Mothers have demonstrated positive results in both consumer and expert tests.
Lens restoration techniques typically require 15-20 minutes per headlight, involving multiple sanding cycles with incrementally finer grits. You’ll achieve 30% brighter light output compared to degraded lenses, directly improving nighttime visibility and safety. However, you must apply UV sealant post-restoration to prevent re-oxidation within months. Without durable protection lasting over a year, fog returns quickly. Professional-grade Detail King kits provide patented sealing formulas for extended durability across multiple restoration cycles. The restoration process depends on damage severity, as mildly hazy lenses may only require polishing without wet sanding, while heavily damaged lenses with deep gouges may achieve 75-80% restoration to like-new condition. Quality restoration kits include abrasive compounds and polishing pads along with protective coatings to safeguard against future damage. Some kits feature ceramic coating for extended protection against future oxidation and UV damage.

KIT CONTENTS - Each headlight restoration kit includes (8) Step 1 Oxidation Removing Wipes, (1) Step 2 Sanding Kit, and (2) Step 3 Ceramic Coating Wipes.
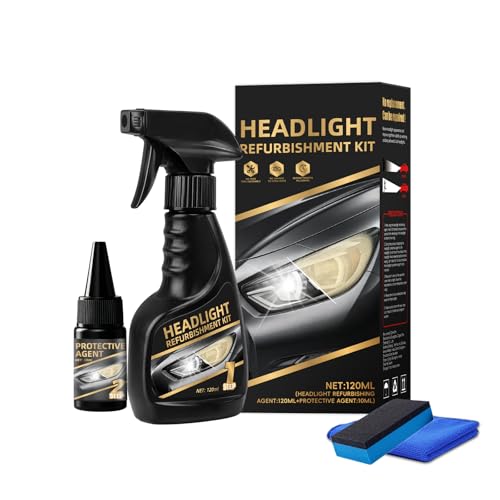
Make Your Vision Brighter:This 2026 New Automotive Headlight Restoration Kits effectively clears up yellowing and cloudiness, shine your car headlamp in just minutes, instantly improving brightness and visibility

KIT INCLUDES: 1 - Disc Pad Holder, 3.25 in (8,2 cm) 6 - 3M Gold Sanding Discs 500 Grit, 3 in (7,6 cm) each 4 - 3M White Finishing Discs 800 Grit, 3 in (7,6 cm) each 1 - 3M Trizact Refining Disc 3000 Grit, 3 in (7,6 cm) 2 - 3M Quick Headlight Clear Co
Using Toothpaste to Remove Oxidation and Haze
While commercial kits deliver superior longevity, toothpaste provides an accessible alternative for clearing minor oxidation when you need immediate results without specialized equipment. For effective toothpaste application, select non-gel, non-whitening paste containing mild abrasives like hydrated silica. Apply a generous strip directly to the headlight lens and rub in firm circular motions using a damp cloth for several minutes. The paste turns cloudy gray as it lifts oxidation. Protect surrounding paint with tape before beginning oxidation removal.
This method restores clarity for 1-2 months but creates micro-scratches that accelerate future degradation. The non-calibrated abrasive particles, ranging 1-4 μm, polish surface oxidation without repairing underlying damage. Whitening toothpastes containing baking soda or silica offer superior results compared to standard formulations for headlight restoration. For longer-lasting results, follow toothpaste restoration with wet sanding and polishing using professional-grade compounds to address deeper oxidation layers. Apply car wax immediately after cleaning to establish a protective barrier and extend results. Wear protective gloves and safety glasses during application to prevent skin irritation and eye injury from prolonged contact with abrasive compounds.

MAINTAIN YOUR WHITEST SMILE – Formulated for everyday use, this toothpaste helps lift stains while supporting enamel health, making it easy to maintain a naturally brighter smile. Works best when paired with Lumineux Enamel-Safe Whitening Strips.
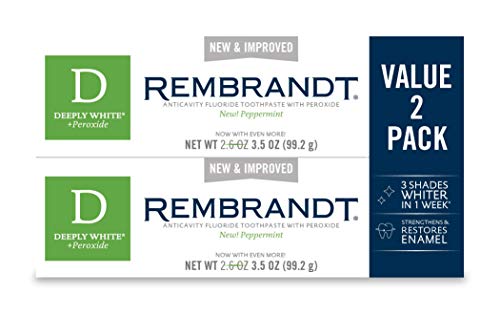
Includes: 2-3.5 oz Tube of REMBRANDT Deeply White plus Peroxide Whitening Toothpaste

Includes: 2-3.5 oz Tube of REMBRANDT Intense Stain Whitening Toothpaste
The Baking Soda Paste Method for Cloudy Lenses
Another household alternative employs baking sodium bicarbonate as the abrasive agent, offering comparable results to toothpaste with adjustable grit levels. Begin by masking surrounding paint with tape, then wash headlights with soap and water. Mix one tablespoon of baking soda with water to form a thick paste. For enhanced cleaning power, create a vinegar mixture by adding one part vinegar to the paste. Apply this compound to the lens surface and let it sit for ten minutes. Scrub in circular motions using a microfiber cloth, progressing through 1200, 1500, and 2000 grit sandpaper stages. Rinsing thoroughly is necessary to prepare the surface for drying, as a completely dry surface ensures optimal results. Rinse thoroughly between applications. This method removes surface oxidation and grime effectively, though results typically last only two weeks without UV sealant protection. For longer-lasting clarity and brightness, consider applying a protective clear coat after completing the restoration process. Repeat the process for persistent haze.
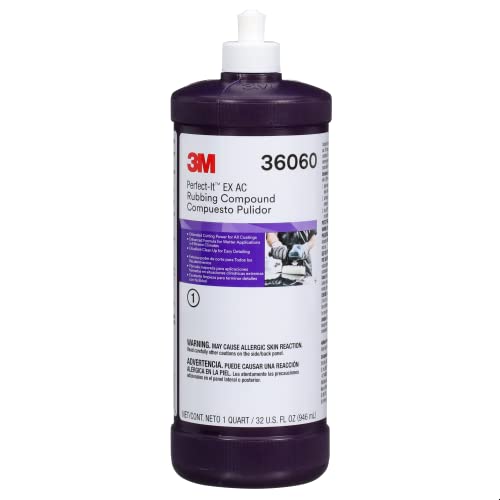
Deep Cleaning With Rubbing Compound
For deeper oxidation that household cleaners can’t penetrate, rubbing compound provides the abrasive power necessary to remove damaged plastic layers and restore optical clarity. Select automotive-grade compound from brands like Turtle Wax ($3-$7) and apply it to a dampened scrubbing pad. Using vigorous circular rubbing techniques, work the compound across the entire headlight surface for 2-5 minutes. Keep the compound wet throughout application—add water if it begins drying to prevent surface damage. Never apply compound to surrounding paint, as excessive pressure can cause corrosion. After treatment, rinse thoroughly with a wet sponge and buff with microfiber cloth. For ideal headlight maintenance, wipe down with alcohol before sealing. If your headlight bulb is also dim or burned out, you may need to replace the H11 low beam bulb alongside your cleaning efforts. This process effectively removes moderate oxidation, though severe cases may require preliminary sanding. Modern LED headlights that have become increasingly bright require particular care during cleaning to maintain their enhanced light output capabilities. While this method delivers impressive results, plan to repeat every few months as the solution provides temporary improvement rather than permanent restoration.

BUFF OUT IMPERFECTIONS: Meguiar's Ultimate Compound removes scratches, swirls & oxidation for a clear, perfect finish
HIGH PERFORMING: Efficiently remove P1200 grade or finer scratches with this high-performing compound

Removes scratches, heavy swirl marks, surface blemishes and 1500 grit sanding scratches
Protecting Your Headlights After Restoration
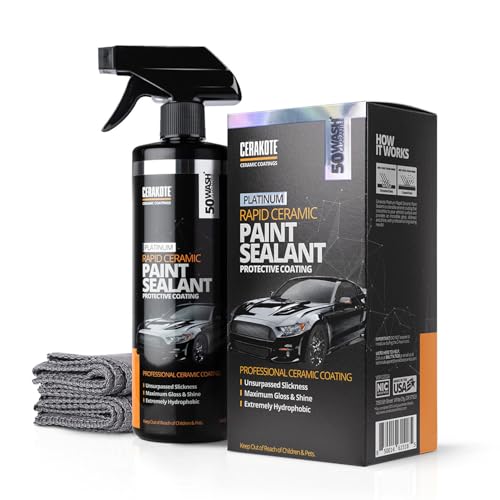
Restoration success depends entirely on immediate protection—without a durable barrier, UV radiation and environmental contaminants will re-oxidize your headlights within weeks. Apply protective coatings within 24 hours of restoration. Ceramic sealants deliver 6–24 months of hydrophobic UV resistance, while professional-grade polyurethane or epoxy clear coats provide multi-year abrasion and chemical protection. For maximum durability, install thermoplastic polyurethane paint protection film (PPF)—it resists stone chips, self-heals minor scratches with heat activation, and lasts 3–10 years. Surface prep is critical: clean lenses with isopropyl alcohol, remove all wax residues, and guarantee complete dryness before application. Follow manufacturer reapplication schedules—consumer ceramic coatings typically require renewal every 6–12 months. Supplement coating or film protection with monthly pH-neutral washing and covered parking to minimize UV exposure. High-quality films with UV protection can slow yellowing and reduce the necessity for expensive headlight restorations.

【PROFESSIONAL GRAPHENE CERAMIC COATING】Compared with other 10H coating, this updated version coating hardness increases to 12H so that it lasts longer. After painted with this kit, a protective layer will be covered on car body. Structure nanocrystal and strong hydrophobic fluorine polymer in this Graphene Ceramic Coating. protects your car from salt fog corrosion, bird's dropping, UV light, scratches, crushed stones and iron filings etc.

MAXIMUM GLOSS & SHINE: Delivers an extremely glossy, mirror-like finish on clean paint. Use as a standalone sealant or a quick ceramic topper that deepens color and adds slickness, not a one-step miracle coating or a paint corrector