To clean foggy headlights, you’ll start with wet sanding using progressively finer grits (400 to 3000), maintaining consistent pressure while keeping the surface wet. Next, apply polishing compound with a foam pad to restore clarity, then wipe clean to assess results. Finally, seal the lens with UV-resistant coating using thin, even layers to prevent re-oxidation. You can also use household items like baking soda paste or toothpaste for mild oxidation. The complete restoration process addresses everything from severity assessment to long-term maintenance strategies.
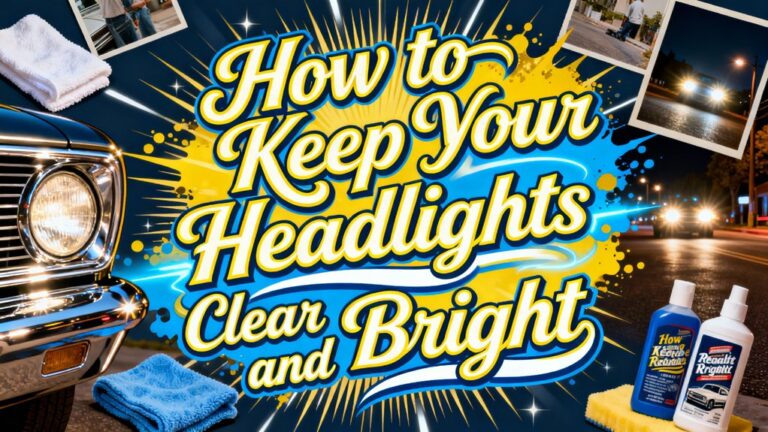
Why Headlights Become Foggy and Cloudy
Headlight lenses degrade through a combination of environmental and mechanical factors that compromise both their protective coatings and underlying polycarbonate structure. UV radiation breaks down the clear coating, exposing the plastic to atmospheric oxygen. This oxidation causes yellowing and surface pitting that scatters light output. Road debris impact accelerates deterioration by abrading the protective layer through gravel strikes and airborne particles. Temperature fluctuations induce thermal stress, creating microfractures that allow moisture penetration. Chemical contaminants—including road salt, exhaust deposits, and pollutants—react with compromised surfaces to produce hazing. When headlight seals fail, internal condensation forms fog that can’t be externally cleaned. Bird droppings and pollen introduce acidic compounds that further corrode the lens surface. Each degradation mechanism compounds the others: scratches enable deeper oxidation, thermal cracks permit moisture intrusion, and chemical exposure weakens structural integrity, progressively reducing transparency and beam effectiveness. Restoration through wet sanding and polishing can remove oxidized layers and restore clarity to affected lenses. If condensation persists after cleaning, this may indicate a crack in the housing that necessitates replacing the entire headlight assembly.
Assessing the Severity of Headlight Oxidation
Before you can select the appropriate restoration method, you must accurately determine the extent of damage affecting your vehicle’s lenses. Examine them under strong light to identify oxidation impact levels. Mild oxidation appears as slight cloudiness on the outer surface, while moderate cases show yellowing and dullness. Severe oxidation presents deep brown discoloration with chalky texture. Run your fingers across the lens—smooth surfaces indicate minor contamination, but roughness suggests deep penetration requiring sanding. Measure light output using a lux meter; oxidation reduces brightness up to 78%. Test beam patterns in darkness and compare both headlights for degradation consistency. Professional goniophotometer assessments provide precise data, directly affecting headlight longevity and restoration planning. For minor cases, applying protective coating or wax after initial cleaning helps prevent re-yellowing and maintains clarity. A UV-resistant clear coat provides long-lasting protection against future oxidation and yellowing. Accurate assessment prevents unnecessary effort or materials by ensuring you choose the most suitable restoration technique for your specific condition.
Household Items That Can Clean Foggy Headlights
While professional restoration products deliver ideal results, several household items offer cost-effective alternatives for clearing oxidized headlight lenses. Baking soda paste, created by mixing baking soda with water or hydrogen peroxide, functions as a mild abrasive that physically removes the oxidized polymer layer. Apply the paste using a cross-hatch scrubbing pattern, then rinse thoroughly. For enhanced oxidation removal, spray white vinegar onto the applied paste to trigger a vinegar reaction that helps break down residue. WD-40 provides temporary clarity improvement by dissolving surface contaminants, though results typically diminish after subsequent washing. Magic Eraser sponges utilize micro-abrasive technology for another cleaning option. To achieve longer-lasting results comparable to professional methods, consider wet sanding and machine polishing for more severe oxidation cases. Regardless of method selected, apply UV sealant or automotive wax post-cleaning to prevent rapid re-oxidation and extend restoration longevity. Use a microfiber cloth for the final polishing step to avoid scratching the freshly cleaned surface.

Mrs. Meyer’s Baking Soda Cream Cleaner removes soap scum and grease build-up to make your kitchen sparkle

A HOUSEHOLD CLASSIC: This bulk 7 lb resealable bag of ARM & HAMMER Baking Soda unlocks 100+ uses across your home—from kitchens and laundry rooms to crafting tables and beyond

Deep Cleaning Power: Effectively removes grease, grime, and limescale buildup from kitchen and bathroom surfaces
Using Toothpaste and Baking Soda for Light Fogging
Simplicity defines this restoration method, as common toothpaste and baking soda leverage mild abrasive compounds to physically remove oxidized polymer layers from headlight lenses. Toothpaste types containing whitening agents or peroxide deliver superior grit for UV-damage removal. Apply paste-form toothpaste directly to the lens surface, while baking soda ratios require approximately three parts powder to one part water, forming a workable consistency. Scrub the mixture using circular motions with microfiber cloths or soft-bristled brushes, maintaining moderate pressure across the entire surface. Allow the compound to partially dry before buffing. Rinse thoroughly with clean water, then dry completely using lint-free towels. Execute three to four application cycles for ideal clarity restoration. These methods temporarily improve light output but don’t provide UV protection, necessitating maintenance every few months. The cleaning process restores brightness and clarity that fogging diminishes in headlight performance.

KIT CONTENTS - Each headlight restoration kit includes (8) Step 1 Oxidation Removing Wipes, (1) Step 2 Sanding Kit, and (2) Step 3 Ceramic Coating Wipes.

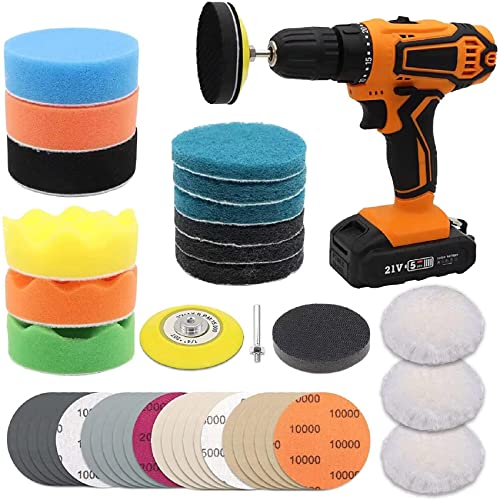
KIT INCLUDES: 1 - Disc Pad Holder, 3.25 in (8,2 cm) 6 - 3M Gold Sanding Discs 500 Grit, 3 in (7,6 cm) each 4 - 3M White Finishing Discs 800 Grit, 3 in (7,6 cm) each 1 - 3M Trizact Refining Disc 3000 Grit, 3 in (7,6 cm) 2 - 3M Quick Headlight Clear Co

KIT INCLUDES: 1 - 3M Trizact Refining Disc 1000 grit, 3 in/7.6 cm 1 - 3M Trizact Refining Disc 3000 grit, 3 in/7.6 cm 2 - 3M Quick Headlight Clear Coat Wipes 1 - Foam Pad with 3M Hookit Attachment, 3 in/7.6 cm 1- Disposable Glove
Commercial Headlight Restoration Kits Explained
Commercial headlight restoration kits provide structured, multi-component systems engineered to reverse polymer degradation through progressive abrasion and protective sealing. You’ll find commercial kit advantages include cost-effectiveness—saving hundreds versus replacement—and user-friendly designs enabling DIY application without professional intervention. A kit component overview typically reveals graduated sanding pads (ranging from coarse to fine grits), polishing compounds for surface refinement, and UV-blocking sealants or ceramic coatings that prevent re-oxidation. Advanced formulations incorporate UV inhibitors critical for maintaining clarity beyond initial restoration. You must follow manufacturer protocols precisely: surface preparation, sequential abrasion stages, compound application, and final UV sealing. Skipping protective coating steps results in rapid degradation within months. Quality varies greatly between products, affecting durability and finish longevity. Professional-grade kits with ceramic protection deliver extended results—up to eighteen months—while basic formulations require more frequent reapplication. Understanding the science behind headlight degradation helps explain why both the restoration process and protective sealing are essential for long-term results. The sanding process removes the outer oxidized layer to eliminate chemical buildup and restore lens transparency. Many restoration kits include all-in-one components with applicators and protective coatings to simplify the restoration process for homeowners.
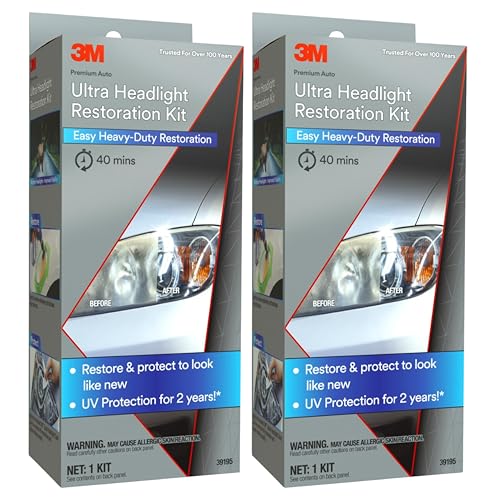
2-PACK VALUE: Includes 2 complete Ultra Headlight Restoration Kits (Part 39195) for restoring multiple vehicles or keeping a spare in your garage.

Complete Set: Exquisite toolbox, 800g headlight repair fluid, atomizing cup + 2 lids set(contains 2 lid silicone rings), 6 sandpapers(180# – 280# – 320# – 600# – 800# – 1200#), emery board, funnel, guard tape, power supply set (110V power cord + car power cord), instruction manual. All the tools you need are included in one kit, no additional purchases are required.
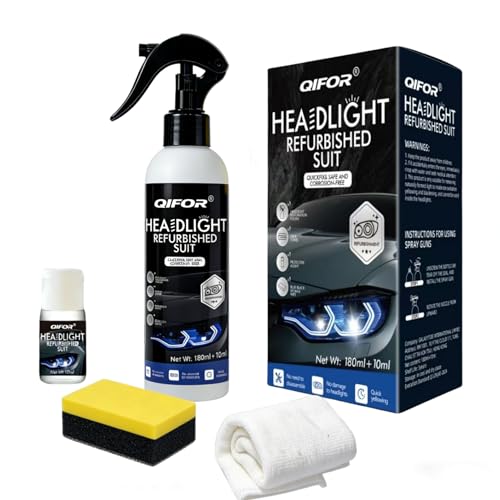
KIT CONTENTS - Each headlight restoration kit includesOne bottle of headlight yellowing removal solution (6.09OZ), one bottle of headlight crystal plating solution (0.34OZ), one towel, and one sponge
Step-by-Step Guide to Sanding and Polishing Headlights
Successful headlight restoration depends on systematic surface preparation beginning with thorough cleaning using automotive soap and water to eliminate contaminants that compromise sanding effectiveness. Mask surrounding areas with automotive tape before inspecting oxidation severity to determine your starting grit—typically 400-500 for heavy damage.
Execute proper sanding techniques by progressing through increasing grits: 400, 600, 800, 1000, 1500, and 2000-3000. You’ll employ wet sanding with continuous water application, changing direction with each grit shift to eliminate previous scratching patterns. Maintain consistent, moderate pressure across the entire lens surface. Frequently lubricate the surface to keep it wet while sanding.
Shift to polishing methods using headlight restoration compound applied with foam pads attached to rotary polishers. Start at low speed, gradually increasing to achieve ideal clarity. Wipe residue thoroughly and inspect results systematically.

Instructions for Use: The first yellow drill attachment installed on the drill, cushion pad white surface and drill attachment black surface paste, use the first in the lamps on the spray water and then use the cleaning pad to dry in a circle, and then according to the grain size from small to large in order to use the waterproof abrasive disc on the lamps for polishing, and finally use the sponge polishing pad for polishing

No Grinding, No Thinning – Just Lasting Clarity: Tired of complicated kits that force you to sand down your valuable headlight lens? Our revolutionary solution requires NO grinding, NO sanding, and NO damaging removal of your headlight's protective layer. Simply clean with our solution, rinse thoroughly, and apply the coating. You get a perfectly restored, like-new finish without compromising your headlight's structural integrity or future durability. It's safe, fast, and permanently effective
【NEW AND SAFE】100% Brand new and high quality headlight restoration kit. Provide a deep clean to dull and hazed headlight lenses, restore the clarity of car lights. During operation, only water is needed.
Applying UV Protective Coating for Long-Lasting Results
After achieving optical clarity through sanding and polishing, you must apply a UV protective coating to preserve your restoration work and prevent future degradation. Without this seal, ultraviolet rays will rapidly oxidize the polycarbonate lens, reversing your efforts within months.
Coating types include liquid UV-resistant sealants, ceramic coatings, and paint protection film (PPF). Ceramic options deliver superior durability and hydrophobic properties, while liquid coatings offer easier application. Apply the product to clean, dry lenses using even strokes to prevent runs or gaps. Multiple thin coats outperform single thick applications.
UV protection benefits extend beyond clarity maintenance—you’ll enhance nighttime visibility, extend headlight lifespan, and resist chemical contamination from road salts and debris. Plastic lenses are especially prone to UV damage compared to older glass alternatives. Reapply coatings every 6–12 months in high-UV environments to sustain protective effectiveness.

UV Headlight Coating Kit: The Sylvania UV Block Clear Coat Kit is a premium headlight clear coat designed to protect and restore dull or cloudy lenses to like-new condition

CLEAR LIGHTS: Meguiar's Clear Headlight Coating is the ultimate solution to maintain exceptional optical clarity on both new and restored headlights, ensuring optimal visibility and safety during nighttime driving

HEADLIGHT RESTORE MADE EASY: Professional-grade 2K clear coat spray with a build in adhesion promoter to restore clarity to yellowed, foggy, or scratched headlights for improved visibility and appearance.
Maintaining Clear Headlights After Restoration
Once you’ve completed the restoration process, maintaining headlight clarity requires systematic care to prevent recurring oxidation and extend the lifespan of your protective coatings. Regular cleaning with mild soap and water removes contaminants before they degrade the surface. Implement protective layering techniques by reapplying automotive-grade urethane clear coats every 1–2 years, ensuring thin, even applications with proper curing times. For best results, consider using purpose-built restoration kits periodically to address any minor haziness that develops between full restoration cycles. Essential headlight maintenance tips include parking in covered areas to minimize UV exposure, conducting periodic inspections for yellowing or coating degradation, and addressing debris like bird droppings immediately. Avoid temporary fixes such as WD-40 or rubbing alcohol that compromise protective layers. Use microfiber cloths and dedicated maintenance products following manufacturer specifications. If you notice more significant damage beyond surface maintenance, consult a professional guide on headlight assembly replacement to determine whether restoration or full replacement is the appropriate solution. Monitor seal integrity to prevent moisture intrusion and verify consistent light output for peak road safety. Applying ceramic coatings provides extended protection against future oxidation and offers superior durability compared to traditional sealants.
When to Replace Instead of Restore Your Headlights
While restoration effectively addresses surface-level oxidation and hazing, certain conditions render headlight assemblies beyond repair and necessitate complete replacement. Deep cracks or chips compromise structural integrity, allowing moisture intrusion that causes persistent internal fogging—issues restoration cannot resolve. When yellowing penetrates deep polycarbonate layers or chrome reflectors oxidize, surface polishing provides only temporary improvement. These restoration limitations signal irreversible damage.
Replacement indicators include warping from impact, seal failure causing water accumulation, and flickering or dimming from electrical malfunctions. If the headlights flicker when turned on without a clicking relay sound, this may indicate internal wiring issues requiring replacement. Restoration addresses lens surfaces exclusively, not internal components or wiring issues. If cloudiness returns quickly after repeated restoration attempts or fogging persists inside the housing, replacement guarantees proper beam alignment and full performance. Different restoration methods, such as UV sealants and abrasive polishing systems, offer varying levels of durability depending on the product selected. Cloudy lenses can reduce nighttime illumination by over 50%, creating hazardous driving conditions. Consider upgrading outdated halogen units to modern LED assemblies for enhanced brightness and longevity.