To replace your Mazda CX-5 headlight bulbs, you’ll work with H11 low beams (55W) and 9005 high beams (65W). High beams offer straightforward rear-access replacement—disconnect the connector, twist counterclockwise, and install the new bulb. Low beams require wheel well liner removal on the driver’s side for proper access. Always disconnect the battery before starting, wear nitrile gloves to prevent oil contamination, and replace bulbs in pairs for balanced illumination. Models with adaptive or HID systems need specialized procedures and calibration to maintain proper function.
Understanding Your Mazda CX-5 Bulb Specifications
Selecting the correct replacement bulb for your Mazda CX-5 requires knowing the precise specifications for each lighting position. Your low beams use H11 bulbs operating at 55 watts and 12.8 volts in halogen configuration. High beams utilize 9005 bulbs rated at 65 watts with a T3.25 shape. These bulb types remain consistent across 2013-2018 models, guaranteeing straightforward replacement procedures.
LED alternatives offer significant performance improvements. Low beam LED sets deliver 6000 lumens at 60 watts, while high beam options like the SL2 Pro produce 2400 lumens using only 21 watts. You’ll find light output substantially increased compared to halogen baselines, with color temperatures reaching 6000K. Front fog lights share the H11 specification with low beams. Evaluating brightness, longevity, and color temperature will help you select the most suitable LED option for your needs. Always verify bulb markings during replacement and confirm LED options include CANbus compatibility for proper electrical system integration. Consider evaluating beam patterns to ensure optimal visibility in different driving conditions and weather scenarios.
Installation of LED high beam bulbs features polarity-specific connectors that enable OEM plug and play compatibility for 2013-2016 Mazda CX-5 models, completing the replacement process in just 20-30 minutes.

See the Road in a New Light: Get 900% the brightness of halogens with a powerful 50,000-lumen beam. The AUXITO H11 light bulbs illuminate more road ahead, giving you the clarity to spot hazards sooner.

Superior Visibility in Bad Weather: Equipped with 54 cutting-edge LED chips and enhanced top convex lens, the F1 Series H11 LED Fog Light Bulb provides 360° illumination, projecting 400% upgraded light over greater distances with precision. H11 fog light bulb led focused lights ensures safe and comfortable visibility during driving in rainy and foggy conditions
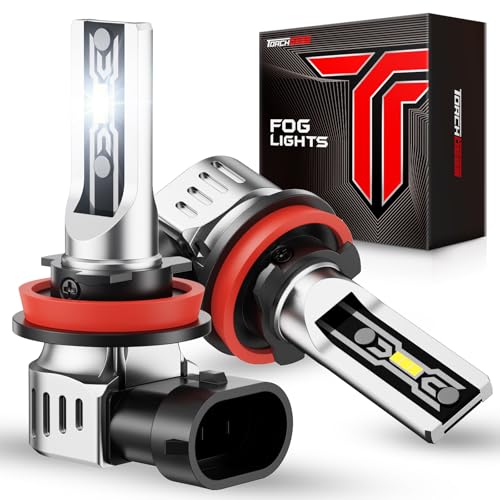
12,000 Lumens Ultra-Bright for All Weather Driving: Cut through dense fog, heavy rain, and snowy roads with 12,000LM of brilliant output—600% brighter than original fog lights. The TF2 Series H11 LED bulb deliver crystal-clear visibility for cars, trucks, and SUVs, keeping you safe in even the toughest driving conditions.
Essential Safety Precautions Before Starting
Before removing any bulb from your Mazda CX-5, you’ll need to take specific safety measures that protect both you and the vehicle’s electrical system. Start by switching off the ignition and removing the key to prevent accidental activation. Allow the headlight assembly to cool for at least ten minutes if recently used. Essential safety gear includes nitrile gloves to prevent oil transfer to halogen bulbs, safety goggles to guard against glass debris, and long-sleeve clothing for forearm protection when accessing tight housings.
Workspace preparation requires parking on level ground with the parking brake engaged. Disconnect the negative battery terminal if your service manual recommends it. Use a headlamp or stable work light to guarantee proper visibility and correct bulb orientation during installation. While inspecting the assembly, check the headlight housing for cracks that could compromise the new bulb’s performance and lifespan.
Gathering the Right Tools for the Job
A successful Mazda CX-5 headlight bulb replacement hinges on assembling the correct tools and replacement components before you begin. Confirm your exact bulb code from the VIN or owner’s manual—early CX‑5s use halogen H11; later trims may have HID or LED modules. For tool organization, gather a metric socket set (10 mm primary), flathead and Phillips screwdrivers, long‑nose pliers, and a trim‑clip remover. Add a work light, inspection mirror, and torque wrench for proper fastener tension. Specialty items include a magnetic pickup tool, flexible socket extensions, and plastic fastener replacements for stripped clips. Stock electrical supplies: multimeter, dielectric grease, terminal repair kit, and spare fuses. Remember to replace headlight bulbs in pairs to ensure balanced lighting across both sides of your vehicle. If you plan to access the headlight assembly through the wheel well, include extra wheel well clips to replace any that may break during removal. Proper workspace setup with organized tools prevents stripped fasteners and damaged connectors during confined-space work.

Simple and Fast Programming Process: Download our APP,Connect device and work on programming by following on-screen step by step instruction. finish in a few minutes.
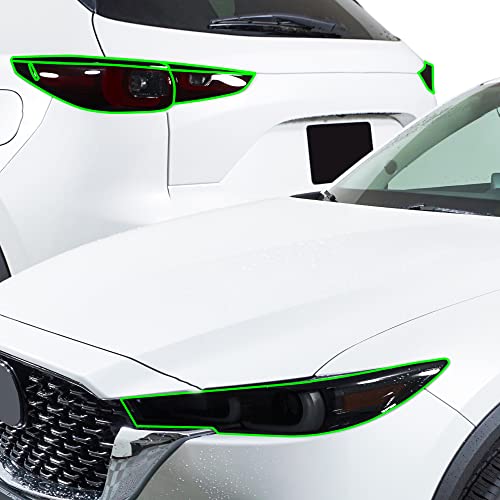
FITMENT: Compatible with Mazda CX-5 2022, 2023, 2024, 2025. Precut pieces sized for factory headlights and taillights.

The KUVR pre-cut headlight taillight tint kit is designed with computer precision to match the exact shape of your 2022- 2025 CX-5 headlights and taillights. No trimming or guesswork needed—just a clean, factory-style fit. Whether you're upgrading your vehicle’s headlight or taillight tint, this kit delivers a seamless, OEM-level look right out of the box.
How to Replace High Beam Bulbs
Unlike the low-beam H11 bulbs that require more intricate access, replacing your Mazda CX-5’s high beam bulbs involves straightforward engine-bay procedures. Locate the 9005 bulb housing from the rear of the headlight assembly. Press the electrical connector tab and pull downward to disconnect power. Twist the bulb counterclockwise to release and extract it from the socket.
Before installation, wear gloves to prevent oil transfer that can cause premature bulb failure. Insert the new 9005 bulb, noting the bulb orientation marking to guarantee proper alignment. Twist clockwise until it secures tightly. Reconnect the electrical connector firmly, then test the high beam function before completing reassembly. Some models may require removing a 10mm bolt or washer nozzle for improved clearance during the procedure. If components appear stuck, use a flathead screwdriver to pry them loose carefully. To avoid damage and maintain the bulb’s lifespan, handle the bulb carefully throughout the entire replacement process. After testing is complete, check headlight alignment to ensure correct aiming of the high beams.

【300% Brighter Than Original Halogens】:SHENKENUO Ultra - High Performance Halogen Bulbs,with 1800LM per set,which is 300% super brighter than original halogen bulb, Provide brighter and clearer lighting effects, enabling drivers to see the road ahead more clearly, thereby improving driving safety.

Lights Dim Over Time, Replace In Pairs: Be sure to replace both 9005 headlights at the same time for optimum performance. If one bulb burns out, the other isn't far behind. Replacing in pairs allows for premium visibility

🚗【Compatible with Mazda CX-5 Halogen Headlight Bulbs】DMEPUGI halogen headlights and license plate lights are perfectly fit for Mazda CX-5 2013 2014 2015 2016 2017.Reduce the risk of error warnings,radio static or flickering.You don't require additional encoders.The headlights license plate lights includes 2pcs 9005/H10/HB3 high beam,2pcs H11/H8/H9 low beam and 2pcs H11/H8/H9 fog lights,2pcs license plate lights,totaling 8 bulbs in the package.
How to Replace Low Beam Bulbs
Replacing low beam bulbs on your Mazda CX-5 requires more extensive access than the high beam procedure, particularly on the driver’s side where wheel well liner removal becomes necessary. Your vehicle uses H11 bulb types, though some models feature non-standard H11 variants with H7 socket adapters. Begin by removing plastic covers behind the headlamp assembly, accessing the driver’s side through the wheel well liner using a flathead screwdriver wrapped in soft cloth. Unplug the electrical socket, then release the retaining clip with a notched screwdriver push. Twist the bulb counterclockwise to free from the H7 adapter. For installation tips, wear surgical gloves to prevent oil contamination, apply bulb grease to the rubber boot flange, and confirm one-way stub alignment for flush seating behind the metal retainer. After completing the installation, check and adjust headlight alignment to ensure proper beam positioning. Test the new bulbs to ensure functionality before reassembly.

Lights Dim Over Time, Replace In Pairs: Your lights are a pair, one is never turned on without the other. If one bulb burns out, the other isn't far behind. Replace your H11 XtraVision Halogen bulbs in pairs for optimum performance.
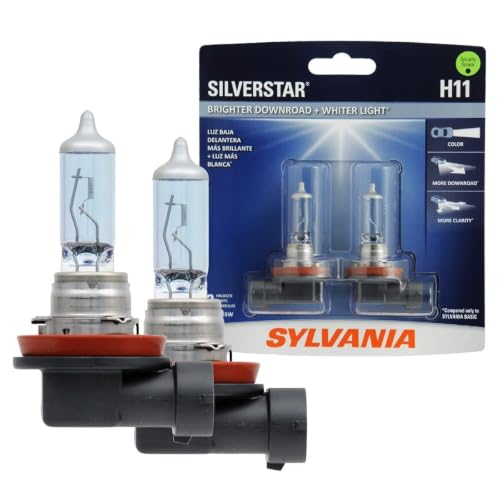
Lights Dim Over Time, Replace In Pairs: Your lights are a pair, one is never turned on without the other. If one bulb burns out, the other isn't far behind. Replace your H11 SilverStar Halogen bulbs in pairs for optimum performance.

Fit For Mazda CX-5 2013-2016: This item include 2*9005/HB3 high beam+2*H11/H8/H9 low beam headlight bulbs, 6000K White light halogen bulbs, total 4 light bulbs.
Navigating Model-Specific Differences
Because Mazda introduced rolling production changes and trim-specific equipment packages across CX-5 generations, you’ll encounter significant bulb-type variation even within identical model years. First-generation models (2013–2016) typically use H11 low beams, but second-generation CX-5s (2017–2021) mix halogen, HID, and factory LED across trims. Higher trims often feature adaptive headlights or leveling systems that restrict bulb access—requiring bumper, fender liner, or wheel removal. Model year variations include mid-cycle switches from halogen to LED without year-code changes. Trim differences affect connector types: halogen H-sockets, HID high-voltage ballasts, and integrated DRL modules aren’t interchangeable. Always verify bulb type via VIN lookup or physical inspection of the lamp socket before ordering. Aftermarket LED conversions may demand CAN-bus decoders or anti-flicker capacitors depending on market-specific wiring.
Working With Adaptive and HID Headlights
When your CX-5 features adaptive front-lighting systems (AFS/ALH) or high-intensity discharge (HID/Xenon) headlamps, you’re no longer swapping conventional halogen capsules—you’re servicing integrated electro-optical assemblies with embedded motors, high-voltage ballasts, and thermal-management subsystems. Adaptive systems use LED modules or HID assemblies requiring module-level replacement rather than plug-and-play bulb swaps. Before accessing HID components, disconnect the battery and follow manufacturer bleed procedures; ballasts retain dangerous voltages even after ignition-off. Never touch HID glass envelopes—contaminants cause premature thermal failure. Stepper motors and actuators directing beam aim are fragile; rough handling during access can expand repair scope. Sealed housings integrate ballasts, cooling elements, and thermal interfaces; damaged seals permit condensation and shorten component life. To prevent future cloudiness and oxidation, consider applying UV protection sealants to your headlight assemblies after service. Heavy cargo in the trunk or rear seats can shift the vehicle’s center of gravity and interfere with adaptive headlight detection. If you’re uncertain about servicing these complex systems, seek professional help to avoid warranty issues and improper installation. After any headlight removal, follow Mazda calibration procedures to restore Forward Sensing Camera alignment and headlamp leveling, preventing adaptive-function faults.

IMPORTANT: The same model car may be equipped with different lamps bulb: halogen/LED or xenon lamps/bulb. Our bulb only for Stock D4S Xenon HID Headllight. Even if system display"Fit", it is not suitable for halogen/LED Headlight Assembly

【Vehicle Fitment】Torchbeam Head Light Assembly Compatible with 2013-2016 Mazda CX-5. Includes 1x Left Headlight Assembly (MA2518146, 20931000, 20931001, 3161147LUS) and 1x Right Headlight Assembly (MA2519146, 20930900, 20930901, 3161147RUS). 9005 High/ H11 Low Beam(Bulbs not included). The headlight assembly housings are made of premium OEM Grade ABS plastic ensure excellent resistance from branches, gravel and some collisions.

This Ballast Kit is Compatible with 06-08 MX-5 Miata
Testing and Troubleshooting After Installation
Successful bulb installation demands immediate verification through systematic functional testing before reassembling trim panels or declaring the repair complete. Activate low beams first—confirm your H11 bulbs illuminate evenly, then switch to high beams using 9005 bulbs without flicker or delay. Check for balanced lighting between sides to detect asymmetry. For installation verification, measure voltage at the socket to chassis ground; you’ll expect approximately 11.5V with an intact fuse. Use your multimeter with headlights activated for accurate voltage checks. If one side fails, swap bulbs between sides to determine if the issue follows the bulb. Inspect headlight fuses for blackening or melting, and swap left-right fuses to isolate circuit faults. Examine sockets for corrosion and confirm connectors click securely without looseness. Maintain an organized workspace throughout the testing process to avoid accidents and ensure all tools remain accessible.