To replace an H11 headlight bulb, turn off your ignition and wait 30 minutes for the bulb to cool. Access the headlight housing from your engine bay or wheel well, then disconnect the electrical connector by pressing its release tab. Twist the old bulb counterclockwise and pull it straight out. Insert your new H11 bulb by aligning its tabs with the socket, twist clockwise until it clicks, and reconnect the electrical connector. Test functionality before reassembly to confirm proper installation and beam alignment.
Gather Your Tools and Materials
Before you begin the replacement procedure, verify that you have the correct H11 bulb specified in your vehicle’s owner’s manual, as H11, H9, and H8 variants share similar form factors but differ in wattage and pin configuration. Establish tool organization by laying out a ratchet set, flathead screwdriver, needle-nose pliers, and a headlamp on a clean workspace. Your materials checklist should include a bulb pair for matched output, nitrile gloves to prevent surface contamination, and a magnetic tray for fasteners. If installing LED conversions, confirm you have CANbus decoders and heat sinks. Gather zip ties, dielectric grease, isopropyl alcohol, and lint-free cloths for preparation. Consider adding safety glasses to your equipment list for eye protection during the installation process. Top-rated brands like Sylvania, Philips, and GE offer reliable halogen options that balance performance with cost-effectiveness. Selecting bulbs with appropriate lumens output will ensure your vehicle maintains visibility during daylight conditions. Keep installation instructions and your service manual accessible for bulb orientation and torque specifications.

Each bundle contain 2 bulbs, 2 55W Platinum ballast, and accessories

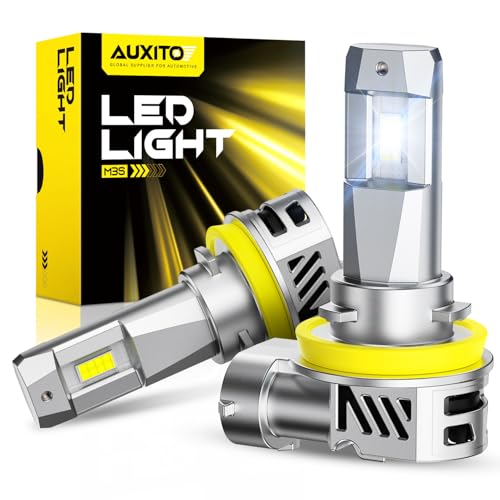
Easy Installation: 1:1 design, no external driver or connector required, plug and play

Crisp 6500K Cool White Light: Experience enhanced nighttime visibility with the pure 6500K cool white beam of the H11/H9 bulbs. This daylight-like color temperature improves contrast and clarity, helping H11 H9 light bulb users identify road signs, lane markings, and potential hazards more easily in various driving conditions
Take Safety Precautions Before Starting
To prevent electrical shock and thermal burns, switch off your vehicle’s ignition and allow a minimum 30-minute cooldown period for halogen bulbs to reach ambient temperature. Engage the parking brake and verify complete power shutdown before proceeding. Don safety glasses and nitrile gloves as standard safety protocols for this operation.
Exercise hazard awareness by keeping skin oils off the glass envelope—contamination causes premature bulb failure. If contact occurs, clean the surface with isopropyl alcohol using a lint-free cloth. Disconnect the negative battery terminal when accessing electrical components. Position your work area to avoid flammable materials and guarantee adequate lighting with a portable flashlight. Clear the workspace around the headlight assembly to ensure better access during the replacement process. For optimal results, consider replacing bulbs in pairs to maintain balanced illumination across both headlights. Never directly view illuminated xenon bulbs, as UV emissions pose eye hazards. LED headlight upgrades offer improved visibility and longer lifespan compared to halogen bulbs, making them a safer long-term alternative. Consult your owner’s manual for model-specific safety requirements.
Access the Headlight Assembly
Accessing the headlight assembly requires identifying which method suits your vehicle’s configuration—most modern cars permit engine bay access, though certain models necessitate wheel well entry or component repositioning. Open your hood and locate the back of the headlight housing behind the engine compartment. Use a flashlight to illuminate tight spaces during this vehicle maintenance step. If components obstruct your reach, turn the front wheels fully to one side and remove the fender cover near the wheel well. For restricted access vehicles, you’ll need to partially remove the front bumper or tilt the battery using a 10mm wrench. Before proceeding with bulb removal, ensure safe battery disconnection if working near electrical components. Proper access guarantees correct headlight alignment during reinstallation, so choose the method providing ideal clearance for your specific model.

➤PACKAGE : 11 pcs different kinds of trim tools to car panel or interior epair/installation with ease. Including 7 pcs metal pry tools and 4 pcs nylon trim tools
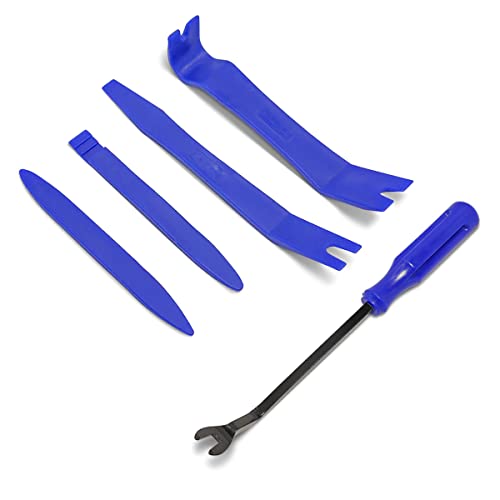
[TRIM REMOVAL TOOLS KIT] Package includes 5 pcs removal tools. Made of super durable plastic material with high level craftsmanship, non-toxic and eco-friendly designed, sturdy enough for long-time usage, not easy to be broken in use. Super lightweight and portable, you can store anywhere or carry in your bag when you're not in use.

120Pcs Trim removal tools kits:Works great for car audio/radio system installing or removing, door panel, moldings, emblems, window trims or automotive interior repairing and furniture restoration.
Remove the Old H11 Bulb
Removing the H11 bulb begins with disconnecting the electrical connector from the bulb’s base. Press the tab on the connector while pulling it away to release the wiring harness. Confirm the connector fully detaches before proceeding. Next, twist the bulb counterclockwise while facing it directly. Rotate until you hear a click or feel looseness, indicating release from the housing. Apply gentle pressure if the bulb resists turning, but avoid excessive force that could damage the housing. Once loose, pull the bulb straight out of the socket. Note the H11 designation on the removed bulb to verify compatibility. Practice proper bulb handling by gripping only the base—never touch the glass filament, as skin contact with bulbs can damage the component and reduce its lifespan. For optimal results, consider the beam pattern quality of your replacement bulb to ensure proper lighting coverage. The connector release process remains identical for both driver and passenger sides. This straightforward procedure takes less than one minute to complete once you become familiar with the steps.

【200% Brighter】Our H11 headlight bulb delivers a brightness of more than 2000LM, 200% brighter than OEM headlight bulb, up to 4300K color temperature, providing the best visibility in foggy and rainy weather, Our halogen headlight bulb filled with more than 45% Xenon gas to be more brighter and whiter.

⭐【Super Bright H11 Bulbs】Our H11 headlight bulbs deliver over 1000LM brightness and a 3800K color temperature, ensuring optimal visibility in foggy and rainy conditions. Upgrade your automotive headlight bulbs for safer nighttime driving.

100% New & Genuine Osram Made in Germany - Pack of 2 bulbs.
Install the New H11 Bulb
Before inserting the replacement bulb, compare it directly with the old H11 to confirm identical specifications and connector configuration. This bulb compatibility check prevents installation errors. Align the tabs or notches on your new LED bulb with the socket openings. For ideal light distribution, position the LED chips at 9 and 3 o’clock directions—keeping them vertical ensures proper beam pattern. Push the bulb fully into place, then twist clockwise until you hear an audible click confirming secure fitment. These installation tips are critical: use the IPF logo as your alignment reference for projector lamps, and adjust the bulb angle if LED elements aren’t level when viewed from the headlight front. If needed, employ a hex wrench for socket angle adjustment before reconnecting the power connector. LED bulbs provide significantly higher brightness and better energy efficiency compared to traditional halogen H11 bulbs. Ensure the bulb fits snugly in the socket to prevent loosening during vehicle operation or vibration. When selecting your replacement, consider the color temperature and lifespan characteristics that best suit your driving needs and preferences.
High Brightness & Energy Efficiency: Equipped with high-quality LED chips, the h11 LED bulbs delivers 900% brighter output with uniform and soft light. It features no flicker or glare, providing a clear and comfortable lighting experience. Compared to traditional bulbs, it significantly reduces energy consumption, helping save electricity costs over long-term use.

Wider Visibility: The fog lights emit white light at the same point as the bulb, replacing the dim bulb.
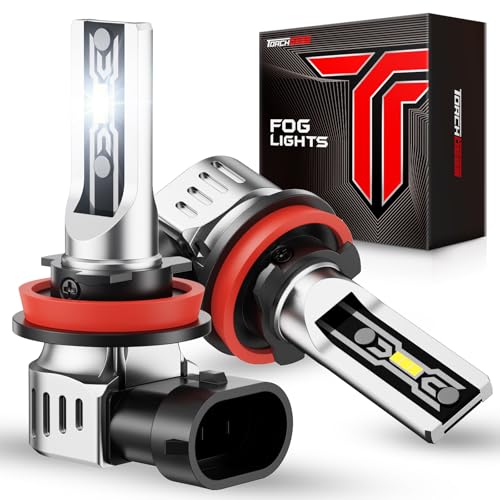
12,000 Lumens Ultra-Bright for All Weather Driving: Cut through dense fog, heavy rain, and snowy roads with 12,000LM of brilliant output—600% brighter than original fog lights. The TF2 Series H11 LED bulb deliver crystal-clear visibility for cars, trucks, and SUVs, keeping you safe in even the toughest driving conditions.
Test the New Headlight
Turn your ignition to the “on” position and activate the headlight switch to begin the functional test of your newly installed H11 bulb. Verify both headlights illuminate with even bulb brightness across the lens surface. Uneven illumination indicates improper seating in the housing socket. Inspect the beam alignment by observing the cutoff pattern against a flat wall from 25 feet. The horizontal line should remain level without scattered light above the cutoff. Check your dashboard for warning lights that signal electrical faults. If flickering occurs, disconnect the bulb and set your multimeter to DC volts mode. Probe the harness contacts with headlights activated; readings near 12 volts confirm proper power supply. Install a CANbus decoder if error codes persist despite correct voltage readings. Consider comparing different bulb technologies to ensure you have selected the optimal replacement for your specific driving needs, just as you would evaluate brightness levels measured in lumens and color temperature preferences. For optimal testing accuracy, perform the beam evaluation in a controlled environment with 0 lumens of ambient light to clearly assess the output pattern.
Vehicle-Specific Considerations
H11 bulb compatibility extends across multiple vehicle manufacturers, but precise fitment verification prevents costly installation errors and potential electrical damage. Toyota Camry (2007–2025), Honda Civic, and Ford Fusion (2006–2016) specify standard H11 for low beams, while Hyundai and Kia models often require H11B with protruding prongs—creating direct compatibility concerns. You’ll find H8, H9, and H16 share interchangeable sockets if wattage matches H11’s 12V 55W rating. BMW 3 Series and Chevrolet Silverado accept H11 variants for headlight upgrades. Consult manufacturer-specific charts for your exact year and model before purchasing. Check plug design carefully: nested prongs indicate H11, protruding prongs signal H11B. These bulb variations aren’t interchangeable without modification, and forcing incorrect types risks overheating your headlight assembly. Top-rated aftermarket replacements from brands like Sylvania, Philips, and GE offer improved brightness and longevity over factory bulbs. When upgrading your vehicle’s lighting system, consider exploring both OEM replacements and aftermarket upgrades to balance cost, warranty coverage, and performance improvements. LED variations of H11 bulbs deliver superior brightness and longevity compared to traditional halogen options.

【Visual Enhancement】: The OKOENIEO H11 headlight bulb are 200% brighter than other halogen bulbs, providing drivers with a wider and farther field of vision. Offering a greater visibility, they allow drivers to spot deer, wildlife, falling rocks, or obstacles ahead of time, ensuring safer nighttime driving.
Lights Dim Over Time, Replace In Pairs: Your lights are a pair, one is never turned on without the other. If one bulb burns out, the other isn't far behind. Replace your H11 SilverStar Halogen bulbs in pairs for optimum performance.

Lights Dim Over Time, Replace In Pairs: Your lights are a pair, one is never turned on without the other. If one bulb burns out, the other isn't far behind. Replace your H11 XtraVision Halogen bulbs in pairs for optimum performance.


