To replace your headlight bulb, first turn off your vehicle and let the housing cool completely. Open the hood, locate the bulb assembly, and disconnect the electrical connector. Remove the retaining clip, twist the old bulb counterclockwise, and pull it out. Wearing gloves to avoid skin oils, insert the new bulb by aligning its tabs, rotate clockwise to lock, and reconnect the wiring. Test the headlight before reassembling. For detailed guidance on accessing hard-to-reach assemblies and ensuring proper beam alignment, explore the thorough steps below.
Safety Precautions Before You Begin
Safety should always come first when replacing your headlight bulb. Before you begin, turn off your vehicle completely and remove the key from the ignition to eliminate any risk of electrical shock. Allow the headlight housing to cool down completely, as bulbs become extremely hot during operation and can cause severe burns. For personal safety, wear nitrile or latex gloves to protect against cuts from broken glass and prevent skin oils from contaminating the new bulb. Safety goggles are essential to shield your eyes from debris or accidental breakage. Proper bulb handling requires you to grasp only the base—never touch the glass surface, as oils cause hot spots that drastically reduce bulb lifespan. Keep your workspace well-lit and organized. Before beginning the replacement process, ensure you have removed the fuse box cover and any dust covers necessary to access the headlight assembly. If you need to connect the new headlight socket, prepare the wires by stripping insulation from the ends before joining them together. While inspecting the headlight assembly, check for any cracks in the housing that could compromise the performance or longevity of your new bulb.
Gathering the Right Tools and Replacement Bulbs
For bulb selection, verify compatibility by checking part numbers stamped on your existing bulb. Choose between halogen, HID, or LED types based on your vehicle’s requirements, prioritizing OEM or high-quality aftermarket options.
Essential tools include screwdrivers (flathead and Phillips), a ratchet with socket set, and gloves for handling bulbs without contaminating the glass surface. Proper tool organization prevents delays and guarantees efficiency. Some vehicles require wheel well liner removal, necessitating additional trim removal tools and a magnetic flashlight for visibility in confined spaces. A small wrench may be needed for adjusting certain components during the replacement process.
![TOPIK 9005 9006 LED Light Bulbs Combo,[Upgraded-Gen] 80,000LM 900% Super Brighter, HB3 HB4 Light Bulbs, Plug N Play, 20+ Years Long Lifespan, No Flicker, 99% Canbus Ready, Pack of 4](https://m.media-amazon.com/images/I/51F9wl-KiFL._SL500_.jpg)
【900% Brighter Than Factory Bulbs】- Powered by high-performance LED chips and a crisp 6500K white light, TOPIK 9005 9006 combo kit delivers an impressive 80,000 lumens. Enjoy wider, farther-reaching illumination that makes nighttime driving safer and more confident.

Crisp 6500K Cool White Light: Experience enhanced nighttime visibility with the pure 6500K cool white beam of the H11/H9 bulbs. This daylight-like color temperature improves contrast and clarity, helping H11 H9 light bulb users identify road signs, lane markings, and potential hazards more easily in various driving conditions

Ultimate Brightness: RCJ 9005 9006 bulbs combo use high-end 16 CSP chips to deliver up to 600% brighter light than OEM halogen bulbs. With 6000K cool white colour temperature, HB3 HB4 bulbs combo allows you to see further and clearer on the road at night, improving driver safety
Accessing the Headlight Assembly
With your tools and replacement bulb ready, begin by opening your vehicle’s hood and securing it with the prop rod or hood strut. Locate the headlight assembly from the engine compartment, identifying retaining bolts or screws on the top, sides, or front. Note that fastener locations vary by make and model.
Some vehicles require removal techniques involving the bumper cover or wheel well liner for complete access. Carefully detach any clips or panels obstructing the housing. Using appropriate wrenches or Torx drivers, remove all retaining hardware—common assembly tips include tracking fastener orientation for reinstallation. A 10 mm socket is typically used to unscrew the bolts securing the headlight assembly. Before purchasing replacement bulbs, verify the H11 and 9005 bulb types specified for your vehicle to ensure compatibility.
Once loosened, pull the assembly forward to expose wiring connectors. Disconnect the main bulb connector with a straight pull or slight twist. Handle all components gently to prevent damage. Use plastic trim tools when removing panels to avoid scratching or cracking interior surfaces.
Removing the Old Headlight Bulb
Before extracting the headlight bulb, prioritize your safety by wearing protective gloves and eyewear—these shield against sharp edges, dirt, and potential glass fragments. Confirm your vehicle’s off and headlights have cooled completely to prevent burns. Locate the electrical connector at the bulb’s rear and release its securing clip by gently pushing or lifting. Pull the connector straight out without yanking wires. Next, identify the metal or plastic retainer clip holding the bulb. Press down or pop it up carefully using your fingers or a flathead screwdriver. Once disengaged, grip the bulb casing—never the glass—and rotate it counter-clockwise approximately a quarter turn. Align the tabs while twisting, then pull straight out. Keep your workspace organized to prevent misplacing small components like clips or screws during the removal process. Most Chevy Cruze models from 2011 to 2017 use H13 bulbs that serve as both high and low beam for your headlight assembly. These installation tips apply across various bulb types, confirming proper removal without damage.
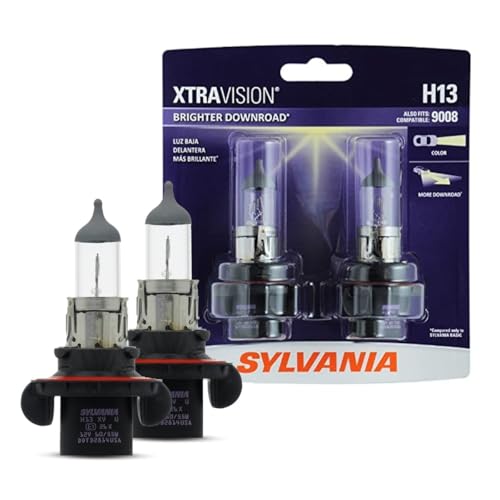
Lights Dim Over Time, Replace In Pairs: Your lights are a pair, one is never turned on without the other. If one bulb burns out, the other isn't far behind. Replace your H11 XtraVision Halogen bulbs in pairs for optimum performance.

Package: 1 Pair 9008 H13 headlight bulb male & female socket connector.

FITMENT GUIDE: Please read the fitment notes above to verify if the selected bulb size is for Low Beam, High Beam, or Foglight. Please contact us to verify bulb size if you are unsure.
Installing the New Headlight Bulb
After removing the old bulb, begin installation by verifying the replacement matches your vehicle’s specifications—consult your owner’s manual or the original bulb’s base for the correct type designation (such as H11, 9006, or H7). Wear gloves to prevent skin oils from contaminating the bulb glass, which causes premature failure. Align the new bulb’s tabs with the socket, paying careful attention to bulb orientation—tabs must match corresponding grooves in the housing. Insert the bulb gently without forcing it, then engage the locking mechanism by twisting clockwise or securing the retaining clip until it clicks firmly. Reconnect the electrical connector, ensuring it seats completely. Replace any dust covers and verify the bulb sits flush within the housing to prevent moisture intrusion which can damage the headlight assembly. For LED upgrades, ensure you have any necessary adapters for LED upgrades to maintain compatibility with your vehicle’s electrical system. After installation, check beam pattern alignment to ensure proper light distribution on the road.

⭐【Super Bright H11 Bulbs】Our H11 headlight bulbs deliver over 1000LM brightness and a 3800K color temperature, ensuring optimal visibility in foggy and rainy conditions. Upgrade your automotive headlight bulbs for safer nighttime driving.

【200% Brighter】Our H11 headlight bulb delivers a brightness of more than 2000LM, 200% brighter than OEM headlight bulb, up to 4300K color temperature, providing the best visibility in foggy and rainy weather, Our halogen headlight bulb filled with more than 45% Xenon gas to be more brighter and whiter.

【Visual Enhancement】: The OKOENIEO H11 headlight bulb are 200% brighter than other halogen bulbs, providing drivers with a wider and farther field of vision. Offering a greater visibility, they allow drivers to spot deer, wildlife, falling rocks, or obstacles ahead of time, ensuring safer nighttime driving.
Testing Your New Headlight
Turn on your headlights to verify the new bulb functions correctly before reassembling any additional components. Switch between high and low beams to confirm both filaments operate properly in dual-filament bulbs. If the bulb doesn’t illuminate, turn off your vehicle and check for secure connector fit and clean contacts.
For thorough verification, you can test bulb voltage at the connector using a multimeter set to DC voltage mode. You should expect readings between 12 to 14 volts with headlights on. Low voltage indicates wiring issues or poor grounds.
After confirming electrical function, perform a quick filament inspection through the bulb glass to ensure proper illumination patterns. Finally, verify beam alignment by observing the light pattern against a wall or garage door approximately 25 feet away. Regular inspections of headlights are recommended monthly, while annual electrical testing keeps systems in check.

【PRECISE READOUTS & CLEAR DIGITAL DISPLAY】Bright LED display shows highly clear readings in any lighting condition, 0.1V resolution gives you reliable indication and shows you the voltage number easily & quickly. Bidirectional light emitting diode on the circuit board for easy battery load testing, red light indicates positive polarity, green light indicates negative polarity.

【Wide Application】Professional automocircuit test light with 6-24V DC voltage testing range, ideal for checking various vehicles circuits, quickly check automotive headlights, taillights, faulty sockets, fuse connections, also for testing other 6-24v DC wirings and circuits.
standard OE H11B replacement bulb, original manufacturer equivalent easy to install, efficient and great value
Reassembling Components and Final Checks
With your new headlight functioning correctly, you can now reassemble all components in reverse order of removal. Align the headlight assembly with mounting brackets using visual markers or guides before tightening hardware. Verify the assembly sits flush with adjacent panels—don’t fully tighten bolts until you’ve confirmed proper alignment verification. Reconnect wiring harnesses until they click securely, confirming sufficient slack to prevent pinching. Replace retaining clips, rings, and screws to manufacturer torque specifications using appropriate tools. Check that weather seals and gaskets are properly seated to maintain waterproof integrity. Use 8 mm and 10 mm sockets to ensure all fasteners are tightened to the correct specifications for secure reassembly. After reassembly is complete, consider applying protective coatings to your headlight lenses to prevent oxidation and yellowing over time. Reattach any trim pieces, bumper covers, or protective shields removed during access. Following proper reassembly techniques prevents misalignment, water ingress, and electrical issues. Before closing the hood, reconnect the battery to restore electrical power to the vehicle. Close the hood after confirming no tools remain inside, completing your headlight replacement procedure.
Pro Tips for Long-Lasting Headlights
Since maintaining headlights extends their service life and guarantees ideal visibility, implementing proactive care strategies proves more cost-effective than repeated replacements. Apply UV protection sealants every 3-6 months to prevent oxidation and yellowing from sun exposure. Clean lenses monthly using pH-neutral soap and microfiber cloths, avoiding harsh chemicals that damage protective coatings. When replacing bulbs, wear gloves to prevent skin oils from contaminating halogen elements. Inspect housing seals regularly for moisture intrusion, which causes premature bulb failure and corrosion. Test headlights monthly to detect early signs of electrical issues or dimming. Consider LED upgrades for enhanced brightness and longevity, as they offer superior color temperature and longer lifespan compared to traditional halogen options. Check wiring connections for corrosion or looseness during routine headlight maintenance. Aging dust covers can compromise sealing and allow moisture intrusion, potentially leading to short circuits and electrical failures. Professional headlight restoration services can remove oxidation and discoloration that regular maintenance cannot address, extending headlight lifespan cost-effectively. Park in shaded areas when possible to minimize UV-related lens degradation and preserve coating integrity.

Wipe-on fluid is excellent for lightly yellowed or recently restored lenses

Ultimate Protection – 303 Aerospace Protectant provides superior protection against damaging UV rays. This protector spray repels dust, lint, and staining while also helping to prevent fading and cracking, to keep surfaces looking newer, longer

UV Headlight Coating Kit: The Sylvania UV Block Clear Coat Kit is a premium headlight clear coat designed to protect and restore dull or cloudy lenses to like-new condition