

To replace your Jeep’s headlights, start by turning off the ignition and engaging the parking brake. You’ll need a screwdriver, socket wrench, and panel removal tool. Remove the front grille’s plastic fasteners, then disconnect the electrical connector by sliding the red lock tab. Twist the old bulb counterclockwise to remove it. Grip only the new bulb’s base during installation, align the tabs, and push until it clicks. Reconnect the electrical plug and reassemble components. Our thorough guide below covers proper adjustment techniques and special considerations for lifted models.
Gather Your Tools and Safety Preparations
Before you begin replacing your Jeep’s headlights, gather the essential tools to confirm efficient and safe completion of the task. You’ll need a screwdriver (flathead or Phillips), socket wrench with appropriate sockets, panel removal tool, and potentially a Torx bit set depending on your model. Consult your owner’s manual to verify correct bulb types before purchasing replacements. Different Jeep Wrangler model years require specific bulb sizes such as H13 for 2007-2017 JK models or H6024 for earlier generations.
Prioritize safety gear throughout this procedure. Wear protective gloves to prevent skin oils from contaminating new bulbs and to guard against broken glass. Eye protection is essential when working near fragile components. Confirm your vehicle’s ignition is off with keys removed to prevent electrical shock. Engage the parking brake and work on a flat surface. Store replacement bulbs in original packaging until installation to maintain cleanliness. Selecting the wrong bulb can lead to compatibility issues that prevent proper installation. Both halogen and LED bulbs offer different benefits in brightness and color temperature for your Jeep Compass.

H4 HB2 9003 Vehicle Headlight Socket: Provide great solution to replace old and broken vehicle headlights or fog lights in vehicles without standard pins for 4" × 6", 7" × 6" and 5" × 7" work; Make car headlight/fog light wire replacement easier a lot

Fit For Jeep Compass 2011-2021: This item include 2*9005/HB3 high beam+2*H11/H8/H9 low beam headlight bulbs, 6000K White light halogen bulbs, total 4 light bulbs.
Access the Headlight Assembly
With your tools assembled and safety measures in place, you’re ready to access the headlight assembly on your Jeep. Begin by removing plastic fasteners securing the front grille using trim tools to prevent clip breakage. Pull the grille straight off once all clips are released. Different headlight types may require removing bumper covers or fender liners for adequate clearance. Locate and remove all mounting bolts—typically 10mm or star bit screws—around the assembly, including fasteners in wheel wells. Disconnect electrical connectors by releasing locking tabs; never force the wiring harness. Press or pry plastic clips on the housing sides carefully. Turn the wheel inward to gain better access to clips and fasteners in tight spaces. Once all fasteners and connectors are removed, pull the assembly straight out. These installation tips guarantee damage-free removal and simplified reinstallation.
Remove the Old Headlight Bulb
Accessing the bulb begins by removing headlight securing screws with the appropriate tool—typically a T15 Torx or star bit screwdriver—to free the assembly or bezel. Detach clips securing grills or covers, then carefully pry air filter cover clips if needed. Set fasteners aside for reassembly.
Identify the bulb connector and slide any red lock tabs to release the wiring harness. Press down on plug clips to release connectors, ensuring wiring considerations include not pulling cables directly. Use a pick tool to disengage locking tabs gently.
Grasp the bulb base and twist counterclockwise 1/8 to 1/4 turn to detach it. Pull straight out, avoiding contact with the glass surface regardless of bulb types. Inspect the socket for damage, corrosion, and verify rubber seals remain intact for proper weatherproofing. Choosing the correct bulb specification for your vehicle ensures compatibility with the electrical system and optimal performance. If the bulb is stuck, a small PVC tool can help carefully pry it loose without causing damage. If the new bulb blows immediately after installation, further electrical diagnosis by a professional may be necessary to identify underlying issues.

❤What You Get: 1 Pcs Torx Screwdriver; Torx Size: T15; Handle Length: 78mm/ 3.1"; Overall Length: 178mm/ 7".

Magnetic tip for convenient installation: Our torx screwdrivers feature a magnetic tip, making installation and disassembly of screws more convenient and efficient. The magnetic design securely holds screws, preventing them from getting lost or dropped, thus improving work efficiency

【12" Extra Long T15 Torx Screwdriver】Shaft Length: 300mm / 12 inch; Total Length: 400mm / 16 inch. 12 Inch extra long size is ideal for hard to reach awkward areas.
Install the New Headlight Bulb
After removing the old bulb, prepare to install the replacement by first handling it correctly—grip only the base, never the glass or LED components, as skin oils can create hot spots that shorten bulb life or cause premature failure. Match the new bulb’s tabs with the three-tab slot inside the housing, ensuring proper bulb orientation. For LED bulbs, align chips to face left and right for correct beam focus. Push the assembly straight into the socket until it clicks, avoiding excessive force. Slide the electrical connector firmly onto the bulb socket until it locks. Before sealing, ensure the LED driver and connector are properly inserted into the headlight assembly. Consider the color temperature and brightness specifications recommended for your vehicle to optimize visibility and safety. Replace dust covers and weather seals, confirming silicone O-rings remain intact. Screw on the bulb cover counterclockwise while maintaining seal integrity. Verify all securing clips snap into place, preventing moisture ingress that could damage components. Use the correct bulb type specified for your model year to ensure optimal performance and compatibility with your vehicle’s electrical system.
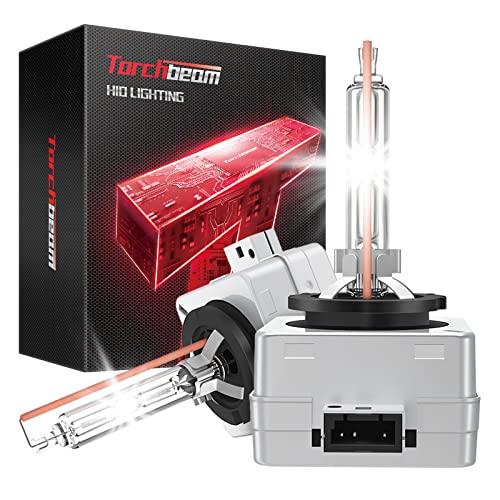
Safer Night Driving: Torchbeam d3s bulbs made with German xenon gas. Replacement OEM Part Number: 42302C1, 42302(WX/XV), 42403(C1), 66340, 66340CBH, 66340CBI, ect.

Superior Visibility in Bad Weather: Equipped with 54 cutting-edge LED chips and enhanced top convex lens, the F1 Series H11 LED Fog Light Bulb provides 360° illumination, projecting 400% upgraded light over greater distances with precision. H11 fog light bulb led focused lights ensures safe and comfortable visibility during driving in rainy and foggy conditions
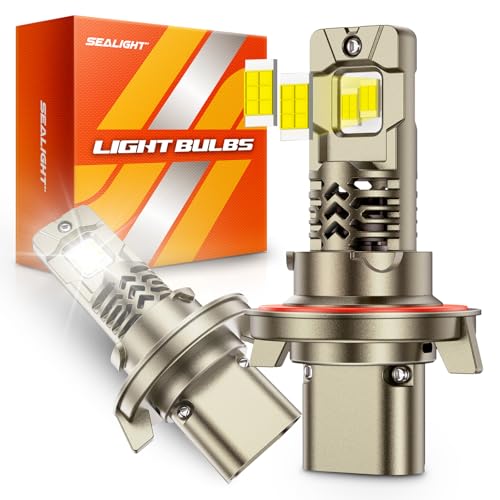
【12X Brighter - Newly Enhanced】SEALIGHT H13/9008 LED bulbs feature 24 high-performance chips, delivering up to 12X the brightness of standard halogen bulbs. Upgrade your nighttime driving experience by replacing dim, yellow stock bulbs with SEALIGHT H13/9008 LED Bulbs fog lights, offering superior illumination and enhanced visibility with a crisp 6500K cool white light for optimal light transmission
Reassemble the Headlight Components
Begin reassembly by positioning the headlight assembly into the mounting area, carefully aligning all bolt holes with their corresponding threaded inserts in the vehicle frame. Hold the assembly firmly to prevent shifting during installation. Insert mounting bolts in the recommended sequence—bottom first, then sides and top—using a 10mm socket. Tighten to manufacturer specifications without overtightening, ensuring assembly security and proper headlight alignment.
Reconnect the electrical plug to the bulb socket, pushing it fully until locking tabs engage with an audible click. Verify connection security by gently tugging the connector. Reattach the washer fluid hose to the headlamp assembly and listen for a click to confirm proper connection. Reattach plastic brackets, grills, and bumper clips, inserting push pins firmly until they lock. Re-secure fender liners and adjacent components removed during disassembly. Perform a final visual inspection, confirming all panels sit flush without gaps before proceeding to headlight testing and beam adjustment.
Test Your New Headlights and Make Adjustments
With the headlight assembly securely reinstalled, you must verify proper operation and beam alignment to ascertain safe nighttime driving. Park on level ground 15 to 25 feet from a flat wall. Activate low beams and mark each beam’s horizontal and vertical center using painters tape. Measure from ground to headlight center, transferring this height to the wall. Cover one headlight with an opaque cloth. Locate the T15 Torx adjustment screws on the headlight housing—upper for vertical, lower for horizontal adjustment. The brightest beam pattern should hit slightly below the horizontal tape line near vertical center. Turn screws clockwise to raise or move right; counterclockwise lowers or shifts left. Ensure both headlights produce an even, cutoff beam pattern that conforms to regulations for optimal safety. This quick adjustment process typically takes under 10 minutes to complete. Test-drive to confirm adequate illumination without blinding oncoming traffic. Lifted Jeeps require careful adjustment to compensate for altered height.


