
To replace your Toyota 4Runner headlight, you’ll need a 10mm socket and Phillips screwdriver. First, disconnect the battery and access the bulb housing—rotate the passenger-side dust cap counterclockwise, or remove the battery for driver-side access. Turn the socket 45 degrees counterclockwise, press the connector release tab, and pull it straight out. Install your new H11 bulb using lint-free gloves, twist clockwise to secure, and reconnect the electrical plug. Our extensive guide covers testing procedures, beam alignment techniques, and troubleshooting electrical issues.
Gathering Your Tools and Materials
Before attempting headlight replacement, assemble the necessary tools to avoid interruptions mid-project. Your tool selection should include a 1/4-inch ratchet with 10mm socket for bolt removal, plus extension bars to access hidden fasteners. You’ll need both Phillips and multi-bit screwdrivers for various screw types throughout the assembly. Panel removal requires specific implements: metal panel poppers for trim clips, plastic prying tools for grille separation, and needle-nose pliers for clip extraction.
Required materials include H11 replacement bulbs for low beam functionality and properly fitted dust caps with O-rings preventing water intrusion. On certain 4Runner models, you’ll need a DRL harness adapter. Consider keeping a headlight socket connector repair harness available if wiring shows deterioration. When selecting bulbs, evaluate brightness levels and color temperature to ensure optimal visibility and compliance with vehicle requirements. Different bulb technologies like halogen, LED, and HID options offer varying performance characteristics for your specific needs. Optional impact wrenches accelerate fastener removal but aren’t mandatory for successful completion. If the installation procedure seems unclear, seek professional help to ensure proper headlight replacement and avoid potential damage to your vehicle.

See the Road in a New Light: Get 900% the brightness of halogens with a powerful 50,000-lumen beam. The AUXITO H11 light bulbs illuminate more road ahead, giving you the clarity to spot hazards sooner.

Lights Dim Over Time, Replace In Pairs: Your lights are a pair, one is never turned on without the other. If one bulb burns out, the other isn't far behind. Replace your H11 XtraVision Halogen bulbs in pairs for optimum performance.
Safety Preparation and Headlight Location
Proper safety protocols prevent injury and component damage during headlight replacement procedures. Turn off your engine completely and engage the parking brake to prevent unintended movement. Park on a level surface away from traffic for stable working conditions. Disconnect your battery terminals for electrical safety during access—critical vehicle safety procedures for headlight maintenance tips. Wear gloves to avoid skin oil contact with bulb glass, which causes premature failure. Quality parts and timely repairs ensure safety and prevent premature bulb failure. Replacing bulbs in pairs ensures consistent brightness across both headlights throughout your vehicle’s lifespan.
Your low beam bulb sits in the outermost section of the headlight assembly, accessed from the rear after opening your hood. The high beam positions closer to center, behind the low beam. Both sockets twist counterclockwise for removal—no tools required. Fog lights mount lower on the front bumper, potentially requiring bumper removal or undercarriage access depending on your specific 4Runner model configuration. The Toyota 4Runner uses H11 bulb size for both low beam headlights and front fog lights. Carefully maneuver connectors, caps, and clips to avoid damage during installation.
Accessing and Removing the Old Bulb
Accessing your 4Runner’s headlight bulb requires different approaches for passenger and driver sides due to engine bay layout. On the passenger side, you’ll encounter minimal obstruction—simply rotate the dust cap 10 to 15 degrees counterclockwise and shimmy it off the rubber O-ring. The driver side presents challenges: the battery blocks access, requiring you to disconnect the negative terminal first with a 10mm wrench, then remove the hold-down bracket and lift the battery out.
Once you’ve accessed either bulb, turn the socket 45 degrees counterclockwise to release it from the three-node retention system. Pull the electrical connector straight out by pressing the release tab gently. Before handling the bulb, avoid touching the glass surface to prevent premature failure and ensure optimal bulb lifespan. To ensure consistent lighting performance, consider changing bulbs in pairs even if only one side has failed. Different bulb types affect replacement frequency, but this removal process remains consistent across standard halogen configurations. The entire job can be completed in under 15 minutes, making it a quick and convenient repair.

Lights Dim Over Time, Replace In Pairs: Your lights are a pair, one is never turned on without the other. If one bulb burns out, the other isn't far behind. Replace your 9003 XtraVision Halogen bulbs in pairs for optimum performance.

Lights Dim Over Time, Replace In Pairs: Your lights are a pair, one is never turned on without the other. If one bulb burns out, the other isn't far behind
Installing the New Headlight Bulb
With the old bulb removed, handle the replacement using lint-free gloves or a clean cloth—skin oils degrade halogen glass and create hot spots that shorten bulb life. Verify the bulb type matches your 4Runner’s specification (H11 for most low beams). Inspect for defects before proceeding.
For bulb orientation tips, locate the three notches or tabs on the bulb base. Insert at the 3:00 position, aligning tabs with housing slots. Wiggle gently to locate the seating position, then push straight in. Twist clockwise 45 degrees until it locks—you’ll feel resistance stop.
Installation precision requires reconnecting the electrical plug until it clicks. Feed cables without pinching. Install the dust cap with the arrow pointing up, pressing and twisting clockwise 10-15 degrees until sealed. When selecting replacement bulbs, consider legal compliance for street use to ensure your headlight upgrades meet safety regulations. Upgrading to LED bulbs provides enhanced brightness and improved visibility for night driving, with benefits including greater longevity and color temperature options compared to standard halogen alternatives. Confirm nothing moves.

Easy Installation: 1:1 design, no external driver or connector required, plug and play
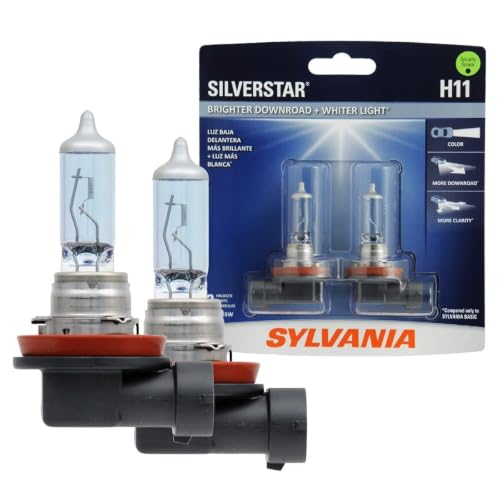
Lights Dim Over Time, Replace In Pairs: Your lights are a pair, one is never turned on without the other. If one bulb burns out, the other isn't far behind. Replace your H11 SilverStar Halogen bulbs in pairs for optimum performance.

100% New & Genuine Osram Made in Germany - Pack of 2 bulbs.
Testing Light Function and Beam Alignment
After installation, test the headlight by turning the ignition to the “on” position and activating the low beams in subdued lighting conditions. Verify both driver and passenger side beams illuminate without flickering or dimness, checking for proper headlight symmetry.
For beam alignment, park on level ground 7.62 meters from a flat wall. Mark the wall at headlight center height. Locate the adjustment hole behind the housing and insert a Phillips screwdriver into the visible gear. Turn clockwise to lower or counterclockwise to raise the beam pattern until the cutoff sits 2-2.5 inches below your mark. Check horizontal alignment—beams should project evenly without jagged ridges. Adjust both headlights to match Toyota’s specification of 79.5mm variance from reference lines, ensuring balanced beam pattern across both sides. Proper beam pattern quality prevents excessive glare while maintaining optimal visibility for nighttime driving. If you experience frequent flashing from oncoming drivers, further lower the beam height to prevent blinding other motorists. While professional alignment equipment provides the most accurate results, these adjustments are suitable for correcting misaligned headlights at home.
Troubleshooting Common Issues
Even properly installed headlights can develop performance issues that require systematic diagnosis. Foggy headlights result from UV-induced plastic degradation—restoration kits provide temporary clarity, but replacement housings offer permanent solutions. Single side failure typically indicates bulb burnout, compromised ground connections, or side-specific fuse problems rather than system-wide electrical faults. Blown fuses that fail immediately upon activation signal short circuits in the wiring harness; inspect for pinched wires or incorrect aftermarket connections, particularly on Morimoto installations using EFI port fuse taps. Rapid burnout suggests faulty grounds or loose connectors causing voltage fluctuations. Installation problems with aftermarket headlights often stem from incompatible harnesses—Morimoto units require specific wiring configurations to maintain daytime running light and high beam functionality. Understanding color temperature and brightness specifications helps ensure your replacement bulbs meet performance expectations and legal requirements. LED technology offers longer lifespan compared to halogen bulbs, making it a worthwhile consideration when selecting replacement headlights for your vehicle. Oxidized headlight lenses significantly reduce nighttime visibility and represent a common aging issue that worsens over time. Address each symptom methodically to isolate root causes.


