To replace your C300’s headlight bulb, you’ll need an 8mm socket, T25 Torx bit, and protective gloves. First, remove the inner fender liner’s push pin fasteners to access the housing. Twist the dust cap counterclockwise, disconnect the electrical connector, and release the metal retaining clasp. Pull out the old H7 bulb by its base only—never touch the glass. Install the new bulb, verifying proper tab alignment before reconnecting. The complete procedure includes model-specific steps that guarantee ideal results.
Tools and Equipment Needed
Before you begin replacing the headlight bulb on your Mercedes-Benz C300, gather the essential hand tools: an 8mm socket for headlight housing bolts, a 10mm socket for bumper fasteners, a T25 Torx bit for bumper screws, a standard screwdriver for loosening the bulb from its socket, and pliers for disconnecting the wiring harness.
Safety precautions require wearing protective gloves and safety glasses throughout the procedure. Never touch the replacement bulb‘s glass surface—oils from your skin will cause premature failure. Handle bulbs only by the base.
Tool selection extends beyond standard equipment. You’ll need a retainer clip removal tool for bumper access and potentially a wiring harness puller for connector release. For replacement parts, obtain H7 low beam bulbs or LED alternatives with Mercedes adapters, plus headlight bulb clips if your originals are damaged. If you’re working on a 2008-2011 C300, consider purchasing factory clip replacements that come with a lifetime guarantee instead of replacing the entire headlight assembly.

Lights Dim Over Time, Replace In Pairs: Your lights are a pair, one is never turned on without the other. If one bulb burns out, the other isn't far behind. Replace your H7 XtraVision Halogen bulbs in pairs for optimum performance.
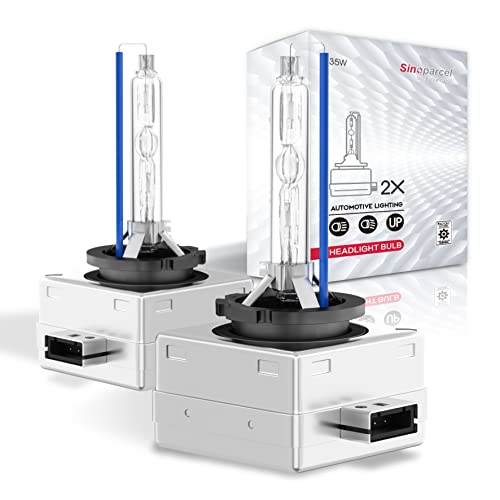
Life time support,2pcs packaged; Replacement part number: 66144 66140 85140 85415 (If there is any problem in the product, please contact us via Account Center,we will reply you within 24 hours)

Fits:Mercedes ML350 /2015 Mercedes CLS/2013 C350 Sport/Mercedes GLS450 fits all X164 and W164 Mercedes Benz models//2016 mercedes/benz c300 4matic/2013 c250 /2017 GLS450/2015 Mercedes/ML 350 4 matic /2012 2015 2017Mercedes ML 350/2014 GL450/2014 C250/2012 C250/2009 Vw Passat/2015 gl350/2010 gl450/2009 Mercedes CLK 350 /2014 mercedes cla250/2008 GL450/Mercedes E320 wagon/2015 GL Mercedes 350
Model-Specific Considerations for Your C300
Since the Mercedes-Benz C300 underwent significant redesigns between generations, you’ll encounter different bulb access procedures depending on your model year. The 2008-2012 W204 requires you to twist the housing cap counterclockwise, then release metal clasp tabs by pushing down. You must align three tabs—bottom and two side tabs under screws—precisely before twisting to lock. In contrast, 2015-2020 W205 models position the low beam as the outermost bulb in the assembly. You’ll twist it counterclockwise to remove and clockwise to install.
Regarding bulb compatibility, 2008-2010 C300s use H7 bulbs for non-Xenon low beams, while fog lights accept H11, H8, or H9. These 2008-2012 differences demand you verify your specific year’s requirements before purchasing replacements. For optimal results and longevity, replace bulbs in pairs to ensure balanced lighting across both headlights. When handling bulbs, it’s important to carefully handle them without touching the glass to preserve their lifespan and performance. Always wear protective gloves during installation to avoid transferring skin oils onto the new bulb’s glass surface.

Super Brightness: This light bulb adopts a 100-watt high-power design, which can provide stronger brightness and lighting effects. It produces a stronger beam than ordinary light bulbs, giving drivers better visibility at night or in adverse weather conditions.

Lights Dim Over Time, Replace In Pairs: Your lights are a pair, one is never turned on without the other. If one bulb burns out, the other isn't far behind. Replace your H7 SilverStar Halogen bulbs in pairs for optimum performance.

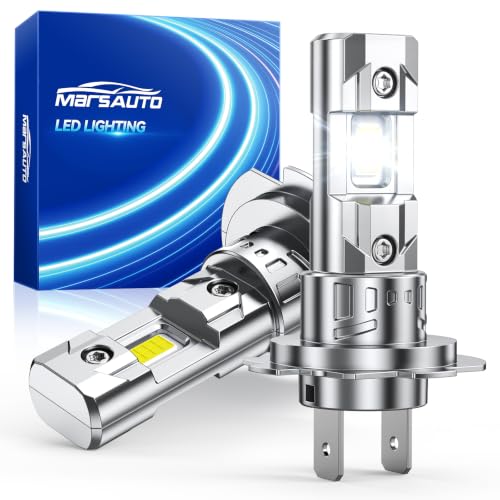
Experience 8X Enhanced Brightness: Equipped with advanced chip technology, Marsauto H7 bulbs deliver 800% greater brightness than standard bulbs, projecting crisp 6500K white light for farther visibility and quicker reaction times, day or night.
Accessing the Headlight Housing
While accessing the headlight housing differs between C300 generations, you’ll need to remove exterior panels before reaching the mounting bolts. For W204 models (2008-2015), remove three push pin fasteners from the inner fender liner and peel it back. Remove under-hood panels and side panels above the headlights using push clips. W205/W206 models (2015+) require bumper detachment—remove retainer clips, two 10mm bolts, and five T25 screws before unpinning the assembly.
Once panels are removed, locate three 8mm headlight mounting bolts. Access the lower bolt from underneath with wheels turned. After removing bolts, disconnect wiring connections at the rear housing by releasing plastic tabs. This grants access for headlight adjustments and complete removal. Handle all plastic clips carefully to prevent breakage during disassembly.

[High-Quality Material]: The headlight bezel is made of high-quality nylon material, making it sturdy, durable, resistant to deformation and damage, wear-resistant, and suitable for long-term use.
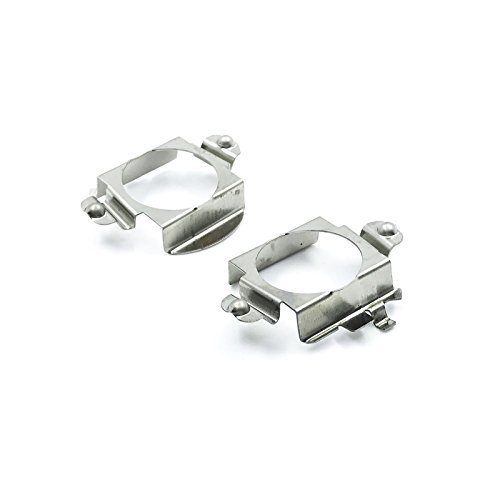
Pack of 2 H7 Retainer LED Adapter headlight bulb Holder fits for C ML CLK GLA GL GLS Class etc (Low Beam); for 2009 Edge; for BM 5 Series X5.

Package Dimensions: 2.794 L x 11.43 H x 3.81 W (centimeters)
Removing the Old Headlight Bulb
Once you’ve accessed the headlight housing, you’ll need to remove the bulb’s protective dust cap by rotating it counterclockwise until it releases. Snap off the electrical cover to expose the bulb connections. Grasp the electrical connector and pull it straight out—don’t twist. Inspect for corrosion during removal. Locate the metal retaining clasp holding the bulb in place. Push down on the tabs or swing the clasp away from the bulb base. For twist-lock designs, rotate counterclockwise. Pull the bulb straight out by its base only; never touch the glass, as skin oils reduce lifespan. Check bulb compatibility before purchasing replacements. Inspect the socket for residue or damage. The bulb connector features arrows labeled “open” and “close” to indicate the proper twisting direction for removal. Having the correct bulb type on hand before beginning will prevent installation delays. Following these maintenance tips guarantees proper installation and peak performance.

【Experience a 1200% Brighter Night】 Transform your drive with our advanced H7 light bulbs. Each H7 light bulb combo, equipped with 12 high-performance chips, delivers a blinding 70,000 lumens per set. Powered by the latest upgraded Z10 technology, it provides unparalleled road illumination—turning night into day for a safer, more confident, and utterly superior driving journey.

800% Brighter Output: With 16 top automotive-grade LED chips, oxilam h7 led bulb produces 38,000 lumens (LM) and 100W per pair, offering 800% brighter light compared to standard halogen bulbs. This significantly improves visibility of road signs, obstacles, and the overall driving environment
【30,000LM Ultra-Intensity & 6500K Daylight Clarity】Engineered to dominate the darkness, these H7 bulbs unleash a staggering 30,000LM of raw luminous power, offering a 600% brightness surge over stock lighting. The 6500K pure white output renders road signs and obstacles with surgical precision, piercing through heavy precipitation and midnight gloom. This extreme output expands your peripheral vision and increases reaction time, redefining the limits of nocturnal driving safety.
Installing the New Headlight Bulb
With the old bulb removed and the socket inspected, you’re ready to install the replacement. First, handle the new bulb with clean gloves to prevent fingerprints on the glass surface. Verify bulb types match OEM specifications—H7 for low beam in 2008-2020 C300 models. For LED replacements, align LEDs facing left and right, not up or down.
Position the bottom tab into the corresponding slot, then align side tabs under retaining screws. Press firmly until seated securely. Use the metal clasp to lock the bulb in place with an audible click. These installation tips guarantee proper fit and function. For optimal light distribution and longevity, consider upgrading to projector-style designs that provide superior beam patterns compared to standard reflector housings.
Twist the housing cap clockwise until locked, then reconnect the electrical harness. Test illumination and beam pattern before final reassembly to confirm correct orientation and secure connections. For long-term clarity and performance, consider applying a UV protectant coating to the lens after installation to prevent future clouding and maintain optimal light output.

Get the best lighting performance and an increased visibility and comfort on the road compared to basic bulbs

【Visual Enhancement】: The OKOENIEO H7 halogen bulbs are 200% brighter than other halogen bulbs, providing drivers with a wider and farther field of vision. Offering a greater visibility, they allow drivers to spot deer, wildlife, falling rocks, or obstacles ahead of time, ensuring safer nighttime driving.

Ultimate Night Vision: Sealight H7 led bulb features 16 high-performance CSP chips for 64000LM output, 900% brighter than original bulbs. Its 6500K cool white light offers strong penetration, wide beam range and long casting distance. It sharpens road details, boosts visibility at night, in rain and fog, lessens blind spots, aids early hazard judgment, and ensures clearer vision for safer driving.
Reassembly and Function Testing
After confirming the new bulb’s proper installation, you’ll reverse the disassembly process to secure all components. Push the metal retainer clasp down until both notches engage firmly, then tug gently to verify retention. Rotate the dust cover clockwise onto the housing, guaranteeing a tight seal that prevents moisture entry. Inspect for gaps before securing the fender liner clips and rotating lock screws clockwise.
For testing procedures, turn on your low-beam switch and verify the bulb illuminates steadily. If there’s no light, flip the connector 180 degrees—proper attachment produces an audible click. Test in reverse gear for full operation confirmation. These reassembly techniques guarantee your headlight functions correctly while maintaining weatherproof integrity. Replace both bulbs simultaneously for even light intensity and ideal visibility.