To replace a headlight bulb on your 2007 Honda Accord, first identify the correct bulb type—9006 (HB4) for low beams or 9005 (HB3) for high beams. Park on level ground, engage the parking brake, and let the engine cool completely. Access the bulb from the engine bay, disconnect the power connector by pressing the plastic tab, then rotate the socket counterclockwise. Install the new bulb wearing gloves, rotate clockwise to lock, and reconnect the harness. The following sections cover troubleshooting techniques and professional recommendations for ideal results.
Bulb Types and Locations for the 2007 Honda Accord
Before replacing any headlight bulb on your 2007 Honda Accord, you’ll need to identify the correct bulb type and its location within the vehicle’s lighting system. Your low beams use 9006 (HB4) halogen bulbs, while high beams require 9005 (HB3) halogen bulbs. Both are accessible from the engine bay within the headlight assembly. Front turn signals utilize 1157 dual-filament amber bulbs, accessed via socket tabs in the headlight area.
When considering bulb compatibility considerations, note that 9006 and 9005 sockets accept LED and HID upgrades for enhanced illumination. Aftermarket bulb options include LED conversion kits offering 360-degree illumination for turn signals and brightness improvements up to 600% for reverse lights. Your Accord’s headlight housing accommodates these upgrades without modification, maintaining proper beam pattern and electrical compatibility. Upgrade available for both low beam and high beam halogen bulbs to improve visibility and lighting performance. To ensure consistent lighting performance, it’s important to replace bulbs in pairs so both headlights maintain the same brightness level and color temperature.
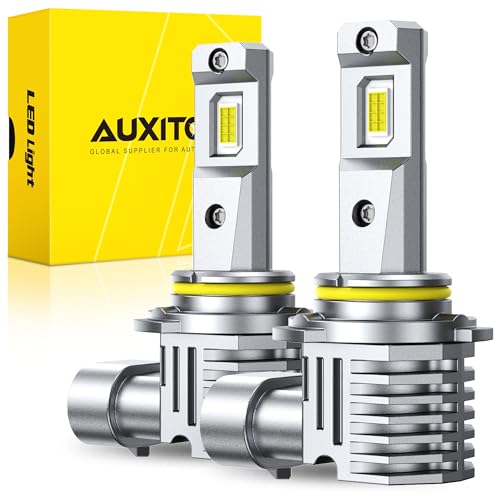
[Easy Installation]: No wiring or modifications needed! The exact 9006/HB4 halogen size slots directly into your vehicle’s housing. Install in under 10 minutes—even beginners can do it with basic tools.

Perfect Beam Pattern – The OXILAM 9005 9006 LED bulbs are engineered with ultra-thin 0.03-inch chip spacing, perfectly simulating halogen filament positions to deliver a 360° uniform beam. This design enhances road visibility while reducing glare, ensuring a safer driving experience

【Perfect Fit with OEM Size】OXILAM 9006 LED bulbs are built to match halogen bulb dimensions, ensuring a seamless and secure fit without modifying the housing or dust cover.
Tools and Supplies You’ll Need
Gather the essential tools before beginning your 2007 Honda Accord headlight bulb replacement to guarantee a smooth installation process. You’ll need nitrile or latex gloves to prevent skin oils from transferring to the bulb glass, which causes premature failure and overheating hotspots. Safety goggles protect your eyes when working in tight engine compartments. A ratchet and Phillips screwdriver comprise the necessary hand tools for accessing headlight assembly fasteners and releasing bulb clips. Cleaning supplies include isopropyl alcohol wipes to remove any oil contamination from touched glass surfaces, plus dielectric grease for improving electrical contact at the socket connection. A flashlight enables inspection of housing cracks and wiring integrity. Paper towels provide an alternative handling method when gloves aren’t available, ensuring residue-free bulb installation. Keep the old bulb nearby during installation to verify you’ve purchased the correct replacement type. Some vehicles have daytime running lights that may illuminate the headlight area during inspection. For those interested in upgrading beyond standard bulbs, consider exploring HID or LED systems for improved lighting performance compared to halogen options.

【100% OE Fitment】Perfect fitment for OE Type 2003 2004 2005 2006 2007 Honda Accord Headlights.Not fit for 2003-2004Hybrid Accord Models.Does NOT fit 2005-2007Honda-Accord Hybrid Sedan 2-Door; bulbs are not included,𝐎𝐄𝐌:𝟑𝟑𝟏𝟓𝟏-𝐒𝐃𝐀-𝐀𝟎𝟏/𝟑𝟑𝟏𝟎𝟏-𝐒𝐃𝐀-𝐀𝟎𝟏

【Compatible with Honda Accord 1992-2007 & 2008-2012 Sedan Headlight Bulbs】QUAYUB Halogen headlight bulbs are perfectly compatible with Honda Accord 1992 1993 1994 1995 1996 1997 1998 1999 2000 2001 2002 2003 2004 2005 2006 2007 & 2008 2009 2010 2011 2012 Sedan.The Halogen headlamp bulbs combo includes 2pcs 9005/HB3 high beam,2pcs 9006/HB4 low beam bulbs,totally 4 Halogen bulbs in the package.

【OEM-Exact Fitment】Fits 2003-2007 Honda Accord 2/4 Door Halogen Type. OEM Part Number: 33101-SDA-A01,33151-SDA-A01.ABPA Partslink Number:HO2503120,HO2502120.Crafted via in-house full process (molding, die-casting, polishing, encapsulation, aging testing) with no middlemen.Seamlessly aligns with vehicle’s electrical system/mounts—no mods/adapters. Meets DOT/SAE/EMC standards, avoids ECU damage, exceeds OEM specs.
Preparing Your Vehicle for Bulb Replacement
Park your 2007 Honda Accord on a level surface and engage the parking brake to guarantee vehicle stability throughout the replacement procedure. Allow the engine and all components to cool completely before beginning any vehicle maintenance work. Don gloves to prevent skin oils from contaminating the new bulb’s glass surface, as this affects headlight safety and bulb longevity.
For driver-side bulb access, you’ll need to remove the battery. Using a 10mm socket, disconnect the negative terminal first, then the positive terminal to prevent electrical shorts. Loosen the battery hold-down nuts and lift the battery from its tray. Verify your replacement bulbs match specifications: 9006 for low beam, 9005 for high beam. The passenger side requires no battery removal. Disconnecting the battery is an important precaution to avoid electrical issues during the replacement process.
Before beginning the replacement process, open the hood of your vehicle to access the headlight assembly and bulbs. Wear work gloves when handling the new bulb to ensure oils from your skin do not reduce its lifespan.
Step-by-Step Bulb Removal Process
Once you’ve completed the preparation steps, locate the power connector on the back of the headlight assembly. You’ll find a light blue socket positioned above the high beam and right of the turn signal. Press the plastic tab at the bottom of the plug near the wires, then wiggle the connector until it separates from the bulb. During connector maintenance, inspect for melting or debris buildup that could affect performance.
Next, turn the socket one-quarter turn counterclockwise and pull straight out from the housing. The high beam sits inside, while the low beam occupies the outside position. If the socket resists, use pliers for additional leverage. To avoid premature burnout, wear gloves to prevent skin oils from contaminating the bulb glass surface. Most aftermarket bulbs offer improved brightness and longevity compared to factory-installed options, making the upgrade worthwhile for enhanced nighttime visibility.
For proper bulb handling, wear gloves to prevent skin oils from contaminating the glass surface, which reduces bulb lifespan and performance. Replace bulbs in pairs to maintain uniform lighting and balanced visibility on both sides of your vehicle.
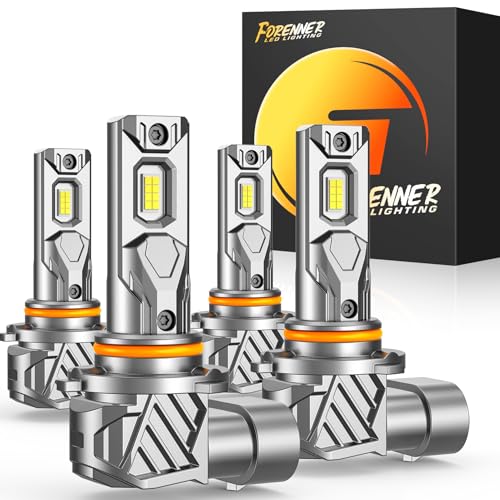
[1000% Brighter Output for Confident Night Driving] - this 9005/HB3 & 9006/HB4 combo , Engineered with 20 high-density chips, delivers an exceptional 900% brightness boost, casting a crisp 6500K white beam that cuts through rain, fog, and darkness with ease—so you can drive with greater confidence no matter the conditions.

Fit for 99% of vehicles - SYJIIP Halogen headlamp are close to the wattage of the stock halogen headlamp bulb, which can reduce the occurrence of CANBUS problems, avoid erroneous and flickering. As long as your stock light bulb model is the same as ours, then SYJIIP's light bulb will be suitable for your car.

Ultra-High Brightness: AUTOONE each 9006 bulb adopts 16CSP automotive chip, each bulb provides 12000LM brightness, 6500K cool white, making your driving vision clearer and safer, creating an optimal nighttime driving experience.
Installing the New Headlight Bulb
Before installing the replacement bulb, verify you’ve selected the correct type—9006 (HB4) for low beam or 9005 (HB3) for high beam on your 2007 Honda Accord. Handle the new bulb with nitrile gloves to prevent skin oils from contacting the glass surface, which shortens lifespan. Orient the bulb’s tabs to align with the housing grooves, then insert straight back until fully seated. Rotate the bulb clockwise approximately one-quarter turn until it locks into position—you’ll feel positive engagement. Confirm proper bulb seating before proceeding. Push the wiring harness connector onto the bulb base until you hear an audible click, confirming secure connector alignment. Tug gently to verify retention. Inspect the socket for corrosion or melting; apply dielectric grease if desired for long-term protection. Consider choosing aftermarket bulbs that offer improved brightness and longevity compared to standard factory replacements. For headlights that appear cloudy or foggy, consider using UV protectant sealants to maintain clarity and prevent future deterioration. Once reassembly is complete, test the new bulb to confirm functionality before closing the hood.

【Ultra 1000%Bright】AUTOONE 9005 9006 Bulbs Combo uses an upgraded CSP chip. It also has 6500K cool white light, providing farther and brighter light for night driving. Wide visibility to ensure the front is fully illuminated.

Lights Dim Over Time, Replace In Pairs: Your lights are a pair, one is never turned on without the other. If one bulb burns out, the other isn't far behind. Replace your 9006 XtraVision Halogen bulbs in pairs for optimum performance.

Illuminate Your Path With Enhanced Brightness: With 6500K cool white light, the SEALIGHT bulbs offer a visibility range up to 1600FT, helping you drive more safely and comfortably at night.
Testing and Troubleshooting Common Problems
After completing the bulb installation, turn the ignition to the “ON” position and activate the headlight switch to verify proper operation of both low and high beams. If low beams fail while high beams function, you’re likely experiencing common failures in the relay or headlight control unit. Test fuses 1 and 6 in the underhood fuse/relay box using a voltmeter to confirm 12V on both sides. Swap the high beam relay with the low beam relay to isolate a faulty relay. For bulb-specific testing techniques, remove the 9006 bulb and apply 12V directly using gator clips. Inspect connectors for melting or corrosion, and test the brown (hot) and black (ground) wires with a test light. Clean debris from sockets and repair stretched wiring before reassembly. When reassembling, remember to reverse all disassembly steps to ensure proper headlight assembly installation. Consider that your vehicle’s headlight design uses either a reflector or projector housing, which affects how light is distributed and focused on the road. If fuses show no voltage on either side, the issue may be the headlight control module, which is located in the sealed portion of the underhood fuse box and typically requires replacement with a genuine Honda part.

Versatile Compatibility: The G8HL-H71 relay 12 VDC is the perfect solution for powering various vehicle accessories, including A/C compressors, headlights, horns, fans, and more.

Replacement Model: Our relay can perfectly replace the relays numbered G8HL-H71, 39794-SDA-A03, 39794-SDA-A05, and 1R191. The AC relay is 0.87×0.57×1.07 inches in size. Please check the model before purchasing

[Great Quality]: Premium quality ac starter relays, made of high quality material for long lasting durability and reliability, meets or exceeds OEM standards.
Safety Tips and When to Seek Professional Help
Working with automotive electrical systems requires strict adherence to safety protocols to prevent injury and vehicle damage. Always disconnect the negative battery cable before starting work to eliminate short-circuit risks. Park on level ground and remove the battery entirely for maximum driver-side access. Handle new bulbs wearing latex gloves—finger oils contaminate glass surfaces, reducing lifespan. Inspect wiring harnesses and connectors for melting or damage before installation. Verify bulbs click securely into place and test functionality immediately after battery reconnection. Different vehicle models may require accessing bulbs through the inner fender or access doors rather than removing the front bumper. When installing new bulbs, insert them carefully to align tabs correctly without touching the glass part to avoid damage and premature failure.
Consider professional assistance if you’re uncomfortable with DIY repairs or encounter housing damage beyond simple bulb failure. Honda dealers offer experienced technicians familiar with model-specific access challenges. Safety precautions include checking for persistent electrical issues and following manufacturer specifications precisely. After completing the installation, you may need to reset factory stereo settings since the battery was disconnected during the repair process. These measures promote compliance and reliable headlight performance.