To replace your Mercedes-Benz E350 headlight bulb, you’ll first need to identify whether your model uses D1S HID bulbs (2010-2016 with xenon headlights) or H7 halogen bulbs (2006-2013 standard models). Park on a flat surface, disconnect the battery, and access the bulb housing from behind the headlight assembly. Twist the dust cover counterclockwise, disconnect the electrical connector, and rotate the bulb socket to remove it. Install the new bulb using gloves to avoid oil contamination, then reverse the steps. This guide covers proper testing procedures, troubleshooting techniques, and maintenance practices to guarantee ideal headlight performance.
Understanding Your E350 Headlight Bulb Type and Specifications
For 2010-2016 models with HID systems, you’ll need D1S bulbs for low beams and H7 halogen bulbs for high beams. Models from 2006-2013 with halogen headlamps use H7 bulbs for both applications. Verify bulb compatibility before purchasing, as some E350s also utilize H11 or H3 bulbs for fog lights.
Standard H7 halogen bulbs operate at 55W with 3000K-3500K color temperature, producing yellowish light. LED replacements offer 6000K color temperature for bright white illumination, delivering 12,000-14,000 lumens per pair while maintaining the same H7 fitting for direct compatibility. LED bulbs also consume less energy than their halogen counterparts while producing superior light output. When evaluating bulb options, consider how beam pattern quality affects your visibility on the road. For optimal nighttime driving safety, consider the color temperature and brightness specifications when selecting between bulb options to ensure adequate visibility in various weather conditions.

Experience 8X Enhanced Brightness: Equipped with advanced chip technology, Marsauto H7 bulbs deliver 800% greater brightness than standard bulbs, projecting crisp 6500K white light for farther visibility and quicker reaction times, day or night.

【Premium Material】Made of high quality aluminum material, the LED Headlamp adapter holder is heat resistance, smart appearance, aluminum material, conform to the environmental protection
Essential Tools and Safety Equipment for the Job
Successfully replacing your E350’s headlight bulbs requires assembling the right tools before you begin work. You’ll need a 10 mm socket for headlight securing nuts and splash guard bolts, an 8 mm socket for wheel well liner fasteners, and a 1/4 inch ratchet for tight spaces. Include screwdriver sets (flat blade and Phillips) and plastic pry tools to prevent trim damage during disassembly.
Essential safety practices include wearing gloves to prevent skin oils from contaminating bulb surfaces, which greatly reduces bulb lifespan. Disconnect the battery to avoid electrical shocks. Use wheel chocks and proper jack stands if accessing wheel wells. Work in well-lit conditions with portable LED lighting for visibility.
Maintain tool maintenance by organizing fasteners in magnetic trays and keeping trim removal tools clean to preserve clip integrity throughout the procedure.

Perfect fit: For Mercedes-Benz E350 2006, 2007, 2008, 2009, 2010, 2011, 2012, 2013, 2014, 2015, 2016 models specifically, guaranteeing a perfect fit and easy installation.

COMPATIBLE TO:Jetta,Jetta SE,CLA250,Mercedes Benz E350,ML350,Tiguan,Subaru,BMW 5 Series (E60 / E61), X5,Mercedes-Benz: E-class, ML class, C-clas,NISSAN QASHQAI, etc.
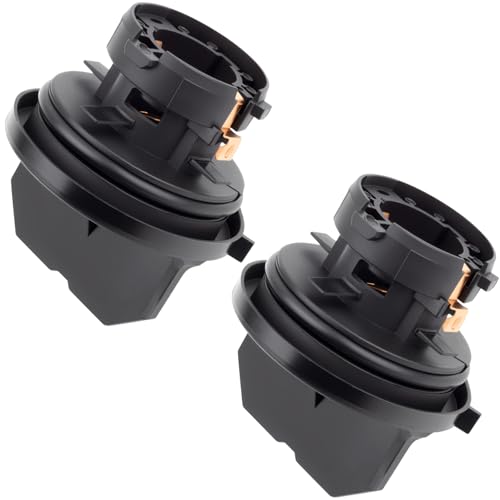
【OE Part Number】: A0018261982, 0018261982; All products have passed the manual quality test to ensure that they can work properly
Preparing Your Vehicle for Bulb Access
Before accessing your E350’s headlight bulbs, proper vehicle preparation prevents component damage and guarantees safe working conditions. Start your vehicle assessment by parking on a flat, stable surface and engaging the parking brake. Turn off the ignition, remove the key, and allow engine components to cool completely. Work in a well-lit, ventilated area for ideal visibility.
Following safety guidelines, disconnect the battery if your manual recommends it. You’ll need to remove the intake hose and reposition the coolant reservoir tank sideways for adequate workspace. Depending on your access point, remove wheel well liners using an 8mm or 10mm socket for fasteners and trim tools for plastic clips. Wear gloves throughout to prevent oil contamination on replacement bulbs and protect your hands. Ensure the light switch is off to prevent any electrical current from running through the system during your work.
Removing the Old Headlight Bulb
With your E350 properly prepared and workspace cleared, you can now access the headlight bulb assembly. Twist the protective dust cover counterclockwise and remove it to expose the bulb socket. Carefully disconnect the electrical connector by releasing its retaining clip. Grasp the bulb socket firmly and rotate it counterclockwise approximately one quarter turn to detach it from the housing. Pull the socket straight out without twisting. If resistance occurs, apply steady pressure while gently wiggling the assembly—avoid excessive force that could crack components. A flat-bladed screwdriver can help carefully pry the bulb assembly if it remains stuck in place. Inspect the socket for corrosion or damage as part of socket maintenance techniques. Compare the removed bulb with your replacement to verify bulb compatibility tips before installation. Modern LED bulbs produce significantly higher lumens output than older halogen bulbs, so ensure your E350’s electrical system supports the replacement bulb type. Note the bulb’s orientation for proper reassembly. Keep all removed components organized in a logical sequence, similar to how professional technicians arrange bolts and clips during disassembly to streamline reinstallation.

Lights Dim Over Time, Replace In Pairs: Your lights are a pair, one is never turned on without the other. If one bulb burns out, the other isn't far behind. Replace your H7 XtraVision Halogen bulbs in pairs for optimum performance.
Life time support,2pcs packaged; Replacement part number: 66144 66140 85140 85415 (If there is any problem in the product, please contact us via Account Center,we will reply you within 24 hours)

Get the best lighting performance and an increased visibility and comfort on the road compared to basic bulbs
Installing the New Headlight Bulb Correctly
After removing the old bulb, proper installation of the replacement guarantees maximum performance and longevity. Begin with essential bulb handling: never touch the halogen glass with bare hands, as skin oils cause premature failure. If contact occurs, clean with isopropyl alcohol and a lint-free cloth. Handle the bulb by its plastic base only.
For alignment tips, locate the positioning tab or notch on your replacement bulb. Line up these tabs with corresponding slots in the headlight housing before inserting. Gently insert the bulb without forcing, then rotate clockwise until you feel a click confirming the locking mechanism engaged. A click sound indicates proper fit and secure placement of the bulb in the socket. Plug the electrical connector securely, ensuring its locking clip engages. Test headlight operation immediately before reinstalling covers, verifying proper illumination and connection integrity.

Super Brightness: This light bulb adopts a 100-watt high-power design, which can provide stronger brightness and lighting effects. It produces a stronger beam than ordinary light bulbs, giving drivers better visibility at night or in adverse weather conditions.

800% Brighter Night Vision Powered by advanced chip technology, Marsauto H7 bulbs deliver 8x the brightness of standard halogen bulbs, producing crisp 6500K white light for enhanced visibility and faster reaction time—whether driving at night or in low-light conditions.

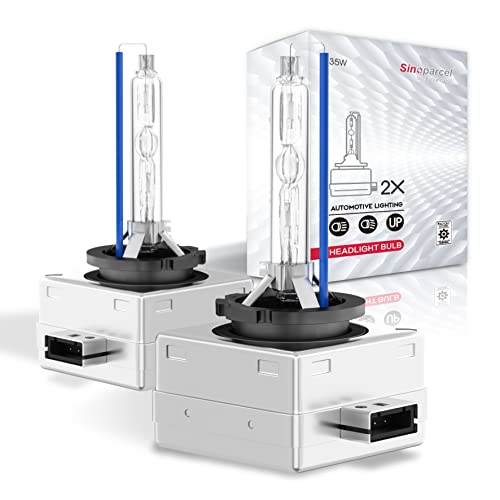
【Reliable Quality】: This car xenon bulb is meticulously crafted from high-quality quartz, and enhanced filaments. It is shockproof, waterproof, and corrosion-resistant, and features efficient light concentration and heat dissipation, ensuring safety and reliability. It can withstand the influence of extreme weather and maintain stable lighting output for a long time.
Reassembling Components After Replacement
Reassemble the headlight assembly components in reverse order of removal to restore proper functionality and protection. Secure the headlight bulb cover by aligning it with the housing opening and twisting clockwise until locked. Verify the sealing gasket seats properly to maintain waterproof integrity. Slide the fender liner back under the wheel well, making certain of component alignment with all mounting holes before inserting plastic push-pins and fasteners. Position liners carefully under metal clips to avoid bending them, replacing any damaged clips immediately. Follow these reassembly tips: reconnect electrical harnesses until locking tabs click, route wiring away from heat sources, and restore all wiring retainers. To prevent premature failure, avoid contact with the bulb glass during the final verification stages. Double-check bolt torque specifications and confirm no gaps exist between components. Line up tabs on the bumper cover with holes on the fender before pushing it into position. These procedures prevent moisture intrusion and guarantee long-term durability.
Testing and Verifying Proper Headlight Function
Once you’ve secured all components back into position, verify the replacement bulb functions correctly through systematic testing procedures. Begin functional tests by activating low beam and high beam settings separately, confirming each filament illuminates without flickering or dimming. Start the engine to check for voltage-related brightness fluctuations that indicate electrical issues. Test daytime running lights if your E350 is equipped with this feature.
Conduct electrical inspection using a multimeter to measure voltage at the headlight connector with the ignition and headlight switch activated. Verify proper grounding by checking continuity between the negative terminal and vehicle ground. Inspect all wiring harness connections for secure engagement and confirm no corrosion exists at contact points. If you’ve installed a complete headlight assembly replacement, ensure the polycarbonate lens is free from condensation or moisture buildup. Finally, perform a road test in low-light conditions to assess real-world beam pattern and visibility performance.
Troubleshooting Common Replacement Challenges
Despite following proper installation procedures, you may encounter obstacles that complicate Mercedes-Benz E350 headlight bulb replacement and require systematic troubleshooting. Begin troubleshooting steps by testing the new bulb before full reassembly to confirm functionality. If the headlight doesn’t illuminate, inspect fuses 29, 30, 74, 75, and 89 using a multimeter to verify electrical supply. Connector issues frequently cause failure—examine the electrical connector behind the bulb for corrosion, bent pins, or damage. Verify the connector seats firmly onto the bulb terminals with an audible click. Use a multimeter to test continuity through the connector and swap bulbs between sides to isolate defective components. If dashboard error codes appear with LED bulbs, install resistor adapters to prevent flicker. Check headlight relays if all other troubleshooting steps prove inconclusive. When replacing HID bulbs, avoid touching them with bare hands as oils from skin contact can reduce bulb lifespan and cause premature failure. For headlights that remain cloudy despite bulb replacement, consider restoring clarity through wet sanding and polishing to ensure optimal light output. Consider upgrading to HID or LED systems for improved lighting performance beyond standard bulb replacement options.

High Quality: This LED headlight load resistor housing is made of high-quality aluminum alloy, making it sturdy and durable. It offers some moisture and water resistance, impact and vibration resistance, good heat dissipation and conductivity, stable performance, and a long service life
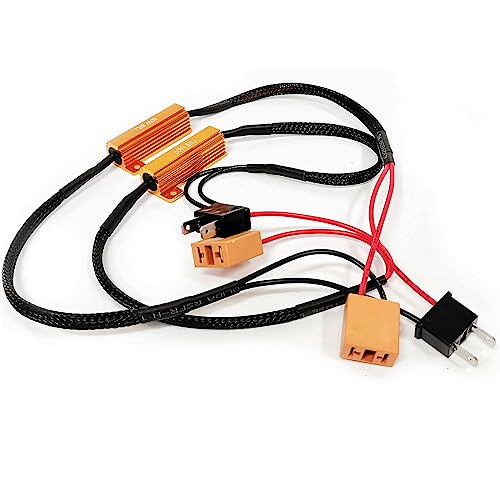
H7 LED Resistor Kit Headlight Bulb anti flickering Heavy Duty Relay Harness.

【Excellent Material】: It is made of durable metal. It is very hard, so it is not easy to break and deform. It is able to withstand high temperatures and a variety of working environments. It is also wear-resistant and corrosion-resistant, which ensures that it can be used for a long time.
Best Practices for Headlight System Longevity
After successfully replacing your Mercedes-Benz E350 headlight bulbs, implement preventive maintenance strategies to maximize component lifespan and reduce replacement frequency. These headlight maintenance tips guarantee peak performance: avoid touching halogen bulb glass with bare hands, as skin oils create hot spots causing premature burnout. Clean headlight lenses regularly using pH-neutral soap and microfiber cloths to prevent oxidation and maintain brightness. To further protect your lenses from yellowing, apply a protective wax coating after cleaning to maintain clarity and prevent re-yellowing. Park in shaded areas when possible to minimize UV damage. Monitor your electrical system for voltage fluctuations that hasten bulb failure. Frequent bulb replacements could indicate underlying electrical issues that require professional diagnosis. Key bulb longevity factors include proper cooling system function for LED units, intact seals preventing moisture intrusion, and vibration from rough roads. High-quality OEM or reputable aftermarket bulbs greatly outlast inferior alternatives, making manufacturer selection critical for longevity. If upgrading to LED technology, prioritize models with effective heat management systems, as heat accumulation is the primary cause of premature LED degradation despite their potential to last 30,000 to 50,000 hours.