Your Peterbilt 579 uses H11 bulbs for low beams and 9005 bulbs for high beams across 2013–2020 models. You’ll need basic tools including screwdrivers, a socket wrench, and nitrile gloves to avoid touching the halogen glass. Open the hood, locate the headlight access panel, unscrew the thumb screws, and twist the bulb counterclockwise to remove it. Install the new bulb by reversing this process, then test function and beam alignment. The guide below covers proper handling techniques, maintenance schedules, and performance upgrade options.
Identifying the Correct Headlight Bulb Type for Your Peterbilt 579
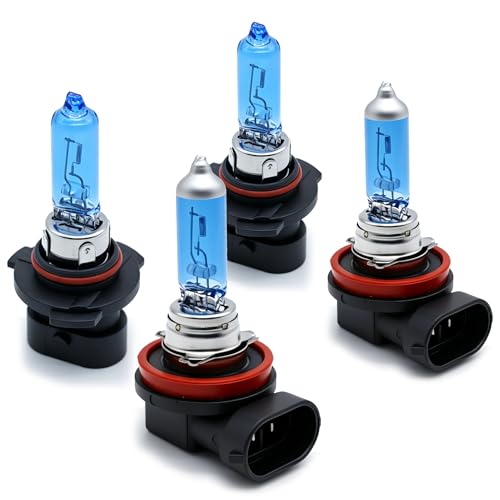
The Peterbilt 579 uses two distinct bulb types for its headlight system: H11 bulbs (also designated as H8/H9) for low beams and 9005 bulbs (HB3) for high beams. This specification remains consistent across 2013–2020 model years, ensuring straightforward bulb compatibility when selecting replacements.
To verify the correct bulb type, consult your vehicle’s owner’s manual or examine the bulb housing directly under the hood. The bulb base typically displays its type designation. You can also use online fitment tools from parts retailers by entering your specific model year and trim.
Cross-reference your findings with manufacturer vehicle specifications to confirm accuracy. Some fog lights also use H11 bulbs, matching your low beam requirements. Always match the exact bulb base type—incorrect selections will compromise fit and headlight function, creating safety hazards during nighttime operation. When selecting replacement bulbs, consider brightness levels, color temperature, and lifespan to ensure optimal nighttime driving performance. When upgrading, consider options like halogen, LED, and HID varieties to enhance visibility and performance.
For high beam installations, the 9005 halogen bulb delivers 65 watts of power, providing reliable illumination for highway driving and rural roads.

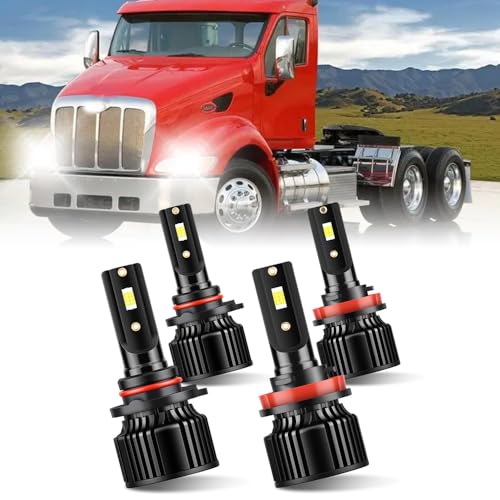
COMPLETE HEADLIGHT UPGRADE FOR PETERBILT MODELS: This 4-piece LED kit provides everything you need to upgrade your Peterbilt's headlight assembly. Includes 2 x 9005XS High Beam bulbs and 2 x H11 Low Beam bulbs. Compatible with Peterbilt 388, 389, 567, 579, 587, and 589 models with factory halogen headlight assemblies.

Compatible with Peter-bilt 388 389 567 579 587 589.
Tools and Materials Required for Headlight Bulb Replacement
Before beginning your Peterbilt 579 headlight bulb replacement, gather the necessary tools and materials to complete the job safely and efficiently. You’ll need screwdrivers (flathead and Phillips), a socket wrench set, and pliers for accessing the headlight assembly. Safety measures require nitrile gloves to prevent oil contamination on the bulb glass, protective eyewear, and adequate lighting for clear visibility. Workspace organization is critical—use a magnetic tray for screws and small parts, ensuring nothing gets lost. Have your replacement bulb (typically H11 or 9003 type), electrical contact cleaner, and anti-seize compound ready. Park your vehicle on a flat surface with the engine off and keys removed. Keep a multimeter available for testing electrical connections post-installation. For added protection and waterproofing of electrical connections, have heat shrink tubing on hand. After installation, verify proper beam positioning to ensure your headlights are correctly aligned. Three different low beam headlight bulb options are available for the Peterbilt 579, with prices starting at $19.99 for budget-conscious operators.

【Visual Enhancement】: The OKOENIEO H11 headlight bulb are 200% brighter than other halogen bulbs, providing drivers with a wider and farther field of vision. Offering a greater visibility, they allow drivers to spot deer, wildlife, falling rocks, or obstacles ahead of time, ensuring safer nighttime driving.

100% New & Genuine Osram Made in Germany - Pack of 2 bulbs.
Step-by-Step Process to Remove and Replace the Headlight Bulb
With your tools and materials organized, you’re ready to begin the actual replacement procedure. First, open the hood and locate the access panel on the fender well or headlight housing rear cover. Unscrew thumb screws or knobs; apply WD-40 if they’re stuck. Remove the cover carefully to expose the bulb holder. Turn the lock ring counterclockwise to release the bulb and holder from the socket. Verify bulb compatibility before installation—common types include H4, H7, or 9007. Handle the new bulb with gloves to prevent oil contamination. Connect the wiring harness securely, then insert the bulb holder back into the socket. Twist the lock ring clockwise to lock it in place. Replace the access cover, tighten screws, and test headlight function. For proper reassembly, securely reconnect sockets to restore optimal headlight performance. Polycarbonate lenses may require gentle cleaning before reassembly to ensure optimal light output. For superior brightness and longer-lasting performance, consider LED headlight upgrades as an alternative to standard bulbs. Common issues include frozen screws and incorrect bulb types.

400% Brighter for Enhanced Visibility - AUXITO H4 Light Bulb Motorcycle delivers 400% brightness, 6000K cool white, providing clearer wider and further visibility at nights in advance.

Get the best lighting performance and an increased visibility and comfort on the road compared to basic bulbs

[Ultra Bright White Light]: H4/9003 Halogen headlight bulb, filled with 25% xenon which lead to 80% more light output than standard bulbs. 4300K warm white light provides perfect light pattern and excellent performance.
Proper Bulb Handling Techniques and Maintenance Best Practices
Handling headlight bulbs correctly extends their lifespan and guarantees peak performance throughout the replacement process. Never touch halogen bulbs’ glass surfaces with bare fingers—skin oils create hot spots causing premature failure. Use clean gloves or lint-free cloth during installation. If accidental contact occurs, clean the bulb immediately with isopropyl alcohol before proceeding.
Effective bulb maintenance requires regular inspections during routine vehicle checks. Replace bulbs as pairs to maintain balanced illumination, even when only one fails. Clean headlight lenses periodically and check mounting hardware for tightness. Lubricate adjustment screws with appropriate grease to prevent corrosion. Experienced truckers often share repair experiences and solutions through online forums to help others troubleshoot common headlight issues. Verify that your replacement bulbs meet legal requirements for road use to ensure compliance and safety.
Always disconnect the battery’s negative cable before starting work. Allow hot components to cool completely, and perform replacements in dry environments. Store spare bulbs in their original packaging within cool, dry locations away from vibration and temperature extremes.
Better visibility: JAKMER 9005xs h11 5000k halogen bulb has a blue quartz glass coating, which can increase brightness by 30% and visibility by 50%.
🚗 Fitment: This 579 587 high low beam light & fog beam bulb combo fits for Peterbilt 579 587 2013 2014 2015 2016 2017 all models.

Direct Replacement- Pair of Halogen headlights compatible with 2013-2020 Peterbilt 579,2011-2018 Peterbilt 587 truck ,make sure the model is right for your truck before ordering. (Driver + Passenger Side)
Exploring LED and HID Upgrade Options for Enhanced Performance
Since factory halogen bulbs in your Peterbilt 579 provide adequate illumination but lack the performance characteristics of modern lighting technology, upgrading to LED or HID systems delivers measurable improvements in visibility, efficiency, and operational longevity.
LED bulbs operate 80 times more efficiently than halogens, drawing minimal electrical power while producing up to 22,000 lumens with 600% brightness increases. Cost comparison shows LED kits under $100 per pair outperform HID systems in lifespan and energy consumption. Installation tips recommend selecting plug-and-play LED options like the H11 LUCENT RF for straightforward replacement, whereas HIDs require ballast wiring and additional mounting considerations.
Verify bulb compatibility with your headlight housing before purchase. Confirm proper heat dissipation for LEDs and validate regulatory compliance for brightness levels. Rain Fighter-coated LEDs maintain peak performance during adverse weather conditions. Premium options like the SilverStar Ultra H11SU offer HID technology with low and high beam compatibility for drivers seeking maximum illumination output.

Upgraded LED Light Bulbs for Peterbilt 388 389 567 579 587 589 Headlight Assembly Replacement, 9005XS High Beam + H11 Low Beam + H11 Fog Light, 6500K Cool White, Plug-and-Play, 6-Pack

900% Breakthrough Brightness: The brightness of SEALIGHT H11 bulbs S3 series is 9 times that of traditional bulbs. We use high-power 7035 lamp beads. Whether it is the brightness, illumination width and illumination mileage of the bulb, it has achieved a comprehensive upgrade, giving you an ultimate night driving experience

The modified headlights fit for Peterbilt 579 587 2011-2021.