To replace your GMC Terrain‘s headlight bulbs, turn the steering wheel fully for access, then use a T20 Torx bit to remove the inner fender liner bolts and push clips. Pull the bumper cover outward to create a working gap. Twist the headlight access cap counterclockwise, grasp the bulb connector, and turn it a quarter turn counterclockwise to remove. Install the new H11 or 9005 bulb without touching the glass, test functionality, and reassemble. The following sections cover essential tools, safety precautions, and techniques to guarantee a successful replacement.
Required Tools and Parts for the Job
Before you begin replacing your GMC Terrain’s headlight bulbs, gather the essential tools to complete the job efficiently. Your tools checklist should include a T20 Torx screwdriver or mini ratchet with T20 Torx bit for accessing tight spaces and removing the fender well bolts. You’ll need 7mm and 10mm sockets paired with a 1/4 inch ratchet for headlight assembly bolts. A flat-blade screwdriver or pry tool helps remove cover panels and pop rivets. For essential components, purchase H11 bulbs for low beams and 9005 bulbs for high beams. An 8mm socket or flathead screwdriver loosens air intake clamps during access. Extensions improve reach on bolts, while body clip tools facilitate fender liner removal when necessary. The correct bulb must physically fit the headlight housing and match your vehicle’s electrical requirements to ensure proper operation. Understanding different bulb technologies available for your headlight socket will help you select the best option for your specific needs. These procedures apply to 2010-2015 GMC Terrain models and are similar for both driver and passenger sides.
Preparing Your GMC Terrain for Bulb Access
Proper preparation guarantees safe and efficient headlight bulb replacement on your GMC Terrain. Begin by turning off your engine completely and removing the keys from the ignition. Park on a level surface and engage the parking brake to prevent movement. Switch off all headlights to avoid electrical issues during the procedure.
For ideal headlight positioning, open your hood fully and secure it with the prop rod. Turn your front wheels inward—this creates access space without removing tires. Essential safety measures include wearing gloves to protect bulb glass from skin oils and waiting ten minutes if your engine’s hot. Clear your work area of debris, keep hands dry for secure grip, and don eye protection when dust or particles are present. Having spare bulbs that match your GMC Terrain model on hand allows for quick replacements if needed.
Accessing the Headlight Assembly Through the Wheel Well
Although accessing your GMC Terrain’s headlight assembly through the wheel well requires patience, it’s the most efficient method for bulb replacement without removing the entire headlight unit. Start by turning your steering wheel fully to maximize access. Using a T20 Torx bit, remove the two bolts securing the inner fender liner. Pry up the center portion of the two-piece push clips with a flat-blade screwdriver, then extract them completely. Once fasteners are removed, pull the bumper cover outward to create a working gap. Reach behind the liner carefully—watch for sharp metal edges in these tight spaces. Locate the headlight access cap, twist it counterclockwise, and extract it through the wheel well opening. This method provides sufficient clearance for bulb replacement.
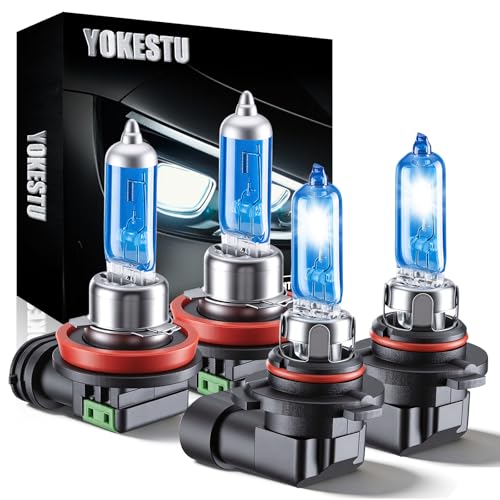
Fit For GMC Terrain 2010-2018: This set include 2×high beam and 2×low beam halogen headlight bulbs, a total of 4 white light bulbs. Please check your vehicle model before purchasing.
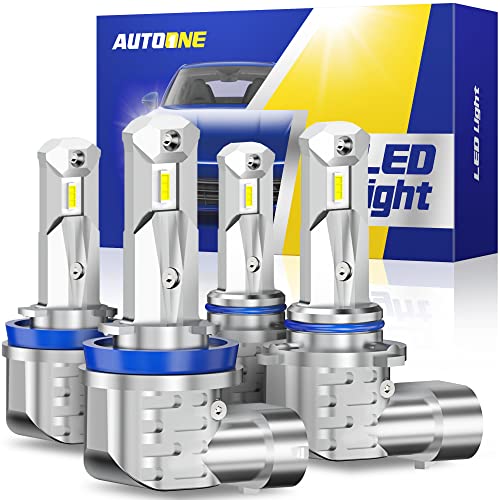
Huge Improvement in Visibility: AUTOONE H11 9005 led bulbs combo are equipped with high luminous efficacy csp chips. And 1:1 halogen bulbs’ beam pattern, spread out the light more to help in the side and front vision but no endangering others
Removing the Old Headlight Bulb
With the headlight assembly now accessible through the wheel well, you’ll need to remove the dust cap protecting the bulb. Position the tab at 6 o’clock, then twist counterclockwise until it fully detaches. Next, grasp the bulb connector and turn it counterclockwise a quarter turn. Pull the socket straight out—use two hands if it’s tight.
Locate the tab on the electrical connector and squeeze it while pulling gently to disconnect the harness. Keep connecting wires clear during removal. For bulb handling, avoid touching the halogen glass directly, as oils from your skin can damage it. If a washer sticks in the socket, remove it separately. Verify you’ve extracted the correct bulb type—9005 for high beam applications. The process for removing the dust cap involves turning it counterclockwise, followed by the extraction of the old bulb via a turn and plug disconnection.

Huge Improvement in Visibility - OXILAM H11 9005 led bulbs combo are equipped with high luminous efficacy CSP chips. And 1:1 halogen bulbs’ beam pattern, spread out the light more to help in the side and front vision but no endangering other drivers. Safer and bright upgrade for fog lights

20X Brighter & 6500K White Light – See Everything Clearly: AUXITO M6 shines 20X brighter than halogen bulbs, delivering crisp 6500K white light. Spot animals, road signs, and curves earlier and more clearly – no more dark, blurry nights on the road.
Installing the New Headlight Bulb
For high beams, expose the socket by twisting the dust cap counterclockwise. Insert the bulb, secure the retaining clip, and rotate clockwise until locked. Replace the cap by twisting snugly into position. Avoid touching the new bulb directly with your bare hands, as oils from your skin can damage it.

⭐【Super Bright H11 Bulbs】Our H11 headlight bulbs deliver over 1000LM brightness and a 3800K color temperature, ensuring optimal visibility in foggy and rainy conditions. Upgrade your automotive headlight bulbs for safer nighttime driving.

60,000-Hour Lifespan: Engineered for extreme durability, the OXILAM Q26 H11/9005 LED combo consumes less power and generates minimal heat compared to halogen. The full aluminum housing and advanced temperature control system work together to prevent overheating, ensuring 60,000+ hours of stable illumination—that’s 7+ years of continuous use

Upgrade to 1:1 OEM size D5S HID bulbs that fit perfectly for 2018 2019 2020 2021 gmc terrain bi-xenon projector headlights stock high/low dual beam hid bulbs (Note: Never fit any halogen bulbs), ensuring hassle-free installation without modifications or tools—ideal for drivers seeking a direct, reliable replacement that matches factory specifications
Common Mistakes and How to Avoid Them
When replacing GMC Terrain headlight bulbs, you’ll avoid most problems by handling components gently and following proper sequences. Bulb handling requires minimal pressure—halogen glass shatters easily, so wiggle bulbs gently rather than yanking forcefully. If the tip breaks, you’ll face difficult extraction. Connector care demands pressing release tabs with two hands before unplugging. Always connect the bulb before inserting it into the housing to prevent misalignment. High beam connectors need correct polarity—flip if there’s no power. Dust caps require pushing while turning for proper sealing, especially with longer LED bulbs. Don’t overtighten or you’ll crack the plastic. Raise metal brackets fully before removal to prevent bending. Test both beams before final reassembly to catch polarity reversals or loose connections early. Additionally, avoid touching the bulb glass with your fingers during installation, as skin oils can significantly shorten bulb lifespan. Selecting the right brightness levels for your replacement bulbs will also ensure optimal visibility and compliance with safety regulations.
Choosing the Right Replacement Bulbs
Proper bulb handling during installation means nothing if you’ve selected the wrong replacement type. First, identify your model year: 2010-2017 Terrains use H11 low beams and 9005 high beams, while 2018-2020 models require HID D5S bulbs.
When comparing halogen vs LED options, consider your priorities. Stock halogen H11 bulbs work reliably, but LED upgrades like the H11 SL2 Pro deliver 2400 lumens at 21 watts with superior longevity. The SL2 fanless version offers 1400 lumens for reduced complexity.
Color temperature affects visibility and appearance. Choose 5000K-6000K for pure white output optimizing night vision. The SL2 Pro’s 6000K rating provides cool white light, while 6500K+ produces bluish tones.
Verify compatibility before purchasing. Some LED conversions require anti-flicker modules or adapters despite plug-and-play connectors. Always confirm specific bulb sizes in your owner’s manual before making replacement purchases.

【800% Breakthrough Brightness】Marsauto H11 bulb shine 800% brighter than traditional bulbs. M1S H11 H8 H9 bulb uses non-traditional chip technology, and its light output is much higher than other chips on the market. At the same time, the number of lamp beads on a single side has been increased from one to two, which solves the problem of low lumen caused by one lamp bead and can also increase the width of illumination, escorting car owners at night.
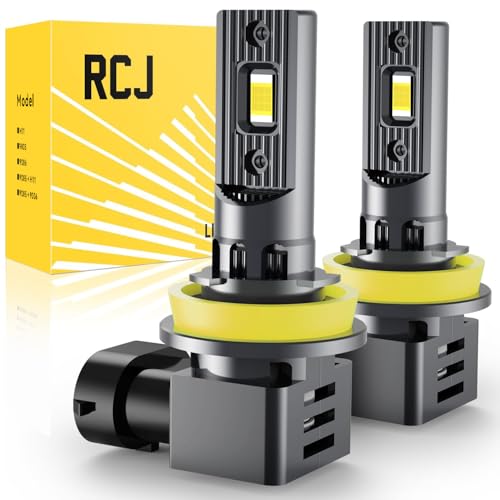
【800% Brighter Than Halogens】- Equipped with advanced lights, 100W, 30000LM, RCJ H11 bulbs can provide 800% brightness, 6000K cool white makes the road clearer

[Superior Visibility - Safe Driving] ZonCar H11 LED bulb features the latest upgraded LED chip, delivering 70,000 lumens of brightness — 13 times brighter than the original equipment bulb. Combined with its ultra-penetrating 6000K cool white light and wide-angle beam, it allows you to see up to 1,400 feet ahead on the road, providing a wide field of view to enhance driving safety.
Testing and Final Assembly
After securing the new bulb in its socket, test both low and high beams before reinstalling any dust caps or housings. Bulb functionality testing guarantees each filament or LED emitter illuminates properly. If a lamp fails to light, use a multimeter to measure socket voltage—approximately 12–14V with the engine running—for wiring continuity verification. This diagnostic distinguishes bulb defects from circuit faults. Perform a bulb-swap test between left and right units to isolate bad bulbs versus faulty ballasts or wiring. Once operation is confirmed, firmly reinstall dust caps, making certain rubber seals compress fully to prevent moisture ingress. Check that connector retention tabs click audibly. Finally, project the beam pattern onto a wall from 10–25 feet to verify correct alignment before road-testing. For optimal results, consider replacing headlight bulbs in pairs to ensure balanced lighting across both sides of the vehicle. Inspect all connection points to ensure they remain tight and secure, as loose connections can cause lighting malfunctions especially after driving on uneven terrain. To avoid bulb contamination that can shorten lifespan, always wear gloves during installation when handling the new bulb.
Maintenance Tips for Long-Lasting Headlights
Because headlight performance degrades over time from environmental exposure, consistent maintenance extends bulb lifespan and preserves ideal visibility. Implement regular headlight cleaning by wiping lenses with a microfiber cloth during each wash, using dedicated cleaner or mild soap to remove road grime without damaging plastic surfaces.
For moisture prevention, inspect rubber seals and gaskets after washes, checking for cracks or wear. Apply silicone spray to O-rings and use butyl rubber sealant on seams to prevent water penetration. If moisture appears, dry vents with a hairdryer immediately.
Apply UV-protective coating annually by spraying two coats from 4-6 inches away, allowing five minutes between applications. Let cure overnight before driving. This prevents yellowing and oxidation that diminish light output and require premature bulb replacement. Professional headlight restoration products can effectively remove existing oxidation and restore clarity when preventative measures are insufficient. Over time, UV exposure and oxidation can cause headlight lens degradation that impacts both safety and vehicle appearance. Replace bulbs in pairs to maintain balanced light output and consistent visibility on both sides of your vehicle.