

To replace your Kia K5 headlight, you’ll first disconnect the battery and allow the LED assembly to cool. Remove the 10mm bolts and plastic push-clips securing the headlight assembly, potentially detaching part of the front bumper for access. Carefully extract the assembly, disconnect the electrical connector, and remove the old bulb by disengaging its retaining mechanism. Install the new bulb matching the original orientation, reconnect all components, and test both beam functions. Proper alignment guarantees FMVSS No. 108 compliance, and the following thorough guide covers advanced troubleshooting techniques.
Understanding Kia K5 Headlight Types
The Kia K5 (2021-2024) employs full LED projector-type headlight assemblies across its trim lineup, with particular emphasis on GT-Line submodels that showcase this advanced lighting technology. These headlight types utilize projector-based optical systems that concentrate light beams precisely, minimizing scatter and reducing glare for oncoming traffic. The LED technology integrated throughout delivers low and high beam illumination with exceptional brightness and clarity, providing superior visibility in low-light conditions. You’ll find LED bulbs offering lifespans exceeding 50,000 hours—substantially longer than halogen alternatives—which reduces replacement frequency and maintenance costs. The composite assemblies combine polycarbonate (PC) lenses for impact resistance with polypropylene (PP) housings for lightweight durability. Position lamps, daytime running lamps, and turn signals also incorporate LED technology within the same unit, simplifying the replacement process. When selecting replacement headlights, verify compatibility with your specific model year, as these assemblies are designed to meet OEM specifications for 2021 through 2024 K5 vehicles.
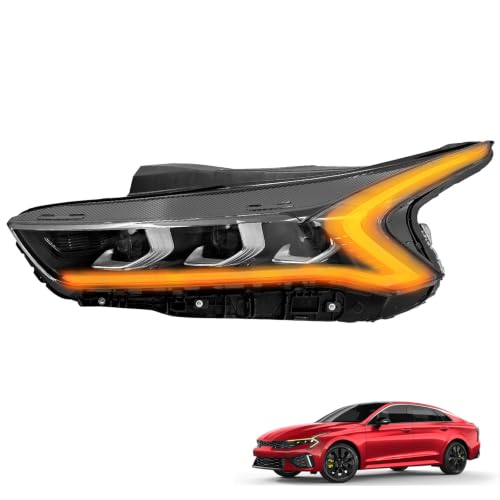
【OE Numbers】: 92101L3100, 92101-L3100, 92101 L3100

【OE Numbers】: 92102L3100, 92102-L3100, 92102 L3100

🚗Good Compatibility: This product is a customized product, specifically designed for the 2021 2022 2023 2024 Kia K5 GT/GT-Line (Not Compatible with LXS/LX/EX). Before purchasing, please check the compatible model of the headlight
Gathering the Right Tools and Preparing Your Vehicle
Before removing your Kia K5’s headlight assembly, you’ll need to assemble the proper toolkit and prepare your workspace systematically. Effective tool selection begins with gathering a 10mm socket set with extension bar, both flathead and Phillips screwdrivers, and a clip removal tool for plastic fasteners. Include protective gloves to prevent oil contamination on halogen bulb surfaces.
Vehicle preparation requires parking on level ground and allowing headlights to cool completely. Turn off the engine, remove the key, and secure the hood with its prop rod. Disconnect the battery on models with advanced lighting systems to eliminate electrical hazards. Organize your workspace by arranging tools within reach and preparing a magnetic tray for hardware storage. Verify replacement bulb compatibility with your K5’s specifications and inspect the headlight assembly for pre-existing damage before proceeding. While an impact gun can expedite the process, a standard socket wrench with extension works equally well for this task.

SMALL BUT ENOUGH FOR YOU - Mini socket set Includes 10 Cr-V 1/4" Metric Sockets 4mm, 5mm, 6mm, 7mm, 8mm, 9mm, 10mm, 11mm, 12mm, 13mm on 10 collecting holders, each socket is labeled with the size which makes organizing easy. 1pcs 1/4" 24-teeth ratchet handle; 1pcs 4'' Extension bars.

PREMIUM MATERIAL - Crafted from high-quality CR-V steel, this 12-Piece 1/4" & 3/8" Drive 10mm Socket Set is designed for durability and long-lasting performance in heavy-duty applications, ensuring reliable results every time.

Comprehensive 46-Piece Tool Set & Multi-Purpose Sockets: This professional 1/4 inch drive socket set offers a complete range of tools for versatile applications. The set includes: 13pcs 1/4" Metric Sockets (4mm, 4.5mm, 5mm, 5.5mm, 6mm, 7mm, 8mm, 9mm, 10mm, 11mm, 12mm, 13mm, 14mm); 21pcs Bit Sockets (Torx: T10, T15, T20, T25, T30, T40; Hex: H3, H4, H5, H6, H7, H8; Phillips: PH1, PH2, PH3; Pozi: PZ1, PZ2, PZ3; Slotted: SL4, SL5.5, SL7). Whether you need a travel socket set or a small socket set, this all-in-one kit satisfies all your precision needs
Accessing and Removing the Headlight Assembly
Once your workspace and tools are ready, accessing the K5’s headlight assembly demands systematic identification of all retention points securing the unit to the vehicle’s front-end structure. Locate 10mm bolts and Phillips screws along the fender edges, bumper interface, and hood perimeter. Remove plastic push-clips using appropriate extraction tools to prevent breakage. Some configurations require partial front bumper detachment—disconnect fog light and sensor connectors before proceeding. At the assembly’s rear, release the wiring harness by depressing locking tabs for DRLs, turn signals, and integrated cameras. Document fastener locations for reinstallation accuracy. Extract the assembly from mounting brackets with controlled force, supporting it with both hands. Begin the bumper detachment process on the driver’s side of the vehicle for optimal access. Perform assembly inspection for damage before proceeding. This methodical approach guarantees proper headlight alignment during reassembly.

【Size】Hex Head Sems Body Bolt With Dog Point, M6-1.0 X 25mm,10mm Hex, 6mm Diameter,20mm Washer.Black Finish Carbon Steel.

【Size】Hex Head Sems Body Bolt With Dog Point, M6-1.0 X 25mm,10mm Hex, 6mm Diameter,20mm Washer.Black Finish Carbon Steel.
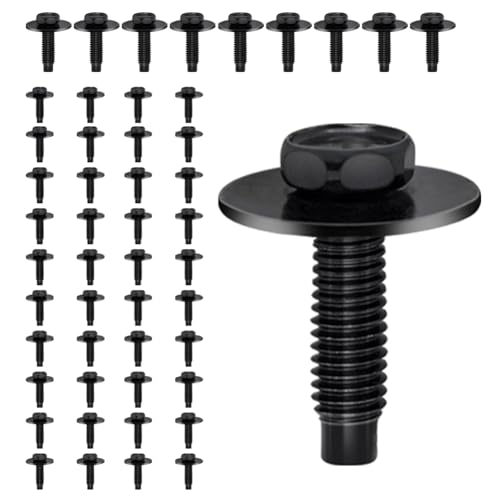
【Size】Hex Head Sems Body Bolt With Dog Point, M6-1.0 X 25mm,10mm Hex, 6mm Diameter,20mm Washer.Black Finish Carbon Steel.
Removing the Old Headlight Bulb
With the headlight assembly properly exposed, you’ll initiate bulb extraction by first ensuring electrical isolation—confirm the vehicle remains off with the key removed from the ignition cylinder. Locate the power connector at the rear of the bulb housing and depress the release tab to disconnect it—pull only by the connector body, never the wiring harness. Identify the securing mechanism specific to your bulb types: twist-lock sockets require a quarter-turn counterclockwise, while metal clips need tab disengagement. Different removal techniques apply based on retainer design. Handle only the bulb’s plastic or metal base, avoiding glass contact to prevent halogen contamination. Allow complete cooling if recently operated. Inspect the socket for corrosion or damage before proceeding with replacement installation procedures. Depending on your vehicle’s model year, you may encounter bulb types such as 9005 or H7 that have specific handling requirements. H7 bulbs feature a distinctive two-pronged plug fitting unique to their type, making bulb replacement specific to your vehicle’s headlight socket design. Place the old bulb carefully in a secure location away from the work area to prevent accidents or injuries from broken glass.

Lights Dim Over Time, Replace In Pairs: Your lights are a pair, one is never turned on without the other. If one bulb burns out, the other isn't far behind. Replace your H7 XtraVision Halogen bulbs in pairs for optimum performance.

Lights Dim Over Time, Replace In Pairs: Your lights are a pair, one is never turned on without the other. If one bulb burns out, the other isn't far behind. Replace your 9003 XtraVision Halogen bulbs in pairs for optimum performance.
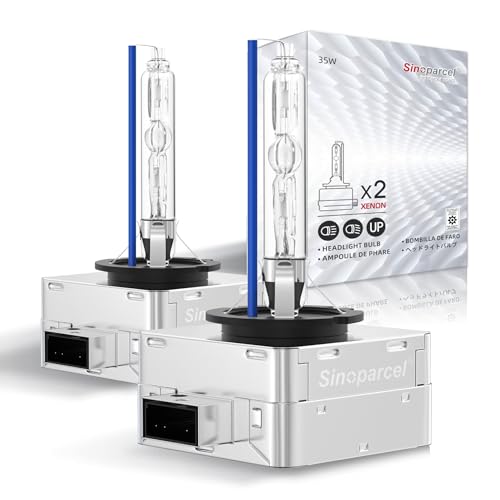
Life time support,2pcs packaged; Replacement part number: 66144 66140 85140 85415 (If there is any problem in the product, please contact us via Account Center,we will reply you within 24 hours)
Installing the New Headlight Bulb
After extracting the failed bulb and verifying socket integrity, you’ll prepare the replacement component for installation while maintaining strict contamination protocols. Handle the new halogen bulb exclusively by its base using gloves to prevent skin oils from compromising filament lifespan. Inspect for manufacturing defects before proceeding.
Execute bulb alignment by matching the orientation of the original component’s position within the socket. Apply proper installation techniques: insert the bulb fully without forcing, engage the retaining wire or clip mechanism until it locks securely, and confirm flush seating within the assembly housing. Align the retaining wire with the groove on the bulb before snapping it into place. Reconnect the electrical connector firmly, ensuring complete terminal engagement and correct polarity orientation.
Activate ignition and test both low and high beam functions. Verify steady illumination without flickering, indicating successful installation and ideal electrical contact.

Get the best lighting performance and an increased visibility and comfort on the road compared to basic bulbs

【Visual Enhancement】: The OKOENIEO H7 halogen bulbs are 200% brighter than other halogen bulbs, providing drivers with a wider and farther field of vision. Offering a greater visibility, they allow drivers to spot deer, wildlife, falling rocks, or obstacles ahead of time, ensuring safer nighttime driving.

Super Brightness: This light bulb adopts a 100-watt high-power design, which can provide stronger brightness and lighting effects. It produces a stronger beam than ordinary light bulbs, giving drivers better visibility at night or in adverse weather conditions.
Reassembling the Headlight and Testing Functionality
Following successful bulb installation and illumination verification, you’ll begin headlight assembly reintegration by positioning the housing unit into its designated mounting brackets. Insert mounting bolts loosely to permit final adjustments before complete torque application. Verify electrical connections by reconnecting low beam, high beam, and turn signal harnesses, ensuring connectors achieve full seating and locking engagement. Route wiring to prevent strain against moving components or heat sources, securing with factory clips. Replace protective dust caps and bulb covers, confirming moisture-tight sealing. Reconnect the battery terminal and activate all lighting functions to verify operational status. Check for flickering, dimming, or non-illumination indicating faulty connections. Adjust beam angle per manufacturer specifications. Conduct a thorough inspection verifying secure fitment, proper alignment, and absence of component interference before road testing. Proper sealing prevents water inside housing, which can damage electrical components and reduce visibility.
Safety Tips and Best Practices for Headlight Replacement
Proper safety protocols form the foundation of successful headlight replacement and protect you from potential electrical hazards, thermal injuries, and contamination-related component failure. You’ll need safety goggles and gloves—the latter prevents skin oils from compromising bulb lifespan through surface contamination. Disconnect the battery before beginning work to eliminate electrical shock risks. Confirm the engine’s cool and bulbs haven’t been recently operated, as thermal burns from hot components pose significant danger. When handling replacement bulbs, grasp only the base to maintain glass surface integrity. Before you begin the replacement process, identify your specific bulb type whether it’s halogen, LED, or HID, as each requires different handling precautions. You can identify bulb types by checking the markings directly on the bulb base to ensure proper selection. Verify your replacement bulbs display DOT and SAE certifications per FMVSS No. 108 compliance requirements. After installation, test both low and high beam functions while checking proper beam alignment to prevent glare affecting oncoming traffic. Consider replacing both headlight bulbs simultaneously to ensure even lighting output and avoid mismatched brightness levels. Understanding safety importance throughout this process guarantees reliable results.


