

To replace your 2007 Silverado’s headlight bulb, you’ll first open the hood and locate the headlight assembly. Remove three 10mm bolts securing the housing—two on top and one near the fender. Gently pull the assembly forward, then disconnect the electrical connector by pressing the locking tab. Twist the bulb counterclockwise to release it from the socket, install the new H11 or H1 bulb without touching the glass, and reverse the process. The sections below provide detailed troubleshooting steps and best practices for peak results.
Gathering Your Tools and Materials
Before you begin replacing the headlight bulb on your 2007 Chevy Silverado, you’ll need to assemble the correct tools and materials to complete the job efficiently. Gather a ratchet with 10mm socket, extenders, flat head and Phillips screwdrivers, and pliers for removing grille clips and headlight housing bolts. Tool organization is critical—use magnetic trays or containers to keep fasteners separated during disassembly. Verify bulb specifications match your Silverado’s requirements, typically H11 for low beams and H1 for high beams, compatible with 2007-2013 models. When selecting replacement bulbs, consider different bulb technologies such as halogen, LED, and HID options to determine which offers the best balance of brightness and durability for your needs. Sylvania Silver Star Ultras offer improved brightness if you’re upgrading. Include rubber gloves or paper towels to prevent skin oils from contaminating bulb glass. It’s important to check DOT regulations before installing aftermarket upgrades to ensure compliance with safety standards. Optional items include trim removal tools, protective eyewear, and voltage testers for circuit verification. This headlight replacement process also applies to GMC Sierra models from the same year range, making the instructions universally helpful for both truck variants.

Fit for 99% of vehicles - SYJIIP Halogen headlamp are close to the wattage of the original halogen headlamp bulb, which can reduce the occurrence of CANBUS problems, avoid erroneous and flickering. As long as your original light bulb model is the same as ours, then SYJIIP's light bulb will be suitable for your car.

[Original 1:1 size perfectly Fit For Chevy Silverado]:This halogen bulb combination is suitable for all Silverado 1500 2500 3500 2007-2015 models. It includes :2*9005 high beams and 2*H11 low beams, totaling 4 bulbs, ensuring perfect coordination and easy installation.Before purchasing, please check the Camry model

Vehicle Compatibility: This item includes pair 9005/HB3 high beam, pair H11 low beam LED headlight and pair 5202/H16 foglight bulbs, compatible with Chevrolet Silverado/Chevy Silverado 2500HD 3500HD 2008-2020, Chevy Silverado 1500 2007-2015 and similar models. Please verify fitment before purchase
Opening the Hood and Preparing the Workspace
Two distinct latch mechanisms secure your 2007 Silverado’s hood and require sequential disengagement before you can access the headlight assembly. Position the vehicle on level ground, engage the parking brake, and shut off the engine. Locate the interior hood release lever below the steering wheel on the driver’s side and pull it firmly until you hear the primary latch disengage. Next, slide your hand beneath the hood’s center near the emblem to find the secondary safety latch. Push this latch rightward toward the passenger side while lifting the hood upward. The hood safety struts will automatically hold it open. Before proceeding, verify workspace organization by clearing debris around the vehicle and confirming adequate lighting for component visibility during headlight replacement procedures. If the hood does not release smoothly, check that the release cable is functioning properly by testing the latch’s movement.
Accessing the Headlight Assembly
Accessing the 2007 Silverado’s headlight assembly requires removing three primary fasteners: two bolts positioned along the top edge of the assembly and one located near the fender junction. You’ll need a 10 mm socket with ratchet and extension bar to reach these mounting points. The third bolt near the fender can be loosened rather than fully removed to facilitate extraction. For improved access, remove the radiator support cover and consider pulling back the wheel well liner to expose concealed fasteners. Different fastener types—including primary mounting bolts and retaining clips—secure various components. Once hardware is removed, gently pull the assembly outward using lateral rocking motions while maintaining proper headlight alignment with retaining tabs. Safely accessing and removing the headlight housing requires careful attention to all connection points and fasteners. Before disconnecting, avoid touching the bulb glass directly to prevent premature failure of the new bulb you’ll be installing. Press the wiring harness release tab to disconnect the electrical connector before complete assembly removal.

SMALL BUT ENOUGH FOR YOU - Mini socket set Includes 10 Cr-V 1/4" Metric Sockets 4mm, 5mm, 6mm, 7mm, 8mm, 9mm, 10mm, 11mm, 12mm, 13mm on 10 collecting holders, each socket is labeled with the size which makes organizing easy. 1pcs 1/4" 24-teeth ratchet handle; 1pcs 4'' Extension bars.

Durable CR-V with Reinforced Walls:Our CR-V sockets deliver unparalleled reliability and safety by fundamentally eliminating the bursting risk common in thin-walled carbon steel models. This is achieved through the powerful synergy of superior chrome-vanadium steel and a robust, thickened inner wall design.

SUPERIOR QUALITY: Our socket wrench sets are made of high-density carbon steel, which is tough enough to greatly increase strength and longevity, providing reliability when you need emergency repairs
Removing the Electrical Connector
Locate the electrical connector at the rear of the headlight bulb socket, where it’s secured by a plastic locking tab mechanism. Before proceeding, verify electrical safety by turning off the vehicle’s ignition and removing the keys. Identify the connector type—typically a push-pull or tab-lock design on the 2007 Silverado. Press down firmly on the locking tab while simultaneously pulling the connector straight back from the bulb socket. Don’t twist or rotate during removal. If resistance occurs, confirm all tabs are fully disengaged before applying additional force. Use a small flathead screwdriver or trim tool to gently release stubborn tabs if necessary. Once disconnected, inspect the connector pins and socket contacts for corrosion or damage. To prevent premature burnout when handling the new bulb, avoid touching the bulb glass with bare fingers. Grip only the connector housing, never pull on the wiring itself to prevent damage. When replacing the headlight, ensure proper alignment and secure fitting of the new bulb to avoid electrical issues or premature failure. For comprehensive guidance on the complete headlight replacement process for 2007-2013 models, consult instructional video support that demonstrates each step in detail.

High Quality: This female adapter wiring harness sockets is made of high-quality materials, the nylon shell has good insulation, heat-resistant and flame-retardant, has good toughness, is not easy to deform or crack, the internal copper wire can stably conduct electricity, has high working efficiency, and can be used for a long time

Replace Part Numbers: 645745 15841609 25962806, perfect match for the original plug

Enhanced Performance: Rated for voltage from 9-36 V, this headlight socket delivers stable electrical performance under various conditions. By replacing worn or faulty connectors, it contributes to improving overall driving safety, particularly during nighttime or adverse weather situations
Extracting the Old Bulb
With the electrical connector safely disconnected, you’ll now release the bulb from its housing using the appropriate method for your Silverado’s headlight type. Different bulb types require specific removal techniques. For twist-lock configurations, rotate the bulb counterclockwise approximately 45 degrees until it disengages from the socket. Direct-pull bulb types, such as the 3157, extract straight out without rotation. Locate the retaining tab or clip securing the bulb—push down or lift this mechanism to open it. Apply steady, gentle pressure when extracting to avoid damaging the socket or breaking the bulb. Never touch halogen bulb glass with bare fingers; oils from your skin greatly reduce bulb lifespan. Use gloves or a clean cloth during handling. Inspect the socket for corrosion or heat damage before proceeding with replacement. The brightness and longevity of your replacement bulb depends on color temperature ranges and the type of bulb selected. For optimal results, consider upgrading to LED bulbs which offer improved visibility and energy efficiency compared to traditional halogen options. Avoid touching the glass of any replacement bulb to ensure maximum longevity.

Fit For - These light bulbs combo compatible with Chevrolet Silverados 1500 high and low beams 2007 2008 2009 2010 2011 2012 2013 2014 2015, compatible with Chevrolet Silverados 2500 3500 high and low beams 2007 2008 2009 2010 2011 2012 2013 2014 2015 2016 2017 2018 2019 2020 2021 2022. Our bulbs are suitable for Off-Road use only. If you need assistance or have any questions, please contact us via Amazon message for a free kit.
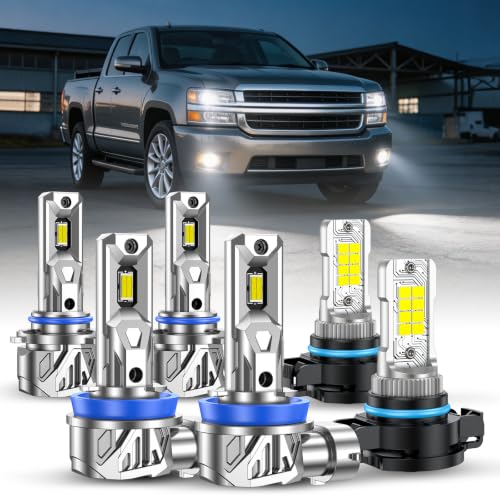
92,000LM Extreme Brightness: These 2×9005 led bulbs + 2×H11 led bulbs + 2×5202 fog lights Kits are 9X brighter than stock halogens, featuring a 6500K cool white light that cuts through dense fog, heavy rain, and snowstorms without blinding oncoming traffic—ensuring 3.1s extra reaction time at 60mph for a safer night drive

⭐【Super Bright H11 Bulbs】Our H11 headlight bulbs deliver over 1000LM brightness and a 3800K color temperature, ensuring optimal visibility in foggy and rainy conditions. Upgrade your automotive headlight bulbs for safer nighttime driving.
Installing the New Bulb Correctly
Before handling the replacement bulb, don clean gloves or grasp it with a lint-free cloth to prevent skin oils from contaminating the halogen glass envelope. Align the bulb with the socket and rotate clockwise approximately one-quarter turn until the locking tabs engage. Verify the bulb sits flush and straight—improper seating compromises beam alignment and bulb lifespan. Snap any retaining clips into position to secure the assembly. Connect the electrical connector to the bulb socket, guaranteeing the locking tab clicks firmly. Test headlight operation immediately to confirm proper electrical contact. If you’ve removed the housing, reinstall it using factory fasteners torqued to specification. Apply dielectric grease on connections to protect against corrosion and ensure reliable electrical performance. Consider the color temperature options available for your replacement bulb to optimize visibility for your driving conditions. Check beam alignment after installation; misaligned headlights reduce visibility and violate safety regulations. Perform a final inspection to ascertain all components are secure.
Reconnecting the Electrical Connector
After securing the new bulb in its housing, reconnect the electrical connector to complete the circuit and restore headlight function. Begin with wiring inspection—examine the connector for corrosion, dirt buildup, or damaged terminals that could compromise electrical contact. Clean contacts with electrical contact cleaner if necessary. Replace the connector if pins are bent or housing is cracked.
Focus on connector alignment by matching the tab locations on both the connector and bulb socket. Push the connector firmly onto the socket until the plastic tab clicks into place. Confirm proper seating by gently pulling the connector—it shouldn’t slip off. If you need a replacement connector, quality replacement options start at $5.99 from trusted brands like Dorman and Carquest Premium. Secure the wiring harness using cable ties or clips, routing it away from hot engine components. Most headlight assemblies require basic tools like a 10mm socket wrench to fully remove if deeper access is needed. Test both low and high beams to verify proper operation before completing the installation. Consider checking for foggy headlight housings during this final inspection, as cloudy lenses can significantly reduce brightness even with new bulbs installed.
Reassembling the Headlight Housing
Once the electrical connector is secured and verified, begin reassembling the headlight housing by positioning it into the mounting area. Align the plastic studs with their designated slots and ascertain mounting holes match the frame bolt holes. Check that no wires are pinched and the housing sits flush for proper housing sealing. Loosely thread all three 10mm bolts—two on top, one accessible from the wheel well—then tighten sequentially to prevent cracking. Take care not to touch the glass of the bulbs during reassembly to avoid damage from oils and residue. Ensure sealing components remain intact to prevent moisture from compromising the headlight assembly. Reattach the mudguard or fender liner using original fasteners. Reinstall the grille assembly by snapping bottom clips first, followed by top clips, then secure with 10mm bolts. Replace the radiator cover and all trim panels. Verify even gaps around the housing edges and confirm headlight alignment adjustment screws remain accessible for future beam correction.
Testing Your New Headlight Bulb
With the headlight housing fully reassembled, perform a thorough verification sequence to ascertain the new bulb functions correctly and meets electrical specifications. Start your electrical testing procedures by turning on the vehicle’s ignition and activating the headlights. Verify both low beam and high beam operation illuminate immediately without flickering or dimming. Use a multimeter to measure voltage at the connector, confirming approximately 12 volts under load. Check for dashboard warning lights indicating bulb failure or electrical faults. Conduct a bulb compatibility check by observing the beam pattern for proper alignment and focus against a flat surface. Confirm the color temperature matches OEM specifications and that no moisture has entered the housing. When upgrading to higher-performance bulb options like LED or HID conversions, ensure compatibility with your vehicle’s electrical system to avoid potential damage. To prevent contamination and ensure optimal performance, wearing gloves during any future bulb handling is recommended. Test headlights in varying ambient conditions to validate visibility and coverage before declaring the replacement complete. Finally, consider subscribing to additional maintenance tutorials to stay informed about routine vehicle care procedures.
Troubleshooting Common Problems
Even when you’ve correctly installed a new headlight bulb, operational failures can occur due to underlying electrical or mechanical defects in the 2007 Chevy Silverado’s lighting system. Begin diagnostics with fuse testing—examine fuses 11, 16, 30, 31, 32, and 33 in the under-hood fuse box using a multimeter rather than visual inspection. Testing fuses with a multimeter can reveal hidden failures that are not visible through simple visual examination. If fuses pass, investigate relay faults by testing the headlight relay’s continuity and switching function. Check for wiring issues including corroded connections at bulb sockets, damaged harnesses, or poor ground points using continuity tests. Most headlight bulbs like the H11 operate at 12 volts and consume 55 watts, so electrical system failures can prevent proper bulb illumination even when the bulb itself is functioning correctly. Switch malfunctions manifest as intermittent or non-responsive headlight operation; verify the headlight switch functionality with a multimeter. Flickering typically indicates wiring issues or failing relays, which can result from an alternator not providing steady voltage to the electrical system. If low beams fail while high beams operate, suspect separate circuit problems requiring wiring diagram consultation for accurate troubleshooting.

Compatible with ===== Fit for Chevy: 02-14 Silverado 1500, 07 Silverado 1500 Classic, 02-06 Silverado 1500 HD, 07 Silverado 1500 HD Classic, 02-04 Silverado 2500, 02-14 Silverado 2500 HD, 07 Silverado 2500 HD Classic, 02-06 Silverado 3500, 07 Silverado 3500 Classic, 07-14 Silverado 3500 HD, 03-06 SSR,02-09 Trailblazer, 02-06 Trailblazer EXT | Fit for GMC: 02-09 Envoy , 02-06 Envoy XL, 04-05 Envoy XUV, 02-14 Sierra 1500, 07 Sierra 1500 Classic, 02-06 Sierra 1500 HD, 07 Sierra 1500 HD Classic, 02-04 Sierra 2500, 07 Sierra 2500 HD Classic, 02-06 Sierra 3500, 07 Sierra 3500 Classic, 07-14 Sierra 3500 HD | Fit for Buick: 05-10 LaCrosse, 04-07 Rainier

Replace Part Number:Flasher relay replace OEM parts numbers are 10383321,15764135,15231201,10383320, please check the OEM part number and make sure your part number matches this part number before buying

[Fitment] Compatible with 2004-2006 Cadillac Escalade, Tahoe, Yukon, 2003-2006 GMC Sierra 3500, Cadillac Escalade EXT, Chevrolet Avalanche 1500/2500, Silverado 3500, 2003-2007 Silverado 1500/2500 HD, GMC Sierra 1500/2500 HD, GMT 800 trucks, 2003-2004 Silverado 2500, Sierra 2500, 2003 2005-2006 Silverado/Sierra 1500 HD, 2007 Silverado Sierra 1500 2500 3500 HD Classic


