To install a headlight switch, first disconnect your vehicle’s battery ground cable to prevent electrical shorts. Remove the dashboard trim panels using trim removal tools to access the old switch. Disconnect the wiring harness after photographing and labeling each connector for proper reassembly. Connect the new switch’s terminals to the corresponding wires, ensuring battery power runs through an inline fuse. Test each function with a multimeter before reconnecting the battery. The following sections detail critical safety checks and troubleshooting techniques you’ll need for a successful installation.
Gathering Tools and Preparing Your Vehicle for Switch Replacement
Before replacing a headlight switch, you’ll need to gather the proper tools and prepare your workspace to guarantee a safe, efficient installation. Collect flathead and Phillips-head screwdrivers, a Torx driver set, trim removal tools, and battery terminal wrenches. Ascertain proper tool organization by placing all equipment within easy reach and using a magnetic tray for screws and small hardware.
Critical safety precautions include disconnecting the battery ground cable before starting work to prevent electrical shorts. Park your vehicle with the ignition off and keys removed. Work in a well-lit area and use insulated tools when possible. Verify your replacement switch matches OEM specifications for your vehicle’s make and model. Clean the dashboard area around the switch to prevent debris contamination during installation. Some vehicles may have integrated daytime running lights controlled through the headlight switch assembly, so familiarize yourself with your vehicle’s light settings before beginning work. Consider taking photographs during disassembly to document wire locations and component positions for accurate reassembly. Apply a UV-protective sealant around the switch housing after installation to protect electrical connections from moisture and oxidation.

Direct replacement - this headlight switch knob is designed to match the fit and function of the original control knob on specified vehicles

【YOUR VEHICLE NEEDS THIS】Perfectly match old led headlight H6054 H5054 H6054LL 6014 6052 6053 [Fused] [negative switched conversion] vehicles like Toyota, Jeep Pickup, Tacoma, Subaru, Mitsubishi, or Suzuki 7x6 5x7 led headlight harness.
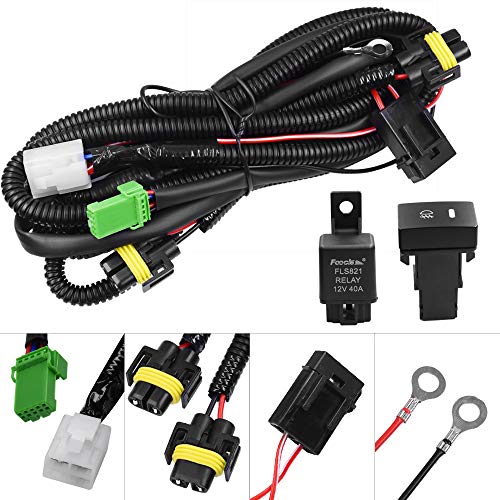
Good For Replacement fog lamps, Add-on fog lights, HID lights, LED daytime running lights, Driving lights, LED work lights, Off-road lighting kit
Removing the Old Headlight Switch From the Dashboard
The headlight switch removal process begins with identifying its location on your dashboard, typically positioned within the driver’s reach on the left side of the instrument panel. Before starting, confirm the switch is in the off position to prevent electrical issues. Remove any surrounding trim panels or covers using appropriate trim removal tools to gain dashboard access. Different switch types require specific removal methods: Volkswagen models need an inward push and clockwise rotation to retract internal tabs, while other designs feature release buttons underneath or on top. Once tabs are disengaged, pull the switch straight out. Depress the tabs on electrical connectors and remove any safety clips before disconnecting the wiring harness. If you encounter resistance, verify all locking mechanisms are fully released before applying additional force. Work in a well-lit area to ensure you can clearly see the clips and tabs during the removal process.
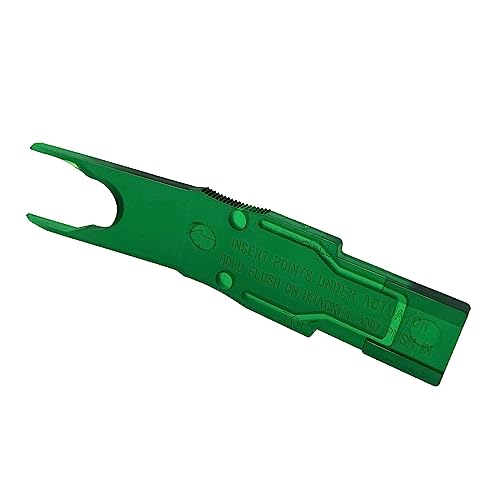
This tool is for safely removing rocker switch covers from current switches.

【Material】: This rocker switch panel actuator removal tool is made of sturdy plastic, which is tough and smooth, effectively preventing scratches on the switch surface during disassembly and protecting the switch from damage, while also having a long service life.

Easily replace a rocker face instead of the whole switch
Disconnecting and Labeling the Wiring Harness
Once you’ve removed the headlight switch from its mounting position, you’ll need to safely disconnect and properly label all wiring harness connections to guarantee correct reassembly. Start by identifying each connector type—low beam, high beam, turn signal, and parking lights. Photograph the harness configuration before proceeding. Use adhesive tags or masking tape to label each connector with clear abbreviations corresponding to its function. When disconnecting, press locking tabs gently and grip connector bodies firmly—never pull wires directly. This wiring safety practice prevents damage to individual circuits. Release any retaining clips securing the harness along its routing path. Once disconnected, bundle wiring sections with wire ties and protect exposed connectors with plastic bags to prevent contamination during installation. If working with the headlight assembly wiring, disconnect the wiring harness using the clips that secure the connectors to the assembly.
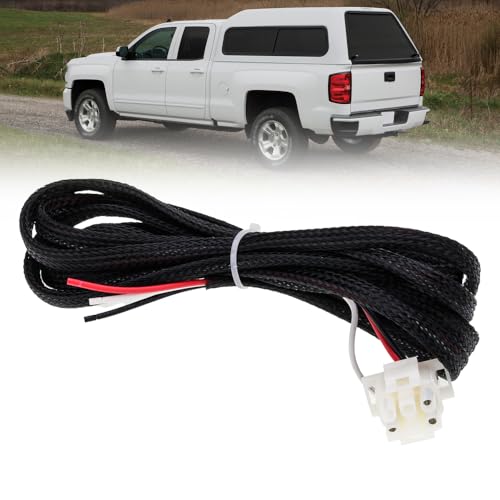
Compatible with: The Leer tag wire harness is designed for Leer truck topper with a TAG Fuse Box, just one single harness solve complex power-on problems for your truck cab

Universal fit: Compatible with all automobiles, boats and devices equipped with a 12 volt power source

Compatible with: The Leer tag wire harness is designed for Leer Pickup Topper with a TAG Fuse Box, just one single harness solve complex power-on problems for your truck cab
Installing and Wiring the New Headlight Switch
With your wiring harness properly disconnected and labeled, you’re ready to install the new headlight switch and establish correct electrical connections. Begin by matching each labeled wire to its corresponding terminal on the switch—battery power, dash lights, dimmer input, parking lights, and tail lights. Strip wire ends and crimp appropriate connectors, ensuring firm terminal attachment for vibration resistance. Connect the battery input to a fuse-protected 12V source, then route low beam and high beam wires through the dimmer switch using proper gauge wire. Employ wiring techniques like protective sleeves near sharp edges and secure routing along existing harnesses. Verify circuit safety by confirming inline fuses protect all headlight circuits. Multiple dash lights can be tied together in parallel for unified control, allowing you to operate all gauge illumination simultaneously from the headlight switch. Consider selecting a switch with automatic ambient light detection capabilities to enhance both safety and convenience in varying driving conditions. Test voltage at each terminal with a multimeter before final installation.

5 Pin Rocker Switch: Nilight 5 pin on-off rocker switch with SPST design (single pole single Throw), simple installation, freely turn on or off the light. Built-in two premium LEDs Emits soft light to illuminate the patterns, easy for you to find the switch in the dark.
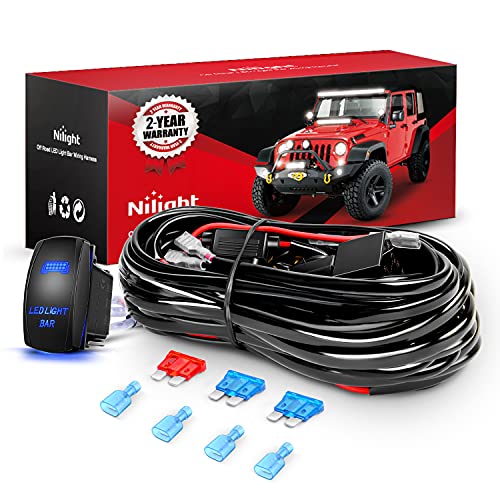
Two Available leads: 12 feet extendable wiring harness, two Sets of light output connectors for dual light fixtures less than 180W
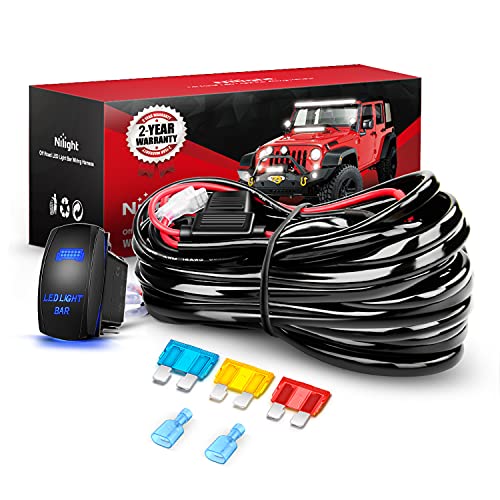
Premium quality: Excellent electrical conductivity, outstanding bending performance, high temperature and melting resistant, longer lifespan
Testing the Headlight Switch Function and Performance
Before reconnecting power to your newly installed headlight switch, you must verify its electrical integrity through systematic testing procedures. Set your multimeter to the ohm setting for continuity testing, placing probes on corresponding terminals while cycling through all switch positions. You’ll hear a beep or see near-zero resistance when circuits close properly. Next, perform voltage measurement with the battery connected, confirming output terminals display voltage close to battery levels when activated. Test each function separately—parking lights, headlights, and dimmer controls—to guarantee proper operation. For thorough validation, connect a 12V test lamp in series to simulate actual load conditions. This reveals contact issues that basic continuity testing might miss. When testing the dimmer function, monitor the resistance changes as you rotate the knob, expecting variable resistance readings between 15-20 ohms down to near zero ohms. Document all readings and compare them against manufacturer specifications before finalizing your installation.

【Safety of Use】: Engineered with an ergonomic non-slip grip, this car fuse tester ensures secure handling and precise control during electrical diagnostics. The integrated probe protection cover shields against accidental contact, adding an extra layer of safety during operation. Its compact and balanced design minimizes hand fatigue during extended use, making it suitable for both professional mechanics and DIY enthusiasts working in tight engine compartments or complex wiring setups.

SAFE & STURDY: This automotive test light features an ergonomic, non-slip handle for a comfortable and secure grip. It offers transparency, durability and resistance to drops, ensuring stable performance with long-term tough use. 39 inch PU wire is both flexible and lightweight, yet more robust than standard cables, significantly enhancing your work efficiency.

【Wide testing range & Voltage Polarity Testing】3-65v low DC volt circuit test light, designed for checking various vehicles’ electrical circuits, such as automotive headlights, taillights, faulty sockets, fuse, also for testing other 3-65V DC wiring and circuits. This is also a bidirectional voltage tester with volt polarity indicating, you can attach the alligator clamp either to ground or positive. A must have tool no matter for business or household use, will serve you faithfully for years.
Troubleshooting Common Issues and Final Adjustments
Even properly installed headlight switches can exhibit problems that require methodical diagnosis and correction. Start by checking fuses—locate your vehicle’s fuse box and perform fuse replacement if you find a blown headlight fuse. If fuses blow repeatedly, you’re facing a short circuit requiring deeper investigation. Test electrical continuity using a multimeter at the switch input terminal, verifying approximately 12V when activated. Backprobe connector terminals to confirm output continuity across different switch positions. Clean corroded contacts with electrical contact cleaner or fine sandpaper to restore proper conductivity. Verify all mounting screws are tight and plastic tabs aren’t cracked. After reconnecting the battery, test all lighting functions—headlights, parking lights, and dash illumination. To ensure proper bulb performance, wear gloves when handling new bulbs to avoid oil contamination that can reduce their lifespan. If your dash lights don’t dim properly with LED bulbs, the reostat spring design in your switch may be causing insufficient resistance control compared to original factory switches. Document your final wiring configuration with photos for future reference.