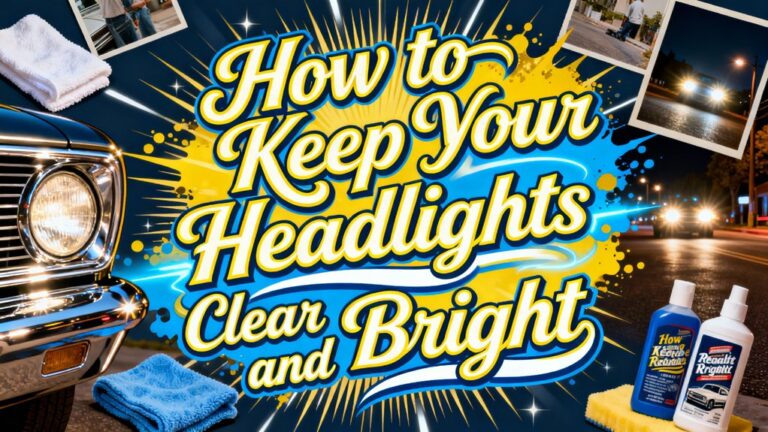
To clean oxidized headlights, you’ll need to address the photochemical degradation of the polycarbonate lens through progressive wet sanding and polishing. Start with 400-grit sandpaper for heavy oxidation, advancing through 1000, 2000, and 3000 grits while maintaining constant water lubrication. Follow with rubbing compound and polishing compound using a dual-action polisher or microfiber applicator. Complete the restoration by applying a UV-resistant clear coat or ceramic sealant to prevent re-oxidation. The thorough process below covers proper technique, protective equipment requirements, and long-term maintenance protocols.
Understanding What Causes Headlight Oxidation
Headlight oxidation fundamentally stems from the photochemical degradation of polycarbonate plastic when exposed to ultraviolet radiation. UV rays systematically break down the lens’s molecular structure, compromising the factory-applied protective coating. Once this barrier deteriorates, you’ll observe yellowing and cloudiness as oxidation factors accelerate surface degradation.
Environmental impact greatly compounds this process. Road debris creates micro-abrasions that increase oxidation susceptibility, while pollutants—including acid rain, smog, and industrial chemicals—react directly with the exposed plastic. Temperature fluctuations generate thermal cycling stress, causing expansion and contraction that develops microcracks. These fissures permit moisture infiltration, expediting oxidation. Damaged seals and cracks in the headlight assembly also allow humid air inside the headlight housing to create additional condensation and moisture buildup that accelerates degradation.
Chemical exposure from harsh cleaners, road salt, and automotive fluids strips remaining protective layers. Poor maintenance practices allow contaminants to accumulate on lens surfaces, with incorrect washing techniques scratching and further damaging the headlight material. Applying protective coating or wax after cleaning helps prevent re-yellowing and maintains long-term headlight clarity. The cumulative effect of these oxidation factors produces the characteristic hazy, discolored appearance requiring restoration intervention.
Gathering Your Restoration Supplies
Before you begin restoration work, assemble all required materials to prevent workflow interruption and guarantee consistent results. You’ll need 2000-grit and 3000-grit wet/dry sandpaper, fine rubbing compound, and polishing compound in cutting, refining, and finishing grades. Essential tools include a variable-speed drill or dual-action polisher with compatible backing pads, sanding blocks, and microfiber towels. Protect surrounding surfaces with automotive masking tape and painter’s plastic sheeting. Wear nitrile gloves, safety glasses, and a respirator when working with solvents or aerosol sealants. Prepare a spray bottle with distilled water for wet sanding lubrication. Adding a few drops of soap to the water provides additional lubrication during the sanding process. Finally, select a UV-blocking clear coat, headlight sealant, or ceramic polymer coating to protect your work. Professional restoration techniques demand proper preparation—investing in quality supplies guarantees superior outcomes and extended headlight clarity.

KIT INCLUDES: 1 - Disc Pad Holder, 3.25 in (8,2 cm) 6 - 3M Gold Sanding Discs 500 Grit, 3 in (7,6 cm) each 4 - 3M White Finishing Discs 800 Grit, 3 in (7,6 cm) each 1 - 3M Trizact Refining Disc 3000 Grit, 3 in (7,6 cm) 2 - 3M Quick Headlight Clear Co

KIT INCLUDES: 1 - 3M Trizact Refining Disc 1000 grit, 3 in/7.6 cm 1 - 3M Trizact Refining Disc 3000 grit, 3 in/7.6 cm 2 - 3M Quick Headlight Clear Coat Wipes 1 - Foam Pad with 3M Hookit Attachment, 3 in/7.6 cm 1- Disposable Glove

Instructions for Use: The first yellow drill attachment installed on the drill, cushion pad white surface and drill attachment black surface paste, use the first in the lamps on the spray water and then use the cleaning pad to dry in a circle, and then according to the grain size from small to large in order to use the waterproof abrasive disc on the lamps for polishing, and finally use the sponge polishing pad for polishing
Preparing the Work Area and Headlights
Proper surface preparation determines restoration success and coating longevity, requiring systematic cleaning protocols before abrasive work begins. Your work area setup demands thorough protection—apply painter’s tape around headlight perimeters and cover adjacent panels to prevent accidental damage during restoration. Begin headlight inspection by examining oxidation severity in daylight conditions, noting uniform dullness or haze patterns that indicate required treatment depth. Remove surface contaminants using water and microfiber towels, followed by isopropyl alcohol application to eliminate residual compounds. Dry lenses completely before proceeding. Prepare lubrication solutions by mixing dishwashing liquid with distilled water in spray bottles for wet sanding protocols. Organize your sandpaper progression from 1,000 grit wet dry sandpaper through finer grades to ensure systematic oxidation removal. This systematic approach guarantees ideal surface conditions for subsequent abrasive stages while maintaining protective barriers throughout the restoration process. After completing the abrasive restoration work, applying a UV headlight sealant will help maintain clarity and prevent future yellowing or hazing. For optimal results after restoration, consider upgrading to premium headlight bulbs that provide enhanced brightness and whiter light for improved nighttime visibility.
Chemical Cleaning Techniques for Light Oxidation
When oxidation affects only the outer protective layer, chemical cleaning methods offer effective restoration without aggressive mechanical abrasion. You’ll find baking soda combined with vinegar mixture creates a fizzing reaction that dissolves surface oxidation on foggy lenses. Apply this solution directly, allowing the chemical interaction to break down mineral deposits and contaminants. For enhanced cutting action, you can blend abrasive toothpaste with baking soda to form a mild polishing compound that removes light yellowing effectively. Commercial compounds like 3M rubbing formulations provide stronger oxidation removal when household solutions prove insufficient. After applying your chosen chemical cleaner, scrub with a soft cloth using circular motions. Clean residue thoroughly with rubbing alcohol before applying protective coatings. For more stubborn oxidation, wet sanding with progressively finer grits can be combined with chemical methods for optimal results. Unlike temporary fixes that allow fast re-oxidation, applying a UV-resistant clear coat after chemical cleaning helps maintain your headlight restoration long-term. These techniques work best on headlights showing minimal UV damage. Always keep the surface wet during application to prevent dry spots and ensure even coverage of the cleaning compound.

KIT CONTENTS - Each headlight restoration kit includes (8) Step 1 Oxidation Removing Wipes, (1) Step 2 Sanding Kit, and (2) Step 3 Ceramic Coating Wipes.

HEADLIGHT RESTORATION AND PROTECTION (GAP11516) – All-in-one formula cleans, restores, and protects plastic headlights, removing yellowing, oxidation, and haze for improved clarity and visibility

Headlight Restoration Kit (GAP401) Restores cloudy, yellowed headlights and plastic lenses by removing oxidation, haze, and discoloration for a clear, like-new appearance.
Wet Sanding to Remove Heavy Oxidation
Heavy oxidation penetrates beyond the headlight’s protective clear coat into the polycarbonate substrate, requiring mechanical abrasive techniques to restore optical clarity. Wet sanding systematically removes degraded material through progressive grit refinement.
Begin with 400-800 grit sandpaper for heavy oxidation, maintaining constant water lubrication to prevent thermal damage and extend abrasive lifespan. Apply consistent, unidirectional pressure while keeping the surface saturated. Progress sequentially through 1000, 2000, 2500, and 3000 grits, allocating 10-15 minutes per stage.
Each grit level produces characteristic haze indicating proper material removal. Inspect surfaces frequently for uniformity across all contours and edges. Post-sanding haziness confirms successful oxidation extraction but eliminates factory UV protection. A flexible hand sanding backing pad helps maintain even pressure distribution across the headlight’s curved surface. To prevent rapid re-oxidation of the exposed polycarbonate, seal the lens with a protective coating immediately after sanding. Different UV sealant options vary in durability and long-term protection effectiveness, so selecting the appropriate coating for your climate is essential. Immediate application of ceramic coating prevents accelerated re-oxidation due to polycarbonate’s inherent porosity.

Full-Cycle Sanding Support - The car drill polishing kit featuring 3 inch sanding discs range 60/80/120/240/400/800/1000/1500/2000/3000/5000/10000 grit sandpaper for dry and wet use, with orbital sander pads, imitation wool buffing pad, and upgraded backing pads for 1/4 and 1/8 inch shank. Seamlessly transition from sanding to polishing.

Sanding Discs Drill Polishing Kit: This complete set comes with 120PCS 3-inch sandpapers in 12 grits from 60 to 10000, supporting wet sanding for rough grinding to mirror polishing. Equipped with 25pcs sanding sleeves ,2pcs sanding drum,backing plates, sanding pads and wool-like polishing pads, it seamlessly connects grinding and polishing for all-around surface refinishing

Complete 137PCS Sanding Kit: This all-in-one sanding and polishing kit includes 120pcs 3-inch sandpapers (60–10000 grit), 1 handheld sanding pad, 3 buffer pads, 2 wool pads, 5 sponge pads, 2 backing plates (inner & outer thread), and multiple adapter rods (6.35mm, 5.8mm, 3mm). Ideal for both professionals and DIY users who need precision from coarse sanding to fine polishing.
Polishing for Crystal Clear Results
After wet sanding removes oxidized material, polishing restores optical transparency through progressive compound refinement. You’ll need specialized polishing products: V34 compound for oxidation removal, V36 cutting polish for medium scratches, and V38 final polish for maximum clarity. Apply compounds with orange hex-logic cutting pads on rotary polishers, spreading product across the entire headlight before activation. Start slowly using swirling motions, then shift to horizontal movements for uniform coverage. Switch to white hex-logic pads with V36, working until abrasives break down completely. Proper polishing techniques require wool buffing pads for final residue removal and foam pads to eliminate holograms. NSP 150 medium-cut polish maximizes gloss between stages. Multiple progressive coats guarantee crystal-clear surfaces that restore factory-level optical performance. For best results, consider how professional restoration services compare to DIY polishing methods. After polishing is complete, applying a protective clear coat prevents the headlights from yellowing again in the future. Maintaining consistent lubrication throughout the polishing process prevents heat buildup and ensures optimal compound activation.

【Function】These Buffing Polishing Compounds Kit great for achieve a smooth and mirror finish on a widely variety items surfaces, help you handle most kinds of projects.

Brand: Tamiya

【Package Contents】Include 25 x 3-inch foam polish pads, 2 x drill adapter, 2 x suction cup.
Applying UV Protection and Sealant
Once polishing restores optical clarity, you must apply UV-protective coatings immediately to prevent renewed oxidation of the exposed polycarbonate substrate. Select from dedicated headlight clear coats, ceramic/polymer formulations, or proprietary aerosol systems—each offering distinct durability profiles. Headlight-specific sprays typically provide 6–12 months of protection, while SiO₂-based ceramic coatings extend longevity through superior UV absorption and hydrophobic properties.
Application techniques demand meticulous surface preparation: thoroughly clean the lens, apply surface activator if specified, then deposit thin, uniform coats using manufacturer-prescribed methods (spray, wipe, or brush). Observe cure times in controlled environments free from dust and moisture. Avoid aggressive washing during the initial cure period. Professional-grade products featuring adaptive abrasive technology can streamline the restoration process by cutting through oxidation layers in a single step before sealant application. Understanding the science behind headlight degradation caused by UV exposure and oxidation helps vehicle owners recognize why immediate protective coating application is essential. UV damage from environmental factors like sun exposure and road salt accelerates the need for protective coatings to maintain long-term headlight clarity. Reapplication intervals depend on UV index, mechanical abrasion from road debris, and coating chemistry—ranging from quarterly touch-ups for wax sealants to annual renewals for advanced ceramic formulations.

HEADLIGHT RESTORE MADE EASY: Professional-grade 2K clear coat spray with a build in adhesion promoter to restore clarity to yellowed, foggy, or scratched headlights for improved visibility and appearance.

UV Headlight Coating Kit: The Sylvania UV Block Clear Coat Kit is a premium headlight clear coat designed to protect and restore dull or cloudy lenses to like-new condition

Wipe-on fluid is excellent for lightly yellowed or recently restored lenses
Maintaining Your Restored Headlights
Even the most robust UV-protective coatings degrade under continuous environmental assault, making systematic post-restoration maintenance the determining factor in headlight longevity. Implement a cleaning schedule of every 1–2 months using pH-neutral car shampoo and microfiber cloths to remove surface grime that accelerates oxidation. Protective measures include shade parking to minimize UV exposure, avoiding automatic brush washes that micro-abrade clearcoats, and promptly removing road salt, tar, and bird droppings. Consider applying protective clear coat or wax periodically to create an additional barrier against oxidation. Conduct monthly visual inspections for yellowing, crazing, or seal failure, and perform photometric checks to verify beam performance. Execute light polishing with non-abrasive compounds every 6–12 months to refresh clarity. Professional-grade restoration kits containing polishing compounds and UV sealants offer enhanced protection compared to standard maintenance approaches. Since oxidized headlights can reduce visibility by up to 50%, regularly assess your headlights’ clarity to ensure optimal nighttime driving safety. Document all maintenance activities and observed conditions to establish deterioration trends. This regular maintenance protocol extends restoration intervals and sustains ideal light output.
Troubleshooting Common Restoration Issues
While proper restoration techniques yield crystalline clarity, implementation errors frequently compromise results and necessitate corrective intervention. Abrasive damage from harsh chemicals or incorrect grits creates irreversible hazing requiring complete re-sanding with progressive 600-1500-3000 grit sequences. Inadequate cleaning leaves residue that causes patchy finishes; you’ll need thorough degreasing with isopropyl alcohol before restarting. Improper sanding without lubrication generates deep scratches demanding backtracking to coarser grits with proper wet-sanding techniques. Polishing errors from insufficient compound breakdown leave residual cloudiness; address this by extending buffing time with hex-logic pads and fresh compound. Sealant failures permit rapid re-oxidation within weeks—immediately apply UV-resistant protective coating to prevent recurring degradation. Persistent cloudiness despite multiple cleaning attempts indicates the need for professional examination, as technicians can identify underlying damage that home restoration cannot address. Each defect requires specific remediation protocols rather than superficial correction attempts. Consider using products with UV block clear coat technology to provide long-lasting protection against future oxidation and degradation.