To replace your D3S HID bulb, you’ll first disconnect the negative battery terminal and wait for the ballast capacitors to discharge. Wear nitrile gloves to prevent oil contamination on the bulb’s glass surface. Access the headlight assembly by removing the dust cap counterclockwise, then press the locking tab to disconnect the HID connector. Carefully extract the old bulb using its retaining mechanism, align the new D3S bulb’s pins correctly, and secure it in place. Test for steady illumination before reassembly, and consider the vehicle-specific access requirements that can streamline your entire process.
Understanding D3S Bulbs and Compatibility
When replacing your vehicle’s headlights, identifying the correct bulb type prevents compatibility issues and guarantees excellent performance. D3S types feature a PK32d-5 base configuration measuring 9mm in diameter and 83.2mm in length, designed exclusively for factory HID-equipped vehicles like Audi A6, Dodge Durango Citadel, and Chevy Equinox HID trims. You can’t interchange D3S bulbs with halogen assemblies requiring 9005, 9012, or H7 bulbs—the technologies differ fundamentally. HID technology requires electronic control gear and ECE D3S category approval, operating at 42V nominal voltage with 35W standard power output. Verify your vehicle’s original equipment through OEM part numbers like OSRAM 66340 or Philips 42302 before purchasing. These bulbs deliver 3200 lumens at 4300K color temperature, providing plug-and-play installation for direct OEM replacement. The XB HID bulbs maintain up to 83% intensity even after extended use, ensuring long-lasting performance throughout their lifespan.
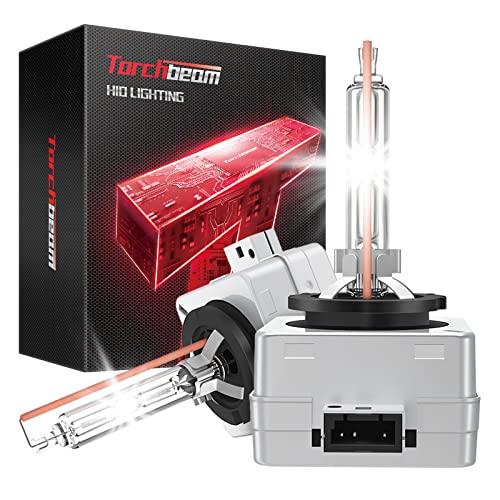
Safer Night Driving: Torchbeam d3s bulbs made with German xenon gas. Replacement OEM Part Number: 42302C1, 42302(WX/XV), 42403(C1), 66340, 66340CBH, 66340CBI, ect.

XENARC D3S ORIGINAL 66340 lamps impress with a wide product range and the reliable OEM quality. Successfully used in millions of new automobiles from renowned manufacturers, whether as standard initial equipment or original spare parts.

XENARC D3S Original 66340HBI lamps impress with a wide product range and the reliable OEM quality. Successfully used in millions of new automobiles from renowned manufacturers, whether as standard initial equipment or original spare parts.
Gathering Your Tools and Materials
Proper tool selection streamlines the D3S bulb replacement process and prevents damage to delicate components. You’ll need replacement D3S bulbs—verify they’re not D1S or D2S bulb types—with matching OEM wattage and voltage. Purchase pairs for uniform output. LED alternatives with internal drivers offer 6500K color at 8,000 lumens per set.
Essential handling techniques require cotton or nitrile gloves to prevent oil transfer onto quartz glass, which causes premature failure. Gather plastic pry tools and T25/T30 Torx bits for headlight fasteners. Include 10mm sockets with ratchet extensions for tight spaces. Stock dielectric grease for connector protection and isopropyl alcohol wipes for cleaning bases. Add anti-seize compound for exposed threads and compressed air for dust removal. HID technology provides superior illumination compared to traditional halogen bulbs, making proper installation critical for optimal performance. Before beginning work, disconnect the battery to prevent electrical shorts during the replacement procedure. These materials guarantee safe, efficient installation.
Replace Only HID Bulbs: Fit for stock D3S HID Xenon bulbs only, NOT ADAPT if your auto has stock Halogen/LED lights

Crystal Clear 6500K Daylight White: Experience exceptional visibility with 6500K pure white light that eliminates yellow glare. These D3S bulbs utilize precision optics for consistent beam patterns without dark spots, ensuring safer driving and reduced eye fatigue in rain, fog, or night conditions

【Complete Kit】Includes HID Ballast Control Module, Igniter, and D3S Bulb. Provides a full solution for replacing faulty or dimming xenon headlight systems, ensuring a perfect match and immediate functionality.
Essential Safety Precautions Before Starting
Before you begin the D3S bulb replacement process, you must address critical safety hazards inherent to high-intensity discharge lighting systems. Electrical safety starts with turning off the ignition, removing keys, and disconnecting the negative battery terminal. Wait several minutes for HID ballast capacitors to discharge, as these components generate high voltages that pose shock risks.
Personal protective equipment is non-negotiable. Wear safety glasses to guard against bulb shatter and nitrile gloves to prevent skin oils from contaminating the glass envelope while protecting your hands. Use insulated tools near wiring to prevent short circuits. Always ensure the vehicle is safely parked on level ground before beginning any work.
Allow the headlight assembly to cool completely before touching—HID bulbs retain significant heat. Never touch the bulb’s glass surface; handle only the base to avoid hot spots that cause premature failure. Applying a UV sealant after replacement can protect your headlights from future oxidation and yellowing. Clear workspace around the headlight assembly for better access to all components.
Accessing the Headlight Assembly
Accessing the D3S bulb requires different approaches depending on your vehicle’s design, ranging from simple engine bay access to complete headlight assembly removal. For standard headlight access, open your hood and locate the cap covers behind the assemblies. Remove these to expose the OEM bulb and retainer. Before proceeding with removal, verify all compatibility between your stock bulb and the new HID bulb to avoid installation issues. When selecting a replacement, consider the color temperature and brightness output that best suits your visibility needs. For optimal results, it is recommended to change bulbs in pairs to ensure balanced lighting across both headlights. On Jeeps, you’ll need to remove the ECU by pushing the clip while pulling up, then perform a quarter-turn counterclockwise on the retainer ring. Ford Mustangs require wheel well access—jack up the vehicle, remove the tire and liner, then push the clip sideways to extract the entire headlight unit. Audi A6 and Lincoln Navigator models demand full assembly removal using multiple screws and Torx fasteners for complete bulb access.
Removing the Old D3S Bulb
Once you’ve gained access to the headlight assembly, removing the old D3S bulb requires careful attention to both electrical safety and component handling. First, disconnect the battery’s negative terminal and allow the assembly to cool for 10–30 minutes. Locate and rotate the dust cap counterclockwise or unclip it, then press the locking tab on the HID connector before pulling straight out—never tug on wires. Identify your retaining mechanism types: quarter-turn bayonet fittings require counterclockwise rotation, while spring clips need careful unhooking. Support the bulb with one hand during extraction to prevent drops. Master these bulb extraction techniques by rotating or releasing the retainer, then pulling the bulb straight out along its axis. Take care to avoid touching the bulb glass directly, as contamination from skin oils can reduce bulb lifespan and performance. Inspect the socket for contamination before proceeding.
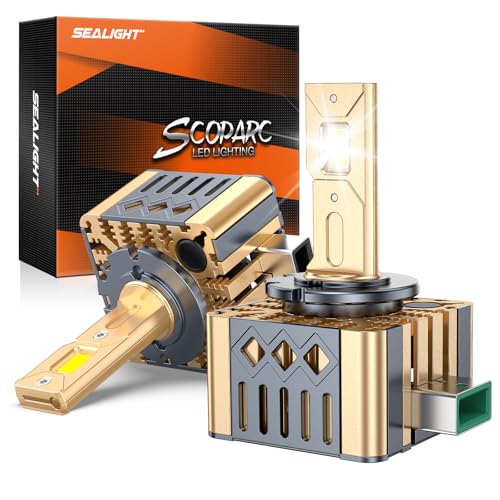
High-Output Lighting: Equipped with 30 high-performance chips, SEALIGHT D3S bulbs produce bright 6000K cool white illumination with a wide and uniform range. Designed to provide clear road visibility in various driving conditions, including nighttime, rain, and fog.

Safer Night Driving: Termitor d3s bulbs made with German xenon gas. Replacement OEM Part Number: 42302C1, 42302(WX/XV), 42403(C1), 66340, 66340CBH, 66340CBI, ect.

【IMPORTANT】Replacement for factory D3S HID Bulb only, NOT fit if your car stock Halogen headlight bulb even system say "fits".
Installing Your New D3S Bulb
With the old bulb removed and the socket inspected, you’re ready to install the replacement D3S bulb. Wear gloves throughout—touching the glass reduces bulb longevity considerably. Examine the pin configuration: one pin alone, a gap, then two pins together. Match these precisely to the adapter slots numbered 1, 2, and 4. Clean any contamination with rubbing alcohol and a dry cloth before proceeding.
For installation tips, connect the D3S bulb directly to the ballast first. If using a warning canceller, attach the D3S plug to the canceller, then to the ballast. Insert the bulb into the headlight assembly and rotate or twist until it locks. Secure with the original retainer clip. Incorrect pin alignment causes flickering or failure, so verify connections before final assembly. Remove the plastic cover from the new bulb before beginning the installation process. Proper beam pattern quality ensures your headlights meet road safety compliance standards and provide optimal nighttime visibility.

【Important】Replacement for stock D3S HID bulbs only, NOT fit if your car stock Halogen/LED assembly, even system says "fit". If you are not sure which bulb size your vehicle requires, PLEASE check if your stock bulbs are HID, or contact us for help
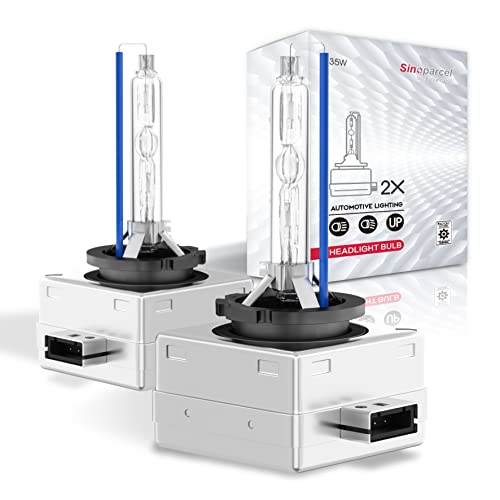
Life time support,2pcs packaged; Replacement part number: 66340 42403 42302 (If there is any problem in the product,please contact us via Account Center,we will reply you within 24 hours)

OEM Quality: Genuine Philips D3S XenStart HID xenon bulb designed to meet original equipment manufacturer specifications for optimal performance
Testing and Troubleshooting
After installing your new D3S bulb, verify proper operation before reassembling the headlight housing. Turn on your headlights and check for stable illumination without flickering or color shifts. If issues persist, begin bulb testing by swapping the new bulb to the opposite side—normal operation confirms the original ballast or wiring caused the problem. For ballast inspection, disconnect and swap ballasts between headlights. If the previously malfunctioning side works, you’ve identified a faulty ballast. Examine all connectors for burn marks, corrosion, or loose clips. Measure voltage at the headlight plug, expecting around 12 volts. Watch for pink or blue tints indicating imminent failure, and ascertain the bulb lights continuously beyond the initial 1-2 second ignition phase. A buzzing or humming noise near the headlight assembly during operation can signal a failing ballast that requires replacement. Testing the ballast with a multimeter before replacement can confirm the fault and prevent unnecessary parts replacement. If you determine that connector or wiring damage is the issue, professional connector repairs typically range from $100 to $300, though DIY solutions with basic tools can cost under $50 for parts alone.
Reassembling the Headlight Housing
Following successful testing of your new D3S bulb, you can now begin reassembling the headlight housing to restore your vehicle to operational status. Start by securing the dust cover over the bulb and housing, guaranteeing it’s seated properly. Reconnect the wiring harness, verifying the plug orientation matches the one-way fit design. For HID configurations, connect bulb pins to adapter slots 1, 2, and 4 correctly.
Push the headlight slowly back into position, maintaining proper headlight alignment with mounting brackets. Confirm the clip holds components before sliding the housing forward. Tighten all four screws evenly to achieve housing stability. Reinstall plastic clips into their designated slots, then press the retaining ring firmly until it snaps securely. Reinstall the ballast in its original location to maintain the integrity of the headlight system. Before closing all access panels, perform a final operational check to verify both low-beam and high-beam functionality and ensure there is no condensation inside the housing that could affect visibility.
Vehicle-Specific Tips for Audi A6 Owners
The Audi A6 presents unique accessibility challenges that require distinct approaches for each headlight assembly. On the passenger side, you’ll need to turn your wheels to access the wheel arch panel, which requires removing two screws—one accessible from above and another requiring an angled ratchet from inside. The driver’s side simplifies D3S maintenance by removing the air filter box cover clips and two screws, providing clear headlight access without wheel arch obstruction. Audi A6 features like adaptive headlights greatly complicate right-side access. Always replace both D3S bulbs simultaneously to maintain consistent light output. Remember that main beams use separate H7 halogen bulbs with different access points. Using proper tools like screwdrivers and clip removers ensures safe access without damaging surrounding components. The ceramic base on OEM D3S bulbs guarantees proper heat resistance for long-term reliability. Before starting any bulb replacement work, ensure the car and lights are turned off to prevent electrical issues and allow components to cool safely.

Compatible with A3 /A3 Quattro 2009-2011&2015-2016, A4 / A4 Quattro 2009-2016, A5 / A5 Quattro 2010-2017, A6 / A6 Quattro 2009-2015, A7 Quattro 2012-2015, A8 Quattro 2011-2014, allroad 2013-2016, Q7 2010-2015, Q5 2009-2017, RS5 2013-2015, S4 2009-2016, S5 2008-2017, S6 2013-2015, S7 2013-2015, S8 2013-2014.

1.5X brightness up new d3s bulbs upgrade for audi a3 s3 a4 s4 a5 s5 rs5 a6 s6 a7 s7 a8 allroad quattro hid projector headlights bi-xenon high/low dual beam(note: not fit any halogen bulbs like 55w h7, never for reflector headlamp models)

【Important Notes】The packaging includes the replacement of D3S HID headlight bulb for Audi 2014 2015 2016 2017 SQ5 2009-2017 A5 Q5 RS5 S5 Quattro Sedan Coupe 2009-2016 A3 S3 A4 S4 Quattro 2010-2015 Q7 2009-2015 A6 A7 Quattro 2011-2015 A8 Quattro. Please note that the same model may use xenon or halogen versions. If your Audi SQ5 A3 S3 A4 S4 A6 A7 A8 A5 Q5 Q7 RS5 S5 Quattro Sedan Coupe headlight bulbs are halogen bulbs, it is not suitable for replacement. Before placing an order, please confirm if the model year is applicable
Vehicle-Specific Tips for Jeep Owners
While Audi A6 models demand wheel arch manipulation and adaptive headlight navigation, Jeep Grand Cherokee owners face their own distinct challenges when replacing D3S bulbs. For 2014-2018 models, you’ll need complete Jeep airbox removal to access the headlights. The passenger side requires approximately 10 minutes, while the driver side proves surprisingly easier despite tight working angles.
Begin by detaching the intake tube’s clip, hose, and band clamp. Lift the engine cover by releasing side clips, then detach grommets securing the airbox base. Watch the vent line carefully during removal to prevent damage. Once you’ve accessed the Jeep bulb location, work the housing clips methodically—one down, one up—due to restricted space. Quarter-turn the D3S bulb counterclockwise, disconnect the harness, and reverse these steps with your replacement bulb. Using a flathead screwdriver or clip remover tool can help you safely manipulate the retaining clips without causing damage to surrounding components. After completing the replacement, you may want to apply UV protectant to the headlight lens to maintain clarity and prevent future cloudiness.
For optimal efficiency, consider replacing both bulbs simultaneously even if only one has failed, as HID bulbs often have similar lifespans and may fail close together.