

To replace a headlight bulb on your 2011 Silverado, you’ll access the driver’s side through the gap beside the wiper fluid reservoir, turning the bulb housing counterclockwise to release it. For the passenger side, you’ll need to remove the air filter box assembly first. Use rubber gloves to handle the new H11 (low beam) or 9005 (high beam) bulb, avoiding contact with the glass surface. Apply dielectric grease to prevent corrosion, then test both high and low beams. Our extensive guide below covers each step in detail.
Tools and Materials Required
Before beginning the headlight bulb replacement on your 2011 Silverado, gather the essential tools to guarantee efficient completion of this repair. You’ll need a 10mm socket with ratchet and extender for accessing bolts, plus a 7mm tool for pop rivets. A Phillips screwdriver removes radiator support cover rivets, while a flat head screwdriver pries clips and tabs. Include needle nose pliers for precise gripping and trim removal tools for extracting rivets without damage. For bulb handling, use rubber gloves to prevent skin oils from contaminating the new bulb’s glass surface, as touching the glass can lead to premature bulb burnout. Keep paper towels and clean cloths nearby for surface preparation. Additionally, wear protective eyewear for safety during the entire replacement process. Consult your vehicle’s manual to identify the specific bulb type required for your model year’s low beams. Following proper safety precautions throughout the process is critical. After completion, confirm proper bulb disposal according to local regulations.

Fit for 99% of vehicles - SYJIIP Halogen headlamp are close to the wattage of the original halogen headlamp bulb, which can reduce the occurrence of CANBUS problems, avoid erroneous and flickering. As long as your original light bulb model is the same as ours, then SYJIIP's light bulb will be suitable for your car.

[Original 1:1 size perfectly Fit For Chevy Silverado]:This halogen bulb combination is suitable for all Silverado 1500 2500 3500 2007-2015 models. It includes :2*9005 high beams and 2*H11 low beams, totaling 4 bulbs, ensuring perfect coordination and easy installation.Before purchasing, please check the Camry model

【600% Ultra-High Brightness】Equipped with high-performance CSP chips, Laxmas 9005 H11 led headlight bulb combo deliver 96,000 lumens of brightness, 600% higher than traditional bulbs. The 6500K cool white light has strong penetration, wider irradiation range and longer projection distance, clearly showing road details. It greatly improves driving visibility at night, in rain and fog, reduces visual blind spots, helps predict road conditions in advance, and brings clearer vision and safer driving experience.
Identifying the Correct Bulb Type
With your tools assembled, confirm the exact bulb specifications for your 2011 Silverado before proceeding with removal. Your low beams require H11 bulbs (12.8V, 55W), while high beams use 9005 bulbs (12.8V, 65W). These specifications remain consistent across all 1500 and 2500 trims for 2011.
Verify compatibility by checking your owner’s manual or inspecting the existing bulb’s base type—P20d or PGJ19-2 for H11, standard socket for 9005. Note that bulb brightness ranges from 1250-1345 lumens for halogens, while LED upgrades offer 6000K color temperatures with enhanced visibility. Understanding base types and socket compatibility ensures the replacement bulb will physically fit your headlight housing without forcing or damaging components.
Consider bulb longevity when selecting replacements. Standard halogens provide reliable performance, but premium options like SilverStar variants or LED conversions offer extended service life. LED packages often include 5-year warranties, ensuring long-term durability and reduced replacement frequency. When upgrading to LED technology, proper beam pattern alignment prevents visibility issues and ensures compliance with road safety standards. Ensure your replacement bulbs are SAE/DOT Compliant to meet federal safety standards and legal requirements.

【Visual Enhancement】: The OKOENIEO H11 headlight bulb are 200% brighter than other halogen bulbs, providing drivers with a wider and farther field of vision. Offering a greater visibility, they allow drivers to spot deer, wildlife, falling rocks, or obstacles ahead of time, ensuring safer nighttime driving.

【160,000LM High-Output Illumination】 Equipped with upgraded CSP chips, the SEALIGHT S2S 9005/HB3 and H11/H8/H9/H16 bulbs generate 160,000LM of focused light with a 6500K cool white output, extending your driving visibility up to 1800FT for clearer nighttime road awareness.

Easy Installation: 1:1 design, no external driver or connector required, plug and play
Replacing the Driver Side Headlight Bulb
Locate the driver side headlight assembly by opening the hood and positioning yourself on the driver side of the engine bay. Reach behind the wiper fluid dispenser through the gap beside the reservoir to access the bulb housing. For diesel models, you’ll need to remove the battery first. Turn the housing 1/2 turn counterclockwise to release it. Pop off the two retaining tabs to disconnect the wiring. Common mistakes include touching the new bulb’s glass with bare hands—always wear rubber gloves to prevent oil contamination. Line up the tabs with housing slots, insert the bulb at the correct angle, and turn 1/4 to 1/2 turn clockwise until it clicks. Before completing the installation, apply dielectric grease to the bulb contacts to prevent oxidation and corrosion. Consider choosing between halogen, HID, and LED options based on your preferences for brightness and longevity. After replacing the bulb, test the high and low beam functionality to ensure proper operation. Maintenance tips: inspect the socket for corrosion and replace both bulbs simultaneously for even illumination.

**OEM-Quality Assurance**: 𝐎𝐄𝐌# 22853027, 22853028. 𝐏𝐚𝐫𝐭 𝐋𝐢𝐧𝐤 𝐍𝐮𝐦𝐛𝐞𝐫# GM2502280, GM2503280. Compatible with 𝟐𝟎𝟎𝟕-𝟐𝟎𝟏𝟑 𝐂𝐡𝐞𝐯𝐲 𝐒𝐢𝐥𝐯𝐞𝐫𝐚𝐝𝐨 𝟏𝟓𝟎𝟎 𝐋𝐒 ; 𝟐𝟎𝟎𝟕-𝟐𝟎𝟏𝟑 𝐂𝐡𝐞𝐯𝐲 𝐒𝐢𝐥𝐯𝐞𝐫𝐚𝐝𝐨 𝟏𝟓𝟎𝟎 𝟐𝟓𝟎𝟎 𝐇𝐃 𝟑𝟓𝟎𝟎 𝐇𝐃 (𝐬𝐮𝐛𝐦𝐨𝐝𝐞𝐥: 𝐋𝐓, 𝐋𝐓𝐙, 𝐖𝐓); 𝟐𝟎𝟏𝟒 𝐂𝐡𝐞𝐯𝐲 𝐒𝐢𝐥𝐯𝐞𝐫𝐚𝐝𝐨 𝟐𝟓𝟎𝟎 𝐇𝐃 𝟑𝟓𝟎𝟎 𝐇𝐃 (𝐬𝐮𝐛𝐦𝐨𝐝𝐞𝐥: 𝐋𝐓, 𝐋𝐓𝐙, 𝐖𝐓); 𝟐𝟎𝟎𝟗-𝟐𝟎𝟏𝟑 𝐂𝐡𝐞𝐯𝐲 𝐒𝐢𝐥𝐯𝐞𝐫𝐚𝐝𝐨 𝟏𝟓𝟎𝟎 𝐇𝐲𝐛𝐫𝐢𝐝; 𝟐𝟎𝟏𝟎-𝟐𝟎𝟏𝟑 𝐂𝐡𝐞𝐯? 𝐒𝐢𝐥𝐯𝐞𝐫𝐚𝐝𝐨 𝟏𝟓𝟎𝟎 𝐗𝐅𝐄. **𝐍𝐎𝐓 𝐅𝐢𝐭 𝟐𝟎𝟎𝟕 (𝐎𝐥𝐝 𝐁𝐨𝐝𝐲) 𝐂𝐥𝐚𝐬𝐬𝐢𝐜 𝐌𝐨𝐝𝐞𝐥𝐬** Kindly note, only high beam & low beam included.

OEM-Quality Assurance: OEM: 22853027, 22853028. Part Link Number: GM2502280, GM2503280. Compatible with 2007-2013 Chevy Silverado 1500 LS; 2007-2013 Chevy Silverado 1500 2500 HD 3500 HD (submodel: LT, LTZ, WT); 2014 Chevy Silverado 2500 HD 3500 HD (submodel: LT, LTZ, WT); 2009-2013 Chevy Silverado 1500 Hybrid; 2010-2013 Chevy Silverado 1500 XFE. NOT Fit 2007 (Old Body) Classic Models. Kindly note, only high beam & low beam included.

COMPATIBILITY - The headlights assemblies are compatible with 2007 2008 2009 2010 2011 2012 2013 2014 Chevy Silverado. Bulbs are not included. OEM part number/OEM number - 22853027 22853028 GM2502280 GM2503280
Replacing the Passenger Side Headlight Bulb
Accessing the passenger side headlight bulb requires removing the air filter box, a critical preliminary step that differentiates this procedure from the driver side replacement. Unplug the mass air flow sensor, loosen the intake tube hose clamp, and remove the four corner bolts securing the box. Pop the bottom clips and extract the assembly completely. Reach behind to locate the bulb housing, rotate it counterclockwise, and pull it free. Press the retaining tab to disconnect the electrical connector, then slide out the old H11 bulb. Install the new bulb using rubber gloves to prevent oil contamination that reduces bulb lifespan. Apply dielectric grease on the bulb base to ensure better electrical contact and improved performance. Reconnect the connector, position the bulb at the correct angle for proper headlight alignment****, and rotate clockwise to lock. Reinstall the air filter box, reconnecting all components. Ensure proper sealing of the air box to prevent dirt and debris from entering the intake system.

Marsauto H11 Fog Light Bulbs

[140,000LM Super Bright Output] Termitor H11+9005 combo bulbs deliver a powerful 140,000LM output with crisp 6500K white light, dramatically improving contrast on roads and trails. Whether navigating fog, rain, or darkness, you get a clear, wide field of view for safer driving. Pack of 4 covers both sets in one upgrade.

【NO GLARE PERFECT BEAM PATTERN】Engineered to precisely match the OEM halogen filament position with a sharp cutoff line. These 9005 H11 LED bulbs deliver a focused, ultra-wide illumination range without creating dark spots or blinding oncoming traffic, ensuring compliant road safety for daily night driving.
Removing and Replacing the Headlight Assembly
Complete headlight assembly replacement becomes necessary when housing develops cracks, moisture intrusion occurs, or mounting tabs break from impact damage. Begin by removing the radiator support cover‘s eight rivets using a Phillips screwdriver. Detach the grille assembly by unscrewing four 10mm bolts and releasing retaining tabs with needle nose pliers. Access the headlight’s three 10mm mounting bolts—two upper and one lower through the wheel arch using an extension. Remove the assembly with lateral movements while depressing the electrical connector‘s release tab. For installation tips, align plastic studs with slotted holes before reconnecting the power connector. Apply anti-seize compound to bolts in corrosive environments. Before ordering replacement parts, identify your vehicle’s lighting package type to ensure compatibility with your specific headlight assembly. Consider upgrading to LED projector headlights for improved visibility and energy efficiency compared to traditional halogen bulbs. Reinstall components in reverse sequence, ensuring clips engage properly to prevent rattling and maintain proper headlight alignment. Regularly check headlights and indicator lights for functionality to catch potential failures early.

[High quality material] : The headlight connector is made of durable ABS material and stable transmission copper wire material, ABS shell is scratch-resistant, wear-resistant, not easy to break, durable; Copper wire has excellent electrical conductivity and stable transmission. The whole has the characteristics of high efficiency, high temperature resistance, heavy duty and lasting, and can be used for a long time
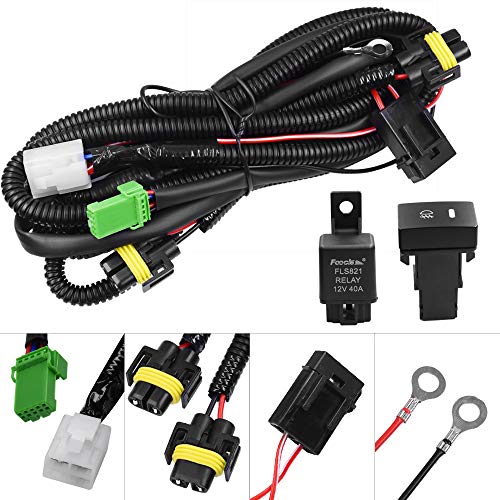
Good For Replacement fog lamps, Add-on fog lights, HID lights, LED daytime running lights, Driving lights, LED work lights, Off-road lighting kit

Fitment - Headlights Compatible with Chevy Silverado 1500 2007-2013/ Compatible with Chevy Silverado 2500 HD 2007-2014/ Compatible with Chevy Silverado 3500 HD 2007-2014/ NOT Fit 2007 (Old Body) Silverado Classic Models
Testing Your New Headlight Bulbs
Before reinstalling the headlight assembly, verify your new bulb’s functionality through systematic pre-installation testing to avoid unnecessary disassembly if the replacement proves defective. Apply 12V directly to bulb terminals using insulated jumper clips for a brief bench test, confirming steady, full-intensity illumination. Never touch halogen glass with bare hands—skin oils create hotspots that drastically reduce bulb lifespan. Wear protective gloves and eyewear during handling. Set your multimeter to continuity mode and probe the bulb base contacts; you’ll hear an audible beep indicating an intact filament. Measure resistance—halogen bulbs typically read low single- to double-digit ohms. If readings show infinite resistance or flickering occurs during the battery test, the bulb’s failed. Ensure the multimeter is functioning properly before conducting any tests to guarantee accurate readings. Consider your bulb’s color temperature and brightness specifications to ensure optimal performance once installed. Proper bulb storage in original packaging prevents premature failure from contamination or physical damage before installation.


