To replace your BMW X3 headlight bulb, you’ll first need to identify the correct type—H7 halogen or D1S/D2S/D3S HID depending on your model year. Park on flat ground, engage the parking brake, and allow the engine to cool completely before disconnecting the battery’s negative terminal. Access varies by generation: you’ll either reach through the engine bay, remove the wheel arch liner, or detach the front bumper cover. Always wear clean gloves to prevent skin oils from contaminating the bulb glass, and consult your owner’s manual for model-specific procedures and safety considerations.
Preparation and Safety Measures
Before replacing your BMW X3 headlight bulb, you must establish a safe working environment. Position your vehicle on flat ground and engage the parking brake firmly. Allow the engine to cool completely, then shut off the ignition and disconnect the negative battery terminal to prevent electrical hazards. HID systems contain high-voltage components that pose electric shock risks.
Workspace organization requires opening the hood and gathering essential tools: Torx screwdriver or T25 socket, flashlight, and optional trim removal tool. On the passenger side, you may need to remove the washer fluid tube for access. When accessing the headlight housing, use a ratchet and Phillips screwdriver to safely remove any screws and covers blocking your path. Consult your owner’s manual or VIN to verify the correct bulb specifications for your specific X3 model year.
Safety precautions include wearing clean gloves and safety glasses throughout the procedure. Never touch halogen bulb glass with bare skin, as oil transfer creates hotspots. Use a microfiber cloth when handling bulbs to maintain their integrity.
Identifying the Correct Bulb Type for Your X3
Selecting the appropriate replacement bulb depends on your BMW X3‘s generation and headlamp configuration. First-generation models (2004-2010) utilize H7 halogen or D2S/D3S HID bulbs for low beams. Second-generation X3s (2011-2017) feature D1S HID systems or H7 halogen variants. Third-generation vehicles (2018-2020) primarily use H7 specifications for both high and low beams. Fourth-generation models (2021+) confirm H7 bulbs across headlight applications.
You’ll need to verify your specific bulb types by cross-referencing vehicle years with your headlamp system. Check whether you have halogen or HID assemblies—HID systems require D1S (P32d base, 35W), D2S, or D3S capsules, while halogen configurations use H7 bulbs. For 2019-2021 X3 models, factory high beam assemblies utilize H21W bulb specifications rather than standard H7 configurations. Most headlight replacements can be completed in approximately 10-15 minutes with basic tools like screwdrivers and socket wrenches. The correct bulb must physically fit the headlight housing and match your vehicle’s electrical requirements to ensure proper operation. Consult your owner’s manual or VIN documentation to confirm exact specifications before purchasing replacements.

Get the best lighting performance and an increased visibility and comfort on the road compared to basic bulbs

800% Brighter Night Vision Powered by advanced chip technology, Marsauto H7 bulbs deliver 8x the brightness of standard halogen bulbs, producing crisp 6500K white light for enhanced visibility and faster reaction time—whether driving at night or in low-light conditions.
Accessing the Headlight Assembly
Accessing the BMW X3’s headlight assembly requires three primary approaches depending on your model year and maintenance objective: removing the front bumper cover for complete assembly extraction, working through the wheel arch liner for partial access, or reaching through the engine bay for simple bulb changes.
For bumper removal, remove upper T30 Torx fasteners from under the hood, detach lower 8mm bolts and wheel-well screws, then release push-pins in the arch liner. Unplug washer hoses and electrical connectors before sliding the bumper back to expose headlight fasteners. Power tools are recommended for efficient bumper removal due to the number of fasteners involved.
Alternatively, remove the wheel and liner using trim tools to access rear mounting bolts without full bumper removal. Critical wiring considerations include depressing connector locking tabs, labeling adaptive headlight harnesses, and inspecting grommets for corrosion before disconnection.

Compatible with BMW 2016-up F48 X1, 2011-2017 F25 X3, 2014-up F26 X4 (does not fit M-Package/performance bumper), 2014-19 F15 X5 (does not fit M-Package/performance bumper), 2015-20 F16 X6 (does not fit M-Package/performance bumper), 2009-2016 E89 Z4

Function: Used for on-car removal and installation transmission mount bushings connecting to the transfer case

【Package & Size】: You will receive 1 car fog lamp harness connector with a size of 1.78 × 1.08 × 0.55 inches, compatible with 12V input voltage, and matching H8, H9, and H11 model LED bulbs, making it a reliable choice for fog light system maintenance or replacement.
Removing the Old Headlight Bulb
Extracting the old headlight bulb begins with proper vehicle preparation to guarantee both safety and efficient workflow. Park on a flat surface, engage the parking brake, and turn off the ignition to eliminate power. Once you’ve accessed the bulb socket through the rear cover, twist it counterclockwise to release from the housing and pull straight out.
For bulb removal techniques, press the release tab or squeeze the latch on the socket. Wiggle the bulb backward from the top, then maneuver it sideways while pulling out. Some bulbs require a 30-degree counterclockwise turn before extraction.
Essential safety precautions include wearing vinyl gloves to prevent finger oils from contaminating the glass surface, particularly on halogen bulbs. Carefully disconnect electrical connectors to avoid damaging wiring harnesses. Before reinstalling, verify that the new bulb works to ensure proper function. Consider upgrading to HID or LED systems for improved lighting performance compared to standard halogen bulbs.
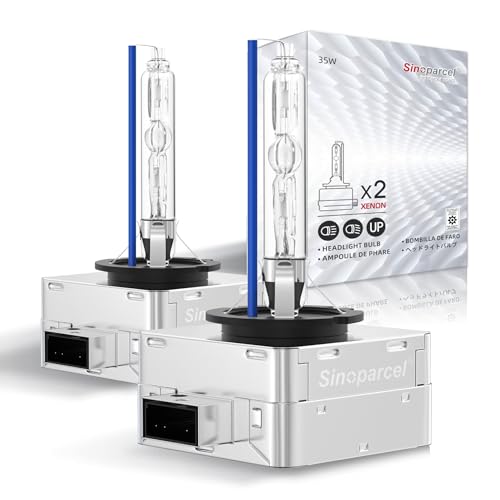
Life time support,2pcs packaged; Replacement part number: 66144 66140 85140 85415 (If there is any problem in the product, please contact us via Account Center,we will reply you within 24 hours)

Super Brightness: This light bulb adopts a 100-watt high-power design, which can provide stronger brightness and lighting effects. It produces a stronger beam than ordinary light bulbs, giving drivers better visibility at night or in adverse weather conditions.

WinPower H7 halogen bulb produces a color temperature of 4300K, up to 110% brighter and 30% longer light distance than other halogen. So you can be confident of getting a bright white light for excellent visibility.
Installing the New Headlight Bulb
Position the new bulb at the socket opening with clean vinyl or nitrile gloves to prevent skin oils from contaminating the glass surface. Verify bulb orientation by aligning the positioning tabs with the socket grooves—the bulb fits only one rotational position correctly. Insert straight into the socket until you feel or hear a seating click, confirming proper seating without forcing. Engage the retaining clip or twist clockwise for twist-lock designs to secure the bulb firmly. Connect the electrical plug until the locking tab clicks audibly, ensuring full engagement. Route wiring away from heat sources and sharp edges, securing with zip-ties. Handle the bulb carefully throughout installation, as improper handling can reduce bulb life significantly. Ensure the rubber seals are properly seated to prevent moisture ingress that could damage the headlight assembly. Compare your new bulb with the old one to verify compatibility before final installation. Briefly test illumination before reinstalling dust covers to verify correct operation and polarity, then reattach all seals completely.
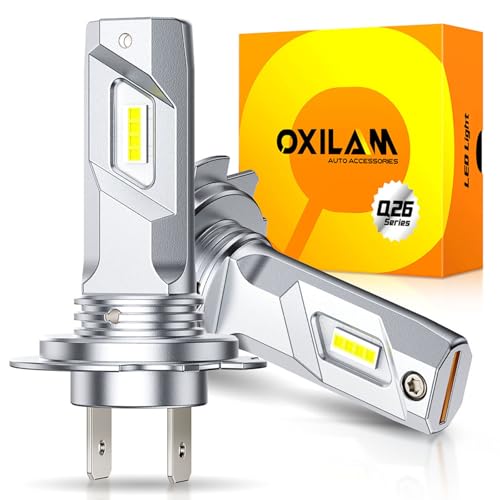
3-Minute Instant Upgrade: OXILAM Q26 H7 LED bulbs feature a 1:1 halogen-sized body, eliminating the need for adapters or polarity adjustments. Install them in just 3 minutes—no modifications, no tools, no hassle!
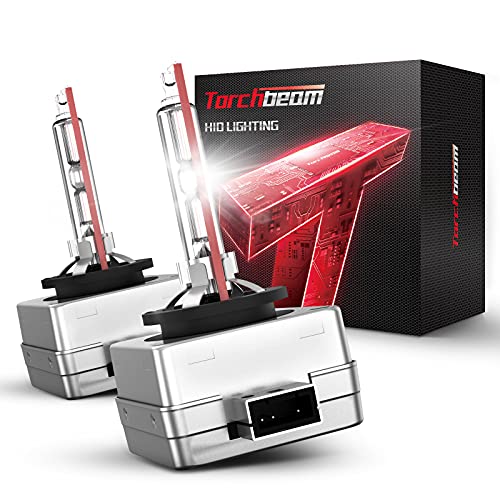
Safer Night Driving: Torchbeam d1s bulbs made with German xenon gas, 300% much brighter than halogen bulbs. Replacement OEM Part Number: 66140, 66140CBI, 66144, 66144CBI, 85415C1, 85415WX, 85415XV, 85410C1, 85410WX, ect.

【IMPORTANT】Replacement for factory D2S HID bulb only, NOT fit if your car stock Halogen headlight bulb even system say "fits".
Testing and Verification
Before reinstalling protective covers or closing the hood, verify your new headlight bulb operates correctly through systematic electrical and visual checks. Turn on your ignition and activate the headlights to confirm proper illumination. Observe the beam pattern for uniform brightness without flickering or dimming. If the bulb fails to illuminate, disconnect it and perform continuity testing using a multimeter set to continuity mode—probe the bulb terminals and listen for a beep confirming circuit integrity. Follow with resistance measurement by switching to ohms; expect readings between 1-3 ohms for functional halogen bulbs. Check the voltage at the connector terminals with lights activated, verifying 11-14 volts DC. For persistent issues, cross-swap bulbs between headlights to isolate component versus wiring faults. To avoid contamination during this process, wear protective gloves when handling bulb components. If your headlights appear cloudy or hazy after replacement, consider restoring headlight clarity through polishing and UV sealant application to maintain optimal light output. Consult your car’s manual for access information and specific testing procedures tailored to your BMW X3 model year.