You’ll need basic hand tools including Phillips screwdrivers, 7mm-22mm sockets, and Torx drivers for your GMC Acadia headlight replacement. First, disconnect the battery and remove the bumper cover on 2007-2012 models, or access through the wheel well on 2013-2016 versions. Disconnect the electrical connector by turning counterclockwise, remove mounting bolts, and extract the assembly. Install the new unit, reconnect wiring, and adjust beam alignment 2 inches down at 25 feet using the adjustment screws. The complete procedure below covers model-specific variations and critical alignment specifications.
Tools and Equipment Needed
A successful headlight replacement starts with gathering the right toolkit before you open the hood. You’ll need basic hand tools including Phillips and flat blade screwdrivers, plus 7mm, 10mm, and 22mm sockets with extensions. Tool organization matters—keep T15 and T20 Torx drivers accessible for mounting hardware and strut area fasteners. Add a trim tool set for bumper separation and an extendable magnet for retrieving dropped components.
Safety precautions necessitate proper vehicle support. Use a floor jack with jack stands and wheel chocks to prevent movement. Wear safety glasses throughout the procedure to protect against debris. A flashlight guarantees visibility in tight spaces, while a torque wrench assures proper reassembly specs. When upgrading to LED bulb options, verify compatibility with your GMC Acadia’s electrical system before installation. Consider adding gloves for handling assemblies and a swivel attachment for accessing the 10mm bolt near the coolant overflow. When selecting replacement parts, choose components with guaranteed to fit specifications to eliminate compatibility issues during installation. Remember to avoid touching the glass on new bulbs to prevent premature failure and ensure optimal headlight performance.

【Vehicle Compatibility】Headlights Assembly Compatible With 2007 2008 2009 2010 2011 2012 GMC Acadia 4 Door Sport Utility Halogen Type. Compatible with models with halogen headlights ONLY. Not compatible with factory HID models. OEM Part Number: 25826765, 25826764, 20912393, 20912394. Parkslink Number: GM2502294, GM2503294, GM2502358, GM2503358.

VEHICLE SPECIFIC HEADLIGHT TINT: Cut specifically for your make, model and year, this vinyl headlight tints are made just for you.
Understanding Year-Specific Requirements
With the right tools organized, you’ll need to identify which Acadia generation sits in your driveway—2007–2012 first-generation models demand different procedures than 2013–2016 mid-cycle refresh units. Model variations determine whether you’ll remove the entire front bumper or access bulbs through enlarged rear service panels. Year comparisons reveal that early models require bumper drop for headlight assembly bolts near the radiator support, while 2013+ units often permit in-place HIR2/9012 bulb swaps through improved dust caps. Higher trims equipped with factory HID or LED packages introduce ballast diagnostics or full-assembly replacement instead of simple bulb changes. Verify your VIN against OE part numbers before ordering replacements—connector tab designs, dust-cap dimensions, and mounting provisions changed across the refresh, affecting both fitment and long-term reliability. The procedure requires removing push clips and Phillips head screws located along the upper and lower sections of the bumper cover.
Headlight Bulb Specifications
Four distinct bulb families serve GMC Acadia headlight systems, and matching the exact specification prevents fitment errors, electrical faults, and beam-pattern degradation. Halogen models use 9012 (PX22d) bulbs rated at 55 W, while factory HID systems require D3S or D1S capsules delivering approximately 3,200 lumens per bulb. You’ll find fog lamps fitted with H11 or 5202 bulbs depending on your model year.
Beam pattern importance demands precise bulb geometry: LED retrofits must position emitters exactly where the original filament sat, or you’ll scatter light and blind oncoming drivers. Review photometric data—not just lumen claims—before purchasing replacements. Premium LED headlight replacements deliver 25,000 lumens per pair, substantially outperforming stock halogen output while maintaining proper beam focus. Ensure your replacement harness includes proper amperage ratings to safely handle the electrical demands of modern LED conversions. Replacing bulbs in pairs maintains consistent lighting output across both headlights.
For color temperature comparison, OEM HID outputs 4,300 K natural white; aftermarket LEDs range 5,000–6,500 K. Higher Kelvin ratings appear whiter but can reduce contrast in rain or fog.

【Repair LED Headlights】Our car LED headlight decoder, as a capacitive decoder that transmits pulse signals, can detect and solve the problem of LED headlight flickering, LED headlight malfunction, excessive flickering, no flickering or dashboard light bulbs burning.

【VEHICLE COMPATIBILITY】Headlights Assembly ONLY Compatible with Factory Halogen Headlight Models, Compatible w/ 2017 GMC Acadia Limited SL | SLE | SLT1 | SLT2, [SLT2 Models] - NOT Compatible With Technology Package Models, Compatible w/ 2013-2016 GMC Acadia, Not Compatible on Models w/ Factory HID Headlights

👍[800% Brightness] : For GMC Acadia 2007-2012 light bulbs feature the latest high-performance 3570 chip, 36000LM, 6500K cold white temperature, providing up to 8x brightness. Illuminate every detail on the road to help you see deer or other wildlife in the distance
Removing the Old Headlight Assembly
Removing the GMC Acadia headlight assembly requires sequential disassembly of three protective layers—bumper cover, fender liner, and mounting hardware—before you can extract the unit itself. Start by removing push clips from the bumper cover and upper grille using a trim tool. Turn your wheels outward for fender liner access, then extract five T20 Torx screws along the wheel well. Remove the 7mm bolt underneath the headlight, followed by two 10mm bolts securing the bumper to the fender. Observe safety precautions by wearing gloves and safety glasses throughout this process. Wearing gloves prevents contamination of the headlight bulb and its reflector surfaces. Carefully wiggle the headlight assembly straight out, avoiding excessive force. Before complete removal, access the rear to disconnect electrical connections—quarter-turn the connector counterclockwise and push the top tab to release the bulb from its reflector housing. You may need to wrestle the liner down slightly to properly access the headlight assembly from behind. Once removed, consider applying a UV-resistant coating to protect the new headlight lens from oxidation and yellowing over time.

Vehicle Fitment: OEM style headlights compatible with Headlights Assembly Compatible with 2013 2014 2015 2016 GMC Acadia w/ Factory Halogen Type Headlight Models. Compatible with 2017 GMC Acadia Limited | SL | SLE | SLT w/ Factory Halogen Type Headlight Models. Compatible w/ Factory Halogen Type Headlight Models ONLY. Not compatible with factory HID models.[SLT2 Models] - NOT Compatible With Technology Package Models.

Fitment (No HID) - Headlights Assembly compatible with 2007 2008 2009 2010 2011 2012 GMC Acadia 4 Door Sport Utility Halogen Type. Compatible with models with halogen headlights ONLY. Not compatible with factory HID models. OEM PARTS NUMER:25826765, 25826764, 20912393, 20912394, GM2502294, GM2503294, GM2502358, GM2503358. Matches original car specs, so it lines up with existing mounting points – no tricky adjustments needed.
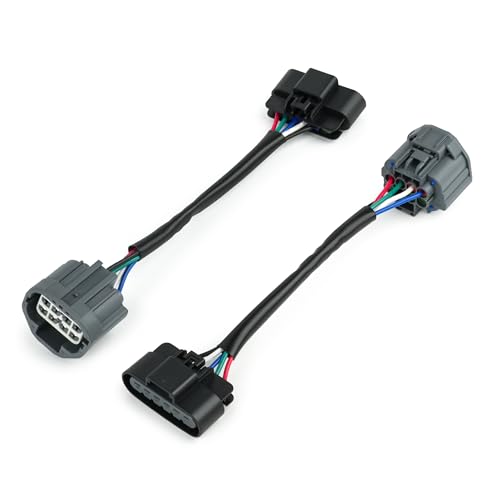
Part Type: HID to Halogen Headlight Swap Harness
Installing the New Headlight Bulb
Installing a new headlight bulb in your GMC Acadia begins with proper access to the bulb housing area, which requires peeling back the inner fender liner you loosened during disassembly. Before installation, verify bulb compatibility by matching your original—H11 for low beams, 9005 or 9012 for high beams on most trims. Handle the new bulb by its base only; oils from your fingers will reduce longevity and cause premature failure. When upgrading to premium options, consider LED and HID conversion kits for enhanced brightness and lifespan compared to standard halogen replacements. Replacing bulbs in pairs ensures consistent lighting performance across both headlights.
For proper installation techniques, insert the bulb into the opening and turn one click clockwise until you hear it lock. Reconnect the wire harness, ensuring proper key alignment—it’ll only fit one way. Push down the safety tab to secure the connection. Finally, tuck wiring below any heat sink, reinstall the back cover clockwise, and test operation before replacing the wheel liner.
Final Assembly and Alignment
Once you’ve verified bulb operation, begin reassembly by positioning the headlight housing into its mounting rails, ensuring it seats flush against the vehicle’s front-end structure. Install all mounting screws finger-tight first, then torque to GMC specifications to prevent warpage. Reconnect the electrical harness until the locking tab clicks, and verify weather seals are properly seated around the housing perimeter.
For fitment verification, inspect the headlight-to-bumper interface for gaps and secure all OEM clips. Next, perform beam alignment by parking on level ground 25 feet from a flat wall. Mark the vehicle centerline and headlight centers with tape. Adjust vertical and horizontal aim screws to match GMC cutoff specifications—typically 2 inches down at 25 feet. Use a basic screwdriver to turn the adjustment screws, rotating counterclockwise to raise the beam or clockwise to lower it. For optimal results, consider replacing bulbs in pairs to ensure consistent brightness and performance across both headlights. Proper beam alignment is essential for improved visibility during nighttime driving and ensures compliance with safety standards. Torque mounting fasteners, then recheck beam patterns with normal vehicle load to confirm proper alignment.
Pro Tips for a Successful Replacement
A successful GMC Acadia headlight replacement hinges on proper preparation before you begin disassembly. Remove all push clips methodically using a trim tool, starting along the bumper cover and progressing to areas beside each headlight. Secure top screws first during interim positioning to maintain alignment.
For bulb maintenance tips, preserve original bulbs and O-rings as backups, even if they’re non-functional. Orient new bulb tabs at the bottom before installation to guarantee proper seating. Like Chevy Silverado headlights, always twist the bulb counterclockwise to remove it safely and ensure the new bulb is securely locked back in place by turning clockwise. Replace bulbs in pairs to maintain even light output across both sides of your vehicle.
Follow wiring safety precautions by tucking wires below the headlight assembly, never across heat sinks where they’ll interfere with fan cooling. Use zip ties to secure excess wiring to core support braces. Select components from reputable manufacturers after reviewing feedback on fitment, brightness, and longevity—avoid no-name brands with documented failure rates.