To replace a headlight bracket, you’ll need basic hand tools including screwdrivers, socket wrenches (8mm-11mm), and penetrating oil for corroded fasteners. Start by disconnecting the battery and removing the headlight assembly after documenting electrical connections. Once accessed, unbolt the old bracket from the vehicle frame, position the new bracket ensuring proper alignment with mounting holes, and secure it with appropriate fasteners using blue thread locker. Reconnect the headlight assembly, restore electrical connections, and perform beam alignment adjustments. The complete procedure involves additional critical steps for best fitment and long-term reliability.
Tools and Materials You’ll Need
Preparation determines whether your headlight bracket replacement proceeds smoothly or devolves into multiple trips to the hardware store. You’ll need basic hand tools including flathead and Phillips screwdrivers, needlenose pliers, and socket wrenches with 8mm, 10mm, and 11mm sockets. Specialty bits—particularly T30 Torx and Allen bits—address model-specific fasteners on various headlight types. For bracket materials like steel or aluminum, gather tin snips, a drill with 2.5mm to 3.5mm bits, and a metal file or Dremel for edge finishing. Stock M3 fasteners: thirteen nuts, plus 3x25mm and 4x10mm screws with blue thread locker. Include plastic rivets, retainer clips, safety gloves, a flashlight, multimeter, and contact cleaner for electrical connections. Have heat shrink tubing available to insulate exposed wires after disconnecting the power connector and cutting the wires from the original socket.

Torx/star screwdriver set is Chrome vanadium steel with heat treatment, high hardness and good toughness and resistance,large torque, long service life.
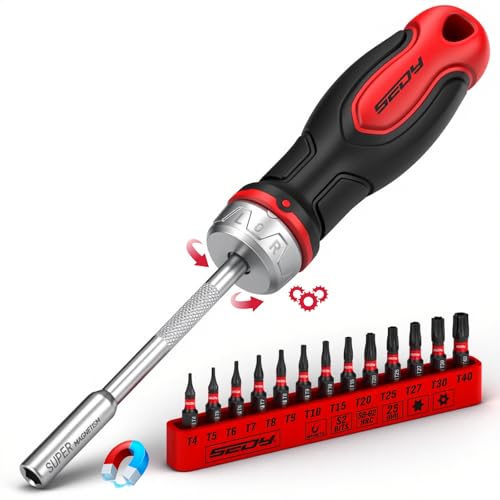
DURABLE DESIGN - This 14-Piece 1/4″ Magnetic Ratcheting Screwdriver Bit Set includes a variety of sizes, from T4 to T40, ensuring you can tackle all your garage, home, work, and DIY repair needs with ease.

Sizes laser etched on blade
Preparing Your Vehicle for Bracket Replacement
Before installing your new headlight bracket, you’ll need to verify proper surface preparation and confirm fitment compatibility with your specific vehicle. Start by pre fitting parts to verify proper alignment before final preparation begins. This step identifies necessary modifications, especially for aftermarket brackets or vehicles with accident history or body damage.
For surface cleaning, use a soft cloth moving in one direction to prevent dirt redistribution. Remove contaminants, oil, and production residue that compromise adhesion. If working with difficult-to-bond plastics, apply LOCTITE SF 770 primer after cleaning to enhance bonding characteristics. Applying a UV sealant after bracket installation can protect metal components from oxidation and corrosion.
Vehicles with composite hoods require hood pins rather than gas struts. Address any prior modifications during pre-fitting to facilitate ideal bracket placement and secure headlight assembly mounting. Proper beam alignment ensures your headlight installation functions safely for night driving visibility. Universal LED headlight brackets are particularly recommended for tube chassis vehicles or situations where the stock headlight assembly is missing or inadequate.
Removing the Headlight Assembly
Locate all mounting fasteners securing the headlight assembly by systematically inspecting the top, sides, bottom, and rear perimeter of the housing. Document fastener types—Torx, Phillips, hex, or plastic push-clips—and prepare corresponding tools. Apply penetrating oil to corroded bolts before removal. Begin by extracting top mounting bolts, then remove side and lower fasteners. Detach grille or bumper components if they obstruct access. Carefully pry out plastic clips to avoid breaking tabs.
Before disconnecting electrical connectors, switch the ignition to accessory off or disconnect the battery. Unplug headlight bulb, turn signal, side marker, and leveling motor connectors. Inspect harness pins for corrosion. Use plastic trim tools to pry connectors without damaging clips or surrounding surfaces. Gently pull the assembly forward once all fasteners are removed, supporting it to prevent lens damage. Check for hidden clips applying steady pressure—never force. For some GMC Sierra models, you may need to remove the cold air intake for better access to the headlight assembly. When reinstalling, ensure 9005 and 9006 bulbs or your model’s correct bulb types are properly seated in their sockets before reattaching the assembly.

【12 Most Popular Sizes】- There are 12 most common sizes of clips which will meet your needs, sturdy and reusable, compatible for GM, Chrysler, Ford, Toyota, Nissan, Mazda. Hyundai, Kia, AMC, Jeep, etc.

COMPATIBILITY: Universal socket removal tool designed for H8, H9, H10, H11, H12, H13, 9005, 9006, and 9012 headlight and fog light bulbs

2-in-1 Multifunctional: This panel clip removal tool delivers "2-in-1" functionality. It not only professionally takes off headlight covers but also effortlessly pulls out various plastic fasteners and plastic rivets from interior panels, and even safely grips and moves wiring harnesses
Installing the New Bracket
Retrieve the new headlight bracket and position it against the vehicle frame, guaranteeing all mounting holes align precisely with their corresponding attachment points. Check that wiring harnesses route correctly without pinching or interference. Begin bracket alignment by threading the upper 13mm bolts by hand to establish initial hold. Once secured, align the lower mounting positions and install 10mm bottom bolts. Verify adequate clearance around hood cables and surrounding components before fastener securing.
Thread all hardware hand-tight, working from upper to lower positions. Snug 8mm fender screws carefully, avoiding over-torque. Complete fastener securing by tightening all bolts progressively once you’ve confirmed proper bracket alignment. This systematic approach prevents misalignment and guarantees structural integrity for headlight assembly installation. Handle all components carefully to avoid damage during the installation process.

FIT VEHICLES:headlight bracket Compatible with 2007 2008 2009 2010 2011 2012 2013 2014 2015 2016 2017 Wrangler JK 7 inch front headlight

7 inch headlight mount bracket retaining bracket ring kit compatible with wrangler JK 2007-2017,perfectly matched with this model,please carefully check your equipment and dimensions

【Compatible With】Headlight Bucket Kit compatible with Chevrolet GMC Buick Cadillac Oldsmobile Pontiac. To confirm that this part fits your vehicle, enter your vehicle's Year, Make, Model, Trim, and Engine in the Compatibility Table.
Reassembling the Headlight Components
With the new bracket securely mounted, position the headlight housing against the bracket and align all mounting tabs with their corresponding slots. Secure fasteners on top, side, and bottom using appropriate wrenches or sockets. These reassembling techniques guarantee proper component alignment throughout the process.
Next, reconnect electrical connectors by pushing them firmly until they click. Attach both high beam and low beam plugs to their terminals, followed by the main power connector at the housing’s rear. Insert bulbs and secure them with wire clips or bayonet retainers, then install rubber covers over the bulb assemblies. To avoid premature bulb wear, avoid touching the bulb glass directly during installation.
Before final closure, cycle lights in accessory mode to verify functionality. Test both high and low beams to confirm proper operation. Apply masking tape and plastic around the headlight edges to protect surrounding surfaces during any subsequent adjustments. Reinstall any removed components like grilles, inspect for missing clips or seals, then close the hood.
Adjusting Headlight Aim
After installing the new bracket and reconnecting all components, proper headlight aim guarantees ideal road visibility without blinding oncoming traffic. Park your vehicle on level ground 25 feet from a wall, ensuring half-full fuel tank and 55 kg driver weight. Mark vertical lines at each headlight’s centerline and a horizontal line connecting their centers. Position marks 4 inches below center for driver side, 2 inches for passenger side.
Block one headlight while adjusting the other. For vertical headlight alignment, rotate the top adjustment screw—clockwise raises the light beam, counterclockwise lowers it. Aim the brightest area 2-4 inches below horizontal. For horizontal adjustment, turn the side screw in quarter-turn increments, positioning the most intense beam portion slightly right of the vertical centerline. Since dipped beams are most frequently used during night driving, prioritize their alignment for optimal safety. Look for signs of misalignment such as reduced visibility or feedback from other drivers about excessive glare during your testing. Perform a night test drive to verify that the adjusted beams provide proper illumination without creating glare for oncoming drivers.
Testing and Final Checks
Once you’ve completed the bracket installation and headlight aim adjustment, conduct a thorough visual inspection of the entire headlight assembly. Check lens clarity for yellowing or cracks, verify mounting brackets aren’t loose, and assess gasket condition for brittleness. Clean any corrosion from terminals showing greenish buildup.
Proceed with electrical testing using a multimeter to verify continuity between wires and proper voltage at bulb sockets. Confirm the wiring harness matches your vehicle’s stock configuration and bulb types are compatible (H11, 9005). Listen for flickering, buzzing, or clicking sounds indicating electrical issues. If you hear a clicking sound when the headlights are turned on, this indicates the relay is engaging properly. Frequent bulb replacements during testing could suggest underlying electrical system issues that should be diagnosed separately.
Reconnect the battery and test all bulbs for proper operation. Verify headlights are positioned correctly without misalignment. Check for moisture absence inside the lens, confirming seal integrity prevents future water ingress. Ensure both beams are even and properly aimed to avoid blinding other drivers on the road.