To install HID headlights, you’ll first disconnect your battery and gather essential tools like screwdrivers and wrenches. Remove the headlight assembly by detaching retaining bolts, then carefully extract the factory halogen bulbs. Install HID bulbs using clean gloves to prevent contamination, connect them to ballasts, and mount ballasts securely on metal surfaces. Wire the relay harness to your battery’s positive terminal with a 20A fuse, establish solid ground connections, and reconnect everything. Test for consistent brightness and proper beam patterns to confirm you’ve achieved peak performance and safety.
Gathering Tools and Safety Equipment
Before beginning your HID headlight installation, you’ll need to assemble the proper tools and safety equipment to confirm a safe and efficient process. Essential tools include flat-tip and Phillips head screwdrivers, adjustable wrenches, ratchet sets, and pliers—each selected for specific tool functionality during bulb and housing access. You’ll also require wire cutters, electrical tape, heat shrink tubing, and zip ties for secure wiring connections.
Safety protocols demand wearing gloves when handling HID bulbs to prevent skin oil contamination, plus safety glasses to protect against debris. Disconnect your car battery completely before starting work to eliminate electrical hazards. Confirm your ignition and headlights are off, and work in a dry, well-lit area. Keep screws organized in a tray and review your installation manual thoroughly beforehand, similar to how the headlight assembly removal process requires careful preparation. Morning hours are preferred for installation work as temperatures remain cooler, reducing the risk of burns from engine components. Unlike daytime running lights that enhance visibility during the day, HID headlights require careful installation to ensure proper headlight alignment and performance for optimal night visibility.

☆FITS FOR☆ 2006 2007 2008 2009Toyota Prius.

Preparing Your Vehicle and Workspace
With your tools gathered and safety equipment ready, you’ll now set up your vehicle for the HID installation process. Park on a flat surface, engage the parking brake, and disconnect the battery’s negative terminal to eliminate electrical hazards. Verify your headlights use projector lenses, as reflector housings cause dangerous glare with HIDs.
For workspace setup, designate a clean, well-lit area with protective covers over painted surfaces. Organize all fasteners and components systematically to prevent loss. Confirm adequate ventilation if using sealants or cleaning solvents. Identify a dry location under the hood for mounting the ballasts to protect them from moisture damage.
Implement critical safety precautions: wear gloves and eye protection throughout installation. Avoid wet or humid conditions that risk electrical shorts. Clear the engine bay area near headlight housings, confirming dry conditions and sufficient access for ballast mounting and wiring routes.
Accessing the Headlight Assembly
Accessing your vehicle’s headlight assembly requires removing specific fasteners and disconnecting electrical components in a precise sequence. Start by opening your hood completely and identifying the headlight location. You’ll find retaining bolts or screws typically positioned on top and sides of the assembly. Remove these fasteners using appropriate tools—socket wrenches for bolts, screwdrivers or Torx bits for screws. Keep all hardware organized for reassembly.
Once loosened, gently pull the assembly forward to expose electrical connectors. Disconnect bulb connectors by pressing release tabs or twisting counterclockwise—never pull directly on wires. Before beginning any work, disconnect the battery to prevent electrical shorts or injury. Complete the assembly removal by confirming all fasteners are detached, then use steady, even force to extract the unit. Some assemblies require sliding or tilting motions. Verify surrounding components won’t obstruct removal before proceeding. For vehicles with limited engine bay space, component removal may be necessary to gain adequate access to the headlight assembly.
Removing the Factory Halogen Bulbs
Turn off your vehicle’s engine and allow the headlights to cool completely before beginning bulb removal—hot halogen bulbs can cause severe burns. Press the locking tab on the bulb’s wiring harness to release the connector, pulling only the connector body to avoid wire damage. Twist the bulb counterclockwise to disengage the twist-lock mechanism, then pull straight out. Don’t force it—resistance indicates a clip still securing the bulb. Wear gloves or use a clean cloth to prevent skin oils from contaminating the glass, which creates hot spots and premature failure. Understanding different bulb types guarantees you select compatible replacements. Compare your old bulb with the new one, verifying size, connector type, and wattage match. Before purchasing replacements, filter your search results by entering your vehicle’s year, make, and model to ensure you receive the correct bulb specification. These installation tips prevent damage during removal and guarantee proper HID conversion preparation.
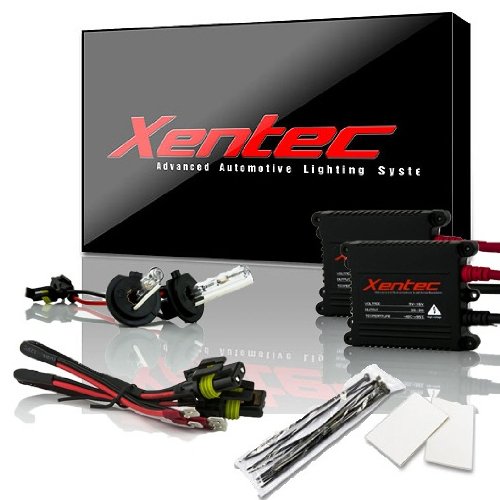
Each bundle contain 2 bulbs, 2 ballast, and installation accessories

Each bundle contain 2 bulbs, 2 ballast, and installation accessories

Each bundle contain 2 bulbs, 2 ballast, and accessories, this bulb is not dual xenon, high beam is halogen (for dual xenon, please select bixenon option)
Installing the HID Bulbs Properly
Handle your new HID bulbs with clean cotton gloves or a lint-free cloth throughout the entire installation process—skin oils create hot spots on the glass surface that compromise bulb longevity and light output. If contamination occurs, clean the bulb with rubbing alcohol immediately.
Insert the bulb firmly into the headlight assembly, aligning it according to manufacturer specifications. Twist clockwise until the locking mechanism engages. Verify that retaining clips and sealing grommets are properly seated to prevent moisture intrusion. Before beginning installation, disconnect the battery to ensure your safety and prevent electrical hazards during the replacement process.
Connect the bulb to the ballast, guaranteeing connectors fit snugly. Match cable polarity correctly—typically black to black. Route wiring away from heat sources and moving parts, ensuring your wiring harness is properly secured to prevent contact with engine components.
These installation tips guarantee peak performance: never force components, double-check all connections, and verify the beam pattern before finalizing the installation. For consistent lighting output and color temperature, replace both bulbs simultaneously even if only one has failed.
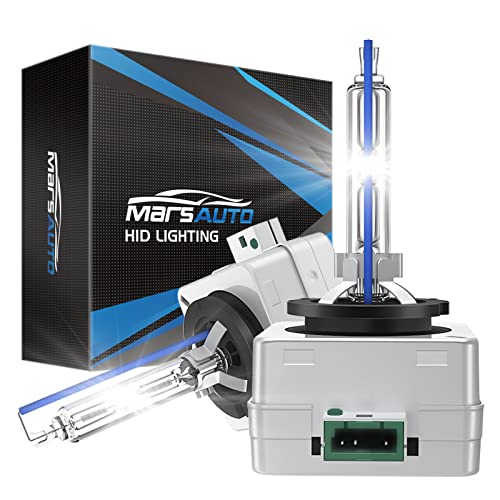
Replace Only HID Bulbs: Fit for stock D3S HID Xenon bulbs only, NOT ADAPT if your auto has stock Halogen/LED lights

Each bundle contain 2 bulbs, 2 ballast, and installation accessories

Each bundle contain 2 bulbs, 2 55W Platinum ballast, and accessories
Mounting the HID Ballasts
Proper ballast mounting determines the longevity and reliability of your HID lighting system. Start with ballast placement near the bulbs to minimize wiring strain, avoiding moving parts and extreme heat sources like the exhaust manifold. Choose a flat, stable metal surface that aids heat dissipation while protecting the ballast from water and road debris.
For mounting techniques, use the manufacturer’s bracket with self-tapping screws, zip ties, or Velcro pads. Never use double-sided tape alone—it insulates the unit and causes overheating. When applying Velcro, clean surfaces thoroughly with alcohol prep pads. Don’t drill into the ballast casing itself. Proper ballast mounting helps prevent voltage spikes and overheating that can damage your HID system prematurely. Quality ballasts with digital versus analog technology offer enhanced protection against electrical fluctuations during startup and operation.
Route wiring carefully through existing openings, securing cables with zip ties. Use rubber grommets if wires pass through drilled holes. Verify all connections maintain proper polarity before testing your installation.

Power Wattage/Voltage 55W AC/12V

Compatible with Chevrolet Blazer 2019-2020; Tahoe, Impala 2014-2020; Suburban 3500 HD 2016-2019; Suburban 2015-2020; Malibu 2013-2015; Impala Limited 2014-2016; Blazer 2019-2020

35W HID Ballast: New DC Chip sest, IP68 Water Seald. It will work in any weather conditions. 0-30% brighter light than the standard ballast.
Connecting the Wiring Harness
After securing the ballasts, you’ll connect the wiring harness that powers your HID system and integrates it with your vehicle’s electrical system. Start by planning harness placement—route from the battery to headlights using the shortest path while avoiding heat sources and moving parts.
Connect the relay harness’s “battery plus” wire with a 20A inline fuse directly to your positive battery terminal. Secure a ground wire to the chassis or engine block. Plug the relay harness’s main connector into the factory headlight socket where you removed the original bulb. This simulates the factory bulb connection, triggering the relay.
Connect ballast input wires from the relay harness to corresponding ballast connectors, observing polarity markings. The ballast’s output plugs into the HID bulb. Mount the relay box vertically to prevent water from pooling inside the enclosure. Secure all wiring connections with zip ties and verify no exposed terminals exist before testing.
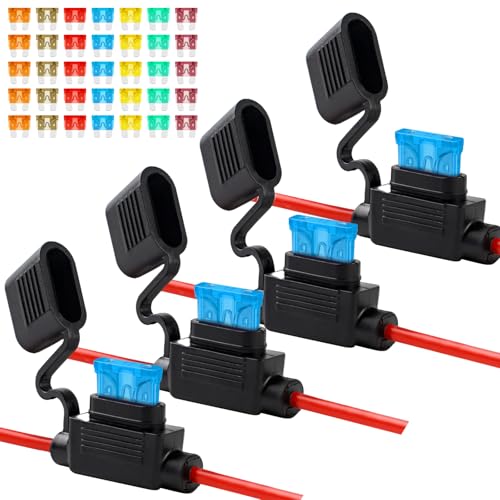
【PACKAGE INCLUDE】 4 packs of 12AWG inline fuse holders and 35 standard blade fuses (5 each of 5A, 7.5A, 10A, 15A, 20A, 30A, 40A). Suitable for 12V automotive and marine circuit protection

14 Gauge Wire: 12V fuse holder wire is 14 AWG wire with 20A blade fuse, the overall length of the fuse holder wire is 9.8 inches in a loop, you can decide the length of each side as you need

【Bolipoeq 20 Amp 12V Circuit Breaker】: Operating Voltage (DC): 12V-48V; Waterproof Rating: IP67; Operating Temperature: -32℃ (-25℉) to 82℃ (180℉). It meets S.A.E. J1625, J1171, and UL1500 (Ignition Protected) standards. Ideal for auxiliary/accessory circuits in cars, trucks, buses, RVs, ATV winches, marine and boating use. Also works with battery chargers, DC sound amplifiers, and vehicle audio-video systems.
Establishing Proper Grounding
Because HID systems draw significant current and operate at high voltages, establishing a solid ground connection is critical for reliable performance and safety. Identify proper ground locations by locating clean metal chassis points near the headlight assembly. Remove paint, rust, or corrosion with sandpaper to facilitate direct metal-to-metal contact.
Use appropriate connection techniques by crimping ring terminals onto ground wires and securing them with bolts. Route dedicated ground wires from each ballast separately to chassis points. Apply dielectric grease to prevent oxidation. The wiring harness comes with grounds and ballast connections, and an inline fuse is included for safety. Unlike traditional halogen bulbs, HID headlights require more robust electrical infrastructure due to their higher voltage operation. This electrical arc technology demands precise grounding to ensure the xenon gas ionizes properly and produces the intense white-blue light characteristic of HID systems.
After installation, verify grounding with a multimeter, checking for low resistance between the ground wire and vehicle frame. Test both headlights under load conditions. If flickering occurs, inspect connection tightness and cleanliness, relocating the ground point if necessary.
Testing Your New HID System
Once you’ve completed the grounding connections, verify your HID installation functions correctly through systematic testing. Start by checking all fuses and verifying power at the headlight connectors using a multimeter. Inspect wiring for damage, corrosion, or loose connections that could compromise system performance. Turn on your headlights and observe both bulbs for consistent ignition and brightness. Perform the bulb switch test by swapping units between sides to isolate faulty components. Run the system continuously for several minutes, monitoring for flickering or dimming that indicates electrical issues. Visual inspection for broken filaments or discoloration can help confirm whether any bulb failure is occurring during operation. Test the beam pattern against a wall 25 feet away, verifying proper cutoff and distribution to ensure compliance with federal safety standards. For aftermarket HID kits, measure the startup current requirements using an appropriate clamp meter to ensure they fall within manufacturer specifications. These troubleshooting techniques confirm your HID system operates safely and efficiently before regular use.
Troubleshooting Common Issues
Even properly installed HID systems can develop problems that require systematic diagnosis to resolve. Start by identifying bulb failure through a swap test—exchange bulbs between sides to see if the issue follows. Look for cracks or darkening in the glass, indicating end-of-life. If bulbs aren’t the culprit, investigate ballast issues by swapping ballasts side-to-side to isolate the fault. Check all connectors for corrosion and verify voltage output with a multimeter. Don’t overlook the igniter; swap it similarly to confirm functionality. Inspect wiring harnesses for loose connections or damage. Test your battery voltage and grounding points, as unstable power supply causes flickering. For optimal results, replace bulbs in pairs to maintain even lighting intensity across both headlights. For headlights that appear cloudy rather than failing completely, UV sealant protection can help prevent future oxidation issues. Always disconnect power before handling high-voltage HID components to prevent electrical hazards. Recognizing these symptoms early can prevent further complications and maintain optimal visibility on the road.