You’ll need to disconnect your battery, remove the bumper cover, and unbolt the headlight assembly with a 10mm socket and T15 Torx driver. Heat the assembly to 200–250°F for 15–20 minutes to soften the permaseal, then carefully pry the lens from the housing. Clean all old sealant from the trough, apply fresh butyl rubber tape around the perimeter, and align the new lens before pressing it into position. Let it cure for 30 minutes at room temperature. This guide covers the complete process, essential tools, and protective maintenance techniques.
Common Problems With Factory Headlight Lenses
Factory C6 Corvette headlight lenses deteriorate through several distinct failure modes that owners will encounter during the vehicle’s lifespan. Cracking and crazing compromise crystal clarity as heat cycles cause irreversible damage to the lens surface. You’ll notice fine crack networks creating hazy, clouded areas that polishing won’t fix. UV exposure triggers oxidation, turning lenses yellow and reducing light output efficiency. These discoloration issues recur quickly after restoration attempts. Seal degradation permits moisture intrusion, causing internal fogging and water spots that accelerate lens deterioration. The factory assembly’s fragile construction complicates repairs—plastic inserts and metal studs break during disassembly. Surface treatments provide temporary cosmetic improvements but don’t address structural damage affecting lens longevity. Complete replacement becomes necessary when visibility or safety are compromised by advanced deterioration. When addressing these issues, you can either replace the lens individually or opt for a complete headlight assembly replacement.
Required Tools and Materials
Success in replacing C6 Corvette headlight lenses depends on gathering the correct tools and materials before you begin work. Proper tool selection includes a 10mm socket, E4 inverted Torx bits, and a heat gun for controlled sealant softening. You’ll need flathead prying tools and dental picks for clip manipulation without causing damage.
Material compatibility is critical when choosing sealants. Select butyl rubber tape, polyurethane, or silicone specifically rated for polycarbonate surfaces to guarantee weatherproof bonding. Clean all surfaces with isopropyl alcohol before application.
Essential safety equipment includes protective gloves, safety glasses, and dust masks during sanding or sealing operations. A torque wrench prevents overtightening that cracks lens assemblies. Stock replacement gaskets, OEM-equivalent lenses with UV protection, and new hardware for corroded fasteners. The replacement covers are manufactured from high-quality ABS plastic that ensures durability and proper fitment for 2005-2013 Corvette C6 models.

Perfect Fit for 2005-2013 Corvette C6 – Easy Replacement for Leaking Headlights: Upgrade and restore your Corvette C6’s headlights with this premium headlight lens replacement kit. Specially designed for 2005-2013 Corvette C6, this kit ensures a perfect fit, making it a hassle-free solution for drivers facing headlight water leaks or worn-out lenses.

For Chevrolet Corvette C6 2005-2013

Fitment: Specifically engineered for 2005 2006 2007 2008 2009 2010 2011 2012 2013 Chevy Corvette C6 models
Removing the Headlight Assembly
Begin by opening the hood fully and disconnecting the vehicle’s battery to eliminate electrical hazards during the removal process. Remove the front bumper cover to access the headlight mounting points. Using assembly tools including a Torx T15 driver, unscrew the fender-mounted screws adjacent to each headlight. Remove the three 10mm bolts underneath the assembly with a socket wrench. Detach fender liner fasteners for improved clearance. Gently lift the fender while pushing the headlight assembly upward to disengage it from mounting clips. Wiggle carefully to free retaining tabs without forcing. Locate and unplug the two main wiring connectors, releasing any metal clips or locking tabs first. Support the assembly throughout disconnection to prevent wiring damage. Note headlight alignment marks before complete removal for easier reinstallation. Apply dielectric grease on connections to protect electrical contacts from corrosion during reassembly. When working with halogen bulbs during reinstallation, avoid touching the glass to prevent shortened bulb life. Wearing safety goggles is recommended to protect your eyes from debris during the removal process.

Fit for Chevrolet Corvette C4 1988-1996
Compatible with Chevrolet Corvette 1988-1996.

Fitment - Projector Head Lamp Compatible with 2005-2013 Chevy Chevrolet Corvette C6
Separating the Lens From the Housing
Once you’ve removed the headlight assembly from the vehicle, you’ll need to separate the lens from the housing to replace it. Begin by preheating your oven to 200–250°F or using a heat gun on medium setting. Heat the assembly evenly for 15–20 minutes, focusing on the seam to soften the permaseal adhesive. Remove metal retainer clips and rubber gaskets using flathead screwdrivers. Insert a plastic pry tool between the lens and housing seam, working around the perimeter with gentle, consistent pressure to prevent lens cracking. Reapply heat if resistance occurs. Different adhesive types require varying heat levels, so monitor temperature carefully. Once loosened completely, pull the lens free without bending components. After separation, peel out all permaseal from the trough area to ensure proper adhesion of the new seal.

COMPATIBILITY: Universal socket removal tool designed for H8, H9, H10, H11, H12, H13, 9005, 9006, and 9012 headlight and fog light bulbs

[OE Number] 20936417, 20936418, 20936419, 25785290, 25785289

Replacement Part Number -- This headlight cover is perfectly compatible with replacement part number:20936417,20936419,25785289,20789691,20789687,20789711. Always check your part number to make sure it is a perfect fit for your vehicle
Preparing Surfaces for the New Lens
After separating the lens from the housing, you must meticulously prepare both the housing’s mounting surface and the new lens to guarantee proper adhesion and optical clarity. Begin lens cleaning using automotive-specific cleaner and lint-free microfiber cloths to remove all dirt, grease, and oxidation. If sanding techniques are required for restoration, start with 800-1000 grit wet/dry sandpaper, keeping the surface wet throughout to prevent scratching. Sand evenly until achieving a uniform frosted appearance. Next, apply specialized prep sprays or alcohol wipes to eliminate residual oils that could compromise bonding. Avoid touching cleaned surfaces with bare hands. Mask adjacent areas using painter’s tape to protect surrounding components from overspray. Inspect the prepared surface under good lighting to confirm complete contaminant removal before proceeding with installation.

KIT INCLUDES: 1 - 3M Trizact Refining Disc 1000 grit, 3 in/7.6 cm 1 - 3M Trizact Refining Disc 3000 grit, 3 in/7.6 cm 2 - 3M Quick Headlight Clear Coat Wipes 1 - Foam Pad with 3M Hookit Attachment, 3 in/7.6 cm 1- Disposable Glove
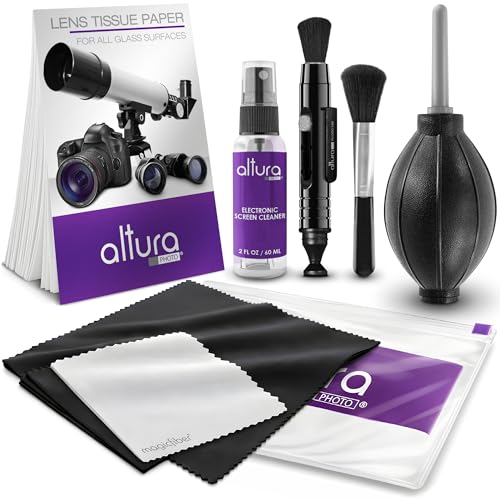
COMPLETE CAMERA CLEANING KIT: Our camera lens cleaning kit includes an alcohol & ammonia-free lens cleaner spray, cleaning brush, lens pen, air blower, MagicFiber microfiber cloths (3), and lens tissue paper wipes (50). Most competing lens cleaning kits cost more and still make you buy the spray and brush separately. Ours doesn't.

【PROFESSIONAL LENS CLEANING KIT】:Dslr cleaning kit includes Camera Dust Blower*1, Lens Cleaning Pen*1, Microfiber Lens Cleaning Cloths*2. Safe for all electronics, coated lenses and sensors.
Installing and Sealing the Replacement Lens
With the housing surface meticulously cleaned, you’re ready to install the replacement lens using proper heating and sealing techniques. Preheat your oven to 350°F to soften the butyl sealant evenly on both the lens and housing flanges. Apply a continuous bead of butyl sealant circumferentially around the housing perimeter, ensuring no gaps exist that could compromise waterproofing. Lens alignment is critical—carefully match the lens tabs with housing studs before pressing firmly into position. Use clamps or tape to maintain alignment during the curing process. Tighten fastening screws to just snug plus an eighth turn to prevent cracking plastic components. Allow the assembly to cool at room temperature for approximately 30 minutes, enabling the butyl sealant to cure and create an effective waterproof bond before final installation. For enhanced durability and protection against future oxidation, Right Stuff silicone can be used as it withstands high temperatures and provides a long-lasting seal similar to UV sealants that protect restored headlights from yellowing. When replacing lenses, always verify that your replacement component is compatible with your vehicle’s specific lighting system, such as HID xenon or halogen configurations, to ensure proper fit and function.


🚗 Rubber Sealant is use for the side of car doors column A/B,it can effectively keeps out the wind, prevents the water leakage and lower the noise outside the car.

PROFESSIONAL GRADE BUTYL SEALANT TAPE: With a length of 4M/13FT and a diameter of 8mm, Taglly butyl tape is an effective sealing, sound deadening and water proofing solution commonly used in construction, car, RVs, marine, headlights, windshield and more.
Maintenance Tips to Extend Lens Life
Proper maintenance practices greatly extend the functional lifespan of your C6 Corvette’s headlight lenses and preserve ideal light output. Implement regular lens cleaning using gentle car soap, microfiber cloths, and thorough rinsing to prevent oxidation buildup. Avoid abrasive cleaners that scratch protective coatings. Apply automotive-grade UV protective coatings and headlight-specific sealants every few months to establish environmental protection barriers. Park in covered areas when possible to minimize UV degradation. Remove corrosive contaminants like bird droppings, tree sap, and road salts immediately. Inspect lenses routinely for early oxidation, hazing, or cracking signs. Address minor imperfections promptly through proper cleaning and polishing techniques. For severely degraded lenses, a wet sanding technique using 800 to 1500 grit sandpaper with water lubrication can restore clarity before applying fresh clear coat protection. When storing your vehicle, use covers to shield lenses from moisture and environmental damage. Handle replacement lenses with clean gloves, and avoid high-pressure spray during washing to prevent coating damage.