
To replace your Jeep Cherokee’s low beam headlight, you’ll need to access the bulb through the wheel well rather than the hood. Turn your steering wheel fully left for the passenger side (or right for driver’s side), then remove the small access panel using an 8mm socket. Disconnect the electrical connector by pulling the release tab, twist the bulb counterclockwise to release it, and pull it straight out. Insert the new bulb without touching the glass, twist clockwise to secure, and reconnect the harness until it clicks. The complete process involves additional preparation steps and testing procedures to guarantee peak performance.
Gather Your Tools and Prepare Your Jeep
Before beginning headlight replacement on your Jeep Cherokee, assemble the required tools: socket set with ratchet, screwdrivers (flathead and Phillips), Torx drivers for specific fasteners, and work gloves to protect your hands and prevent skin oils from contaminating new bulbs. A flashlight enhances visibility in tight spaces. Verify replacement bulb specifications match your Cherokee’s year and model before starting.
For tool organization, arrange equipment within reach to minimize workflow interruptions. Implement essential safety precautions: park on level ground, engage the parking brake, and disconnect the battery’s negative terminal to eliminate electrical hazards. Turn the steering wheel fully left when accessing the passenger-side headlight. Remove wheel well liners secured by plastic clips for maximum access. When installing new bulbs, avoid touching the glass to prevent premature failure and reduced brightness. Confirm you have the appropriate replacement bulbs, such as H11 or 9012 bulb types commonly used in Cherokee models, and keep fasteners organized to streamline reassembly. Replace bulbs in pairs to ensure consistent brightness across both headlights.
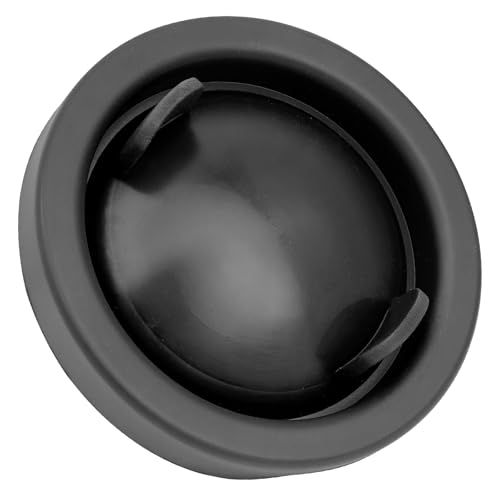
Compatible Models: Headlight cover fit for Jeep Grand Cherokee 2017 2018 2019 2020 2021 2022WK, replace 170086 68354272AA headlight dust cover cap Guarantees a precise snap-on fit to the headlamp housing, making it the perfect for jeep grand cherokee headlight dust cover upgrade.

Vehicle Compatibility: Compatible with 2014-2021 Jeep Grand Cherokee. Replacement for CH1225272 68223399AA

Perfectly Compatible: This headlight bulb dust cap cover replacement compatible with Jeep Grand Cherokee 2017 2018 2019 2020 2021 2022 and Cherokee WK 2022.
Access the Headlight Assembly
With your tools ready and safety measures in place, you’ll now access the headlight assembly through one of two primary methods depending on your Cherokee’s model year and your preferred approach.
For bumper removal access, loosen plastic rivets securing the bumper cover near the headlights, then carefully peel back the cover. Remove the grill assembly and upper plastic panel by pressing push clip centers and extracting outer portions. This method accommodates all headlight types and prevents connector issues during removal. Careful removal of retaining clips and screws is essential to avoid damaging surrounding components during this process.
Alternatively, use wheel well access by turning the steering wheel fully left or right. Remove the small panel inside the wheel well using 8mm bolts, then bend it back gently. Disconnect any obstructing vacuum or intake hoses. Use a flashlight to locate bulb covers and electrical connectors from this position. Before installation, verify the bulb compatibility with your specific model year to ensure correct fit and performance.
Remove the Old Low Beam Bulb
Grasp the electrical connector at the back of the low beam bulb housing and locate the release tab on its side. Press the tab firmly and pull straight back to disconnect. If resistance occurs, use a flathead screwdriver to gently pry the connector loose without damaging wiring.
Identify your bulb’s retaining mechanism—either twist-lock or clip-style. For twist-lock bases, rotate counterclockwise 1/4 to 1/2 turn. With spring clips, press or unhook to release tension. Some models require pushing inward before twisting.
Grip the bulb base firmly and pull straight out. Avoid touching glass surfaces. If stuck, wiggle gently using a plastic tool.
Inspect the socket for corrosion or moisture. Clean the assembly area for best lighting. Handle replacement bulbs with gloves to prevent oil contamination. To ensure proper reassembly, note the position of the red locking tab before removal. Plan proper bulb disposal following local regulations.

Lights Dim Over Time, Replace In Pairs: Your lights are a pair, one is never turned on without the other. If one bulb burns out, the other isn't far behind. Replace your H11 XtraVision Halogen bulbs in pairs for optimum performance.

⭐【Super Bright H11 Bulbs】Our H11 headlight bulbs deliver over 1000LM brightness and a 3800K color temperature, ensuring optimal visibility in foggy and rainy conditions. Upgrade your automotive headlight bulbs for safer nighttime driving.

Wide Compatibility: Compatible with a vast array of bulb types like H8, H9, H11, 880, 881, 886, 889, 890, 892, 893, 894, 898, 899, PG13, PGJ13 and supporting 12V input, this headlight connector, suitable for most cars, trucks, and SUVs, ensures stable lighting performance
Install the New Low Beam Bulb
Remove the replacement bulb from its protective packaging only when ready to install, handling it exclusively by the plastic or metal base. Observe handling precautions by wearing gloves or using a clean cloth to avoid touching the glass surface, as oils cause premature failure. Check bulb orientation by aligning the tabs with the socket grooves before insertion. Insert the bulb carefully into the headlight housing without applying pressure to the glass. Twist approximately 30 degrees until it locks securely. Confirm the bulb base clicks firmly into place. Connect the wiring harness until you hear an audible click. Replace the protective dust cap clockwise, ensuring all gaskets seal properly. Verify all clips and retainers are secured. Proper installation requires disconnecting the vehicle’s battery beforehand to ensure safety during the replacement process. Test the low beam function before final reassembly. Consider upgrading to LED headlights for enhanced visibility and improved vehicle appearance.

See the Road in a New Light: Get 900% the brightness of halogens with a powerful 50,000-lumen beam. The AUXITO H11 light bulbs illuminate more road ahead, giving you the clarity to spot hazards sooner.

【800% BRIGHTER THAN HALOGEN】 – OXILAM Upgraded H11/H8/H9 LED bulbs with 16 high-power chips deliver 32,000LM of intense 6500K pure white light, which cuts through darkness like daylight. Making night driving safer and more comfortable.

【9X Brighter Illumination】: Experience exceptional visibility with OXILAM H11 H8 H9 bulbs, featuring 16 upgraded high-power chips that deliver a staggering 900% increase in brightness. These high-performance bulbs allow you to see further on the road.
Test and Finish Reassembly
After installing the new low beam bulb, turn the vehicle’s ignition to the accessory position without starting the engine. Activate the headlight switch and verify both bulbs illuminate evenly without flickering. Complete headlight testing by checking for proper beam brightness and any moisture in the housing.
Begin the reassembly process by aligning the headlight assembly with mounting brackets. Hand-tighten all bolts before using a 10mm socket to torque fasteners per manufacturer specifications. Confirm all clips and tabs engage properly. Unlike some vehicles where bulbs can be accessed without removing the bumper, most Jeep Cherokee models require full headlight assembly removal for low beam replacement. Consider selecting LED or HID bulb options during replacement to improve visibility and beam pattern quality compared to standard halogen bulbs.
Reattach the bumper, fender liners, and trim pieces using the original push pins and screws. Park on level ground 25 feet from a wall. Adjust the vertical and horizontal aiming screws until the beam cutoff aligns correctly. Test high beams, turn signals, and conduct a final inspection before driving.


