To replace your Kia Forte headlight bulb, first park on a flat surface, engage the parking brake, and let the engine cool for 10–15 minutes. Open the hood and locate the headlight assembly from behind. Twist the bulb cover counterclockwise to remove it, disconnect the electrical connector, and release the retaining clip. Remove the old bulb by twisting counterclockwise, then install the new bulb in the correct orientation and secure all components. Test both beams to verify proper function, and you’ll find additional maintenance insights and troubleshooting techniques below.
Preparation and Safety Measures
Before replacing your Kia Forte’s headlight bulb, you must establish a safe working environment and prepare the vehicle properly. Park on a flat, stable surface and engage the parking brake to prevent movement. Turn off the engine, remove the key, and wait 10–15 minutes for the bulbs to cool, reducing burn risk. Confirm your work area is well-lit and free from obstructions.
Wear protective gloves to avoid touching the halogen bulb’s glass surface, as skin oils cause premature failure. Use safety goggles to protect against glass breakage. Verify bulb compatibility by confirming the replacement matches the original type (H7, HB2, or 9005). Understanding color temperature preferences helps ensure your chosen bulb meets both safety standards and visibility requirements. Disconnect the vehicle’s electrical system before handling components. Consider upgrading to LED or HID conversions for improved visibility and longevity compared to standard halogen bulbs. Have replacement bulbs, clean cloths, and appropriate hand tools ready before beginning the procedure. Ensure you have car keys available to assist with removing covers if needed.
Accessing the Headlight Assembly
With your safety preparations complete and your workspace ready, you’re now positioned to access the headlight assembly itself. Begin by opening and securing the hood using the prop rod. Locate protective caps on the rear of the headlight assembly and twist them counterclockwise for removal. For thorough headlight maintenance, you’ll need to identify retaining bolts—typically 12 mm on top and 10 mm on sides—and remove them using appropriate socket wrenches. Before assembly removal, carefully disconnect all electrical connectors by pressing release tabs on the housings; never pull directly on wires. To prevent damage during this process, always wear gloves when handling bulbs and connectors. Most headlight bulb replacements can be completed in approximately 10 minutes without specialized tools, making this an accessible DIY task. Lift or release locking tabs securing the assembly underneath. Some configurations require removing the front bumper cover by detaching clips, gravel guards, and fog light connectors. Gently wiggle the assembly free once all fasteners are released. The bumper removal is necessary to provide clear access to the headlight assembly for replacement.

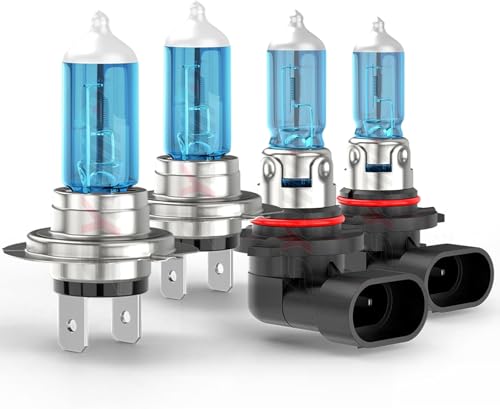
💡【VEHICLE COMPATIBILITY】Headlights Assembly Compatible With 2014 2015 2016 Kia Forte, Forte Koup, Forte5.High beam bulb type: H1(Bulb is included); Low beam bulb type: H7(Bulb is not included)

[PRECISE FITMENT] Direct replacement for 2017-2018 Kia Forte (without DRL). Matches part numbers 92101-B0701 (L) & 92102-B0701 (R). No gaps, bolt-on plug-and-play.
Removing the Old Headlight Bulb
Grasp the headlight bulb cover firmly with your fingers and rotate it counterclockwise to begin removal. If it’s stuck, wiggle carefully or use your key to gently pry it loose. In tight spaces, you may need to loosen nearby bolts first.
Once exposed, push and twist the electrical connector counterclockwise, then pull straight out without tugging wires. Next, release the retaining wire or clip by depressing and lifting it upward. Note its position for reinstallation.
Twist the bulb counterclockwise and remove it gently, avoiding the glass surface. If troubleshooting issues arise with stuck components, apply steady leverage at the base. Before proceeding with installation, inspect the bulb socket for damage or any accumulated debris that could affect the new bulb’s performance. Pay attention to the type of headlight bulb, such as halogen or LED, as different bulb types may require specific handling techniques. Always work with the engine off and wear gloves to prevent oil transfer to avoid damaging the glass portion of the bulb.

Lights Dim Over Time, Replace In Pairs: Your lights are a pair, one is never turned on without the other. If one bulb burns out, the other isn't far behind. Replace your H7 XtraVision Halogen bulbs in pairs for optimum performance.
Fit for 99% of vehicles - SYJIIP Halogen headlamp are close to the wattage of the stock halogen headlamp bulb, which can reduce the occurrence of CANBUS problems, avoid erroneous and flickering. As long as your stock light bulb model is the same as ours, then SYJIIP's light bulb will be suitable for your car.

Installing the Replacement Bulb
Installing the replacement bulb requires careful handling to assure proper function and longevity. Begin by aligning the new bulb according to the correct bulb orientation—typically positioned between 4:00 and 7:00 on an imaginary clock face. Avoid touching the halogen glass with bare fingers, as oil residue causes premature failure. Insert the new bulb into the socket and rotate clockwise until it locks securely. Ascertain tabs align with housing slots before twisting. Next, focus on securing connectors by pressing the electrical socket firmly until it clicks. Verify no wires are pinched or exposed. Replace the dust cap by turning clockwise until sealed flush. Once the cover is reinstalled, check the tightness of all connections to prevent future issues. Test both low and high beams to confirm proper illumination. Check beam alignment and inspect for flickering, which indicates connection issues.

Excellent Brightness: Equiped with filament from Austria, high purity quartz , and 28% more xenon , which lead to 20% more light output than original bulbs. The brightness even higher than Internation Standard.
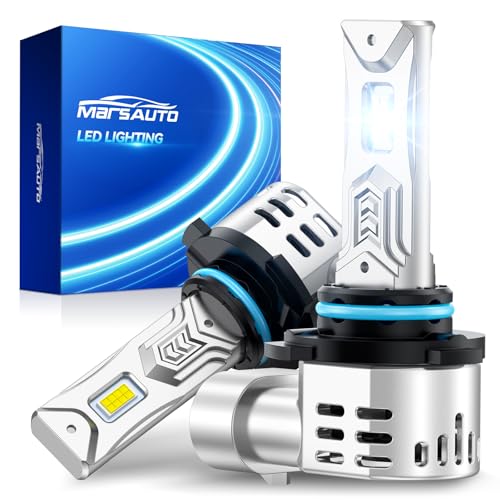
【1200% Brighter Light】Experience the next-level visibility with our Marsauto 9005/HB3 bulbs, delivering 1200% more brightness than stock bulbs through advanced dual-sided M4 chips for wider and farther illumination. For RV Interior Lighting.

⭐【Super Bright H11 Bulbs】Our H11 headlight bulbs deliver over 1000LM brightness and a 3800K color temperature, ensuring optimal visibility in foggy and rainy conditions. Upgrade your automotive headlight bulbs for safer nighttime driving.
Reassembling the Headlight Components
After confirming proper bulb function and illumination, you’ll now reinstall the headlight assembly to complete the replacement process. Position the assembly so mounting tabs align precisely with vehicle frame slots. Verify electrical connectors orient correctly to prevent strain. Confirm all securing clips snap firmly without forcing, validating no wiring harnesses are pinched between assembly and body.
Reinsert fasteners—typically two 10mm bolts and one 12mm bolt—hand-starting threads before tightening evenly using a socket wrench. Double-check all fasteners for tightness to prevent loosening from vibration.
Reconnect all wiring connectors until they click securely. Replace protective dust caps and verify rubber seals seat properly against moisture intrusion. Reattach any removed bumper clips, gravel guards, or fender liners. Conduct a final visual inspection verifying proper alignment and flush panel fit. After reassembly, turn on the Kia to conduct a final test of the headlight functionality before driving.

PRECISION FITMENT: Designed specifically for the 2010 2011 2012 2013 Kia Forte/ Koup LX EX SX. This package includes a pair of headlights that guaran-tee a seamless installation without modifications. Confirm your vehicle’s year and model for optimal compatibility. Note: The Bulbs are Included.

【Ideal Compatibility】Specifically designed for 2010 2011 2012 2013 Kia Forte (halogen headlight models only) — NOT compatible with factory-installed HID headlight variants.OEM Part Number: 921011M030, 921021M030, 921011M230,921021M230; Partslink Number: KI2502141, KI2503141

Package Includes: 1 pair of Aftermarket Headlamps Headlights Assembly Compatible with Forte.
Testing the New Headlight Bulb
Before reconnecting the battery or starting the vehicle, perform a thorough visual inspection of the newly installed bulb. Confirm proper seating in the socket and check for filament damage or connector looseness. Verify bulb compatibility with your Kia Forte’s specifications before proceeding.
Once assembled, turn on the headlights and confirm steady illumination without flickering. Test both low and high beam functions. Use a multimeter for voltage testing at the socket—you should read approximately 12 volts. Check continuity in the wiring and measure bulb resistance, typically around 1 ohm for halogen types.
These testing methods help identify installation errors or electrical faults. If the bulb fails to light, reassess connections and wiring. To prevent oil transfer from fingers that can reduce bulb lifespan, ensure you handled the bulb with gloves during installation. Perform a nighttime walk-around to evaluate beam pattern and brightness uniformity before regular operation. For optimal long-term performance and consistency, consider replacing bulbs in pairs rather than individually.

Clear, Focused Beam – The ultra-thin chip design of the HB3 9005 bulb precisely replicates the halogen filament position, delivering a glare-free, 360° uniform beam for improved night driving safety

Broad Vehicle Compatibility: Integrated with a smart CANbus system and adaptive power technology, these bulbs are compatible with 99% of modern vehicles. Most install instantly, and dedicated support is available should your model require additional assistance.
Additional Tips for Kia Forte Owners
While proper installation guarantees immediate functionality, maintaining your Kia Forte’s headlight system requires ongoing attention to several vital factors. Always consult your owner’s manual to identify the correct bulb types for your specific model year, as using incompatible options can trigger electrical issues. Handle replacement bulbs with gloves or clean cloth to prevent oil contamination that shortens lifespan. Store spare bulbs in cool, dry locations within your vehicle for emergency situations. Consider upgrading to compatible LED options for enhanced performance and longevity. Different bulb technologies such as halogen, LED, and HID offer varying brightness levels and color temperatures to suit your visibility needs. If you encounter persistent electrical issues after replacement, utilize diagnostic tools to detect error codes, or consult professional service centers. The body control module plays a vital role in headlight operation, requiring specialized diagnostics when standard troubleshooting fails.