
To replace your Honda’s headlights, start by parking on level ground, engaging the emergency brake, and disconnecting the battery. Remove the engine cover if necessary, then access the headlight assembly—method varies by model year, with some requiring bumper removal. Disconnect the electrical connector, twist the dust cap counterclockwise, and rotate the bulb base counterclockwise to extract it. Install the new bulb wearing gloves to prevent oil contamination, align the locating tabs, and rotate clockwise until locked. Reconnect all components and test functionality. The following sections explain model-specific procedures and troubleshooting techniques.
Gathering Your Tools and Materials
Before beginning any headlight replacement on your Honda, you’ll need to assemble the correct tools to avoid stripping bolts or damaging trim pieces. Proper tool organization streamlines the workflow and prevents component damage during disassembly.
Your essential toolkit includes a 10mm socket, Phillips #1 screwdriver, and flathead screwdriver for accessing fasteners. Add a 5mm Allen socket for upper retaining bolts and an 8mm socket for wheel well connections. Material selection matters—use deep sockets for recessed battery cable and headlight bolts, while a ratcheting socket wrench reaches top mounting points. Many Honda models use H11 headlight bulbs, which are among the most common bulb types for low beam and fog light applications.
For support equipment, deploy hydraulic jacks with jack stands when bumper removal becomes necessary. Disconnect the negative battery cable using appropriate socket wrenches. Include specialty tools like plastic rivet pullers and metal clip removers to prevent trim breakage during component extraction. When working with halogen or HID bulbs, take care to avoid touching the glass with bare hands to prevent premature burnout. Having help available is essential when removing the bumper cover to prevent damage and ensure safe handling of the large component.

Replacement For - 33116-SD4-961; suitable for Honda CR-V 2005-2006; for Honda Prelude 1997-2001; for Acura RL 1996-2004; for Acura TSX 2004-2008

Durable Materials: Made of high-quality nylon, the shells of the wiring harness socket connectors are sturdy and less prone to break even when impacted. The copper contacts have excellent conductivity, which can provide you with stable performance

High Quality: This female headlight socket/male headlight plug replacement is made of high-quality plastic head and tinned copper terminal combination, wear-resistant and high temperature-resistant, corrosion-resistant and oxidation-resistant, can withstand high temperatures, has good conductivity and long service life
Opening the Hood and Preparing Your Workspace
Proper workspace preparation determines whether your Honda headlight replacement proceeds smoothly or becomes a frustrating ordeal involving dropped fasteners and damaged components. Begin by parking on level ground with the emergency brake engaged and engine completely cooled. Disconnect both battery terminals using a 10mm socket to guarantee electrical safety. Pull the interior hood release, then move forward to release the secondary latch and secure the hood with its prop rod.
Prioritizing workspace safety means removing obstructions from the engine bay. Use a flathead screwdriver to pry out eight plastic pins securing the engine cover, then lift it clear. Position yourself for unobstructed access to the headlight assembly‘s rear section. For more complex replacements requiring bumper removal, elevate your vehicle on drive-on ramps or jack stands to provide easier access to undercarriage fasteners and fender well components. In certain model years, you may need to remove components like the radiator overflow tank to gain better access to the headlight assembly. Before beginning work, wear protective gloves to avoid premature wear from skin contact with bulb components. Confirm adequate lighting and organize tools within reach on a clean surface.
Accessing the Headlight Assembly
Accessing Honda headlight assemblies varies greatly by model year, with some requiring minimal disassembly while others demand complete bumper removal. For 2006-2011 Civics and 2013-2015 Accords, you’ll remove the front bumper cover by extracting upper retaining bolts with a 5mm Allen socket, Phillips screws at fender points, and six lower retaining rivets using a fork tool. Disengage the cover from fender slots by pulling outward and downward. Once exposed, locate three 10mm hex bolts securing the headlight bracket—accessible through the wheel well using Phillips or 8mm sockets. Remove upper retaining bolts with a 10mm socket while supporting the assembly. Before extraction, disconnect wiring connections using needle nose pliers. You’ll need to disconnect the blinker light bulb assembly near the wheel well before completely removing the headlight unit. This careful disassembly preserves headlight alignment during reinstallation and prevents damage to connectors and clips during the removal process.
Removing the Old Headlight Bulb
Ascertain the engine has cooled completely before initiating bulb removal, as headlight housings retain significant heat that can cause burns. Disconnect the electrical connector by pressing the tab downward and pulling straight out—use a pocket screwdriver if clips resist on older models. Twist the dust cap counterclockwise less than a quarter turn, then lift it clear. Note the bulb’s vertical orientation to guarantee proper bulb compatibility during reinstallation. Rotate the bulb base counterclockwise until tabs align with slots, then extract with a straight pull. Apply gentle wiggling if binding occurs. Wear gloves throughout these installation techniques to prevent skin oils from contaminating the glass surface. Inspect the bulb contacts for any oxidation or corrosion, as buildup in these areas can contribute to premature failures. Different bulb types such as 9005 or H7 may be required depending on your vehicle model year. Before reassembling the headlight housing, verify that all components fit securely together. Both bulbs should be replaced simultaneously to maintain even illumination output and color consistency across the vehicle’s front lighting system.

Lights Dim Over Time, Replace In Pairs: Your lights are a pair, one is never turned on without the other. If one bulb burns out, the other isn't far behind. Replace your H7 XtraVision Halogen bulbs in pairs for optimum performance.
Lights Dim Over Time, Replace In Pairs: Your lights are a pair, one is never turned on without the other. If one bulb burns out, the other isn't far behind. Replace your 9005 Halogen bulbs in pairs for optimum performance.

Lights Dim Over Time, Replace In Pairs: Be sure to replace both 9005 headlights at the same time for optimum performance. If one bulb burns out, the other isn't far behind. Replacing in pairs allows for premium visibility
Installing the New Headlight Bulb
Before handling the replacement bulb, confirm the correct part number against your Honda’s owner’s manual or the OEM sticker on the removed component to prevent fitment errors and incompatible beam patterns. Wear nitrile gloves to avoid transferring skin oils onto the bulb surface. Align the bulb’s locating tabs with the housing slots, ensuring proper bulb orientation before insertion. Push the bulb straight into the socket without forcing, then rotate clockwise approximately one-quarter turn until you hear or feel the lock engage. Verify all retention tabs sit fully behind their receivers. Reconnect the wiring harness until the locking tab clicks, securing connections completely. Install any dust cap or rubber boot to seal against moisture and protect the headlight assembly from water damage. When upgrading to LED bulbs, consider options that offer superior brightness output measured in lumens for enhanced visibility. For LED or HID conversions, mount anti-flicker modules securely away from heat sources and moving components. If you notice the bulbs flickering after installation, you may need to install a warning canceller module to eliminate dashboard warnings and ensure proper function.
800% Enhanced Visibility for Road Safety: Our advanced HID kits dramatically improve vision, enabling earlier detection of road obstacles and animals. This motorcycle hi/low beam upgrade delivers superior illumination for safer riding and driving in all conditions, thanks to the intense output of HID technology
Huge Improvement in Visibility: AUTOONE H11 9005 led bulbs combo are equipped with high luminous efficacy csp chips. And 1:1 halogen bulbs’ beam pattern, spread out the light more to help in the side and front vision but no endangering others
10X Ultimate Brightness: SEALIGHT 9005 9006 bulbs combo use high-end 16 CSP chips to deliver up to 1000% brighter light than original bulbs. With 6500K cool white colour temperature, HB3 HB4 bulbs combo allows you to see further and clearer on the road at night, improving driver safety
Reconnecting Components and Reassembly
With the new bulb seated and locked, reverse the disassembly sequence to restore all protective components and structural elements. Start reconnecting connectors by pressing each electrical plug onto the bulb terminals until you hear a distinct click. Verify secure attachment before proceeding. Position the bracket against the headlight assembly, then insert the 10mm mounting bolts and tighten with a socket wrench. Install the upper shield by tucking it behind the bumper cover lip, ensuring proper alignment with the painted surface. Bring the bumper cover rearward to seat, then secure with Phillips head screws at the fender junction. Drive push clips into their mounting holes along the bottom and sides. Finish securing assembly by tightening the 10mm hex bolt inside the engine compartment, establishing proper headlight positioning. Ensure you have identified the correct bulb type for your specific Honda model before installation to guarantee compatibility. Avoid touching the glass surfaces of halogen bulbs during installation, as skin oils can cause premature burnout and reduce bulb lifespan. Once reassembly is complete, test the headlights to ensure optimal performance and verify that both lights illuminate evenly and brightly.
Testing Your New Headlights
After completing reassembly, verify proper headlight operation through systematic functional testing of all lighting modes. Turn headlights to low-beam and observe the beam pattern against a flat surface at 25 feet to establish baseline light brightness. Activate high beams to confirm intensity increase and proper center flash pattern. Test DRLs, turn signals, and parking lights for correct sequencing and illumination levels.
Measure voltage at the headlight connector with lights on; expect 12–14V in a healthy system. Perform continuity checks on bulb circuits to detect open filaments or faulty LED drivers. Inspect ground connections for low resistance. For vehicles equipped with adaptive or LED headlight systems, use a diagnostic scanner to check for stored fault codes that may indicate installation or component issues.
Conduct a night-road test to evaluate real-world beam cutoff and roadway illumination. Make headlight adjustments as needed using manufacturer-recommended aiming procedures on a level surface.
Model-Specific Tips for Popular Honda Vehicles
Honda headlight replacement procedures vary considerably across model generations, requiring distinct approaches for bulb access and tooling. For 2006-2011 Honda Civic models, you’ll access low beams through the fender wheel well by prying the liner, while high beams require working under the hood. The 2012-2015 generation simplifies this with hood-only access for both bulb types. The 2016-2021 Honda Civic uses H11 low beam and HB3 high beam bulbs, demanding careful connector alignment before installation. Driver side replacements prove consistently tighter across all generations due to wire routing constraints. Passenger side high beam access remains easier throughout model years. You’ll need gloves to prevent oil transfer onto bulb glass, which compromises longevity. Always verify connector clicks for secure electrical contact. When installing the new bulb, ensure the pointer on the bulb faces the tab of the plug for proper alignment. For optimal results, replace both low-beam bulbs simultaneously to ensure even illumination across your headlights.

Lights Dim Over Time, Replace In Pairs: Your lights are a pair, one is never turned on without the other. If one bulb burns out, the other isn't far behind. Replace your H11 XtraVision Halogen bulbs in pairs for optimum performance.

【Huge Improvement in Visibility】-AUTOONE H11 led bulbs are equipped with high luminous efficacy CSP chips. And 1:1 halogen h11 bulbs’ beam pattern, spread out the light more to help in the side and front vision but no endangering other drivers. Safer and bright upgrade for fog lights or drl

Lights Dim Over Time, Replace In Pairs: Your lights are a pair, one is never turned on without the other. If one bulb burns out, the other isn't far behind. Replace your H11 SilverStar Halogen bulbs in pairs for optimum performance.
Troubleshooting Common Issues
Headlight failures in Honda vehicles stem from three primary failure modes: electrical system faults, component degradation, and environmental damage to the lamp assembly.
Electrical failures manifest as corroded ground wires showing green/white deposits at harness connections, blown fuses, or failed relays affecting beam operation. Check connector pins for moisture contamination or physical displacement. Measure voltage drop across bulb circuits—excessive resistance indicates degraded grounds or cables requiring replacement before new bulbs. Ground wires may break in vulnerable areas behind the dashboard or near the fender well, particularly after prior bulb replacement work that stresses connection points.
Moisture damage from cracked lenses or failed gaskets causes condensation, reflector corrosion, and socket deterioration. Persistent fogging after washing signals compromised seals; internal water exposure shorts circuits and pits chrome reflectors, often necessitating complete assembly replacement.
Clouded polycarbonate lenses reduce output despite functional bulbs. Misaligned aim produces glare and poor road illumination—adjust per specifications after any replacement work.
![True Mods H6054 H4 LED Headlight Wiring Harness [Negative Switched Conversion] [Fused] Universal H4 Head Light Relay Harness Kit for 9003 H6024 5x7 7x6 4x6 Subaru Toyota Jeep Sealed Beam Headlamp](https://m.media-amazon.com/images/I/51+wV9S2Q4L._SL500_.jpg)
YOUR VEHICLE NEEDS THIS - Swapping out old headlights for LED conversions on negative switched vehicles like Toyota, Subaru, Mitsubishi, or Suzuki, is not a simple job. But with our plug-and-play universal dual H4 headlight relay harness kit for high/low beam it can be! The compatible sockets include: 7x6 5x7 H6024 (2D1 H6054 H5054 H6054LL 6014 6052 6053)|H6024 (2D1)|4x6 6x4 (H4651, H4652, H4656, H4666, H6545)|H5006 (2C1) sealed beam headlights and more!
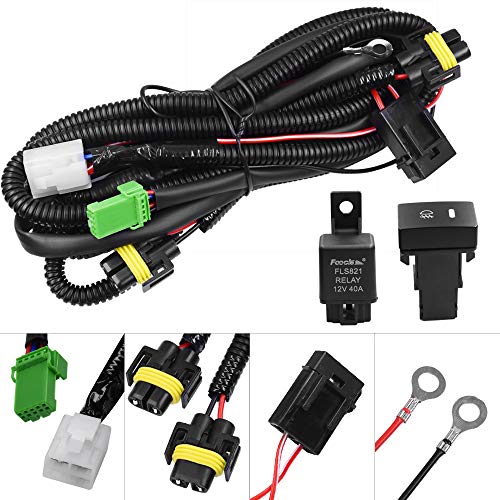
Good For Replacement fog lamps, Add-on fog lights, HID lights, LED daytime running lights, Driving lights, LED work lights, Off-road lighting kit

High Quality: This female adapter wiring harness sockets is made of high-quality materials, the nylon shell has good insulation, heat-resistant and flame-retardant, has good toughness, is not easy to deform or crack, the internal copper wire can stably conduct electricity, has high working efficiency, and can be used for a long time