To replace an H7 headlight bulb, you’ll need safety glasses, nitrile gloves, and the correct replacement bulb. First, turn off your engine and disconnect the battery‘s negative terminal. Open the hood, locate the headlight housing, and remove the protective dust cover by twisting counterclockwise. Release the spring clip securing the bulb, disconnect the electrical connector, and extract the old bulb. Insert your new H7 bulb without touching the glass, reconnect the connector, and secure everything. For detailed troubleshooting steps and professional installation techniques, explore the extensive guide below.
Gathering Your Tools and Safety Preparations
Before you access the headlight assembly, you’ll need specific personal protective equipment and tools to complete the H7 bulb replacement safely and efficiently. Wear safety glasses to protect against glass shards, nitrile gloves to prevent oil contamination of the bulb envelope, and closed-toe footwear for drop protection. Your tool organization should include the correct replacement H7 bulb, basic hand tools (screwdrivers, socket set), needle-nose pliers for retaining clips, and a headlamp for illumination in tight spaces.
Follow this safety protocol: confirm the engine is off with ignition key removed, parking brake engaged, and vehicle on level ground. Disconnect the battery negative terminal when working near sensitive electronics. Allow hot components to cool completely, and consult your owner’s manual for model-specific warnings before beginning work. Verify that your H7 bulb matches your vehicle’s original specification to ensure proper fit and electrical compatibility. Most vehicles have headlight controls located on the dashboard or steering column that should be tested after bulb replacement. Open the car’s hood using the latch mechanism and secure it with the prop rod to maintain safe access to the headlight assembly.

Lights Dim Over Time, Replace In Pairs: Your lights are a pair, one is never turned on without the other. If one bulb burns out, the other isn't far behind. Replace your H7 XtraVision Halogen bulbs in pairs for optimum performance.

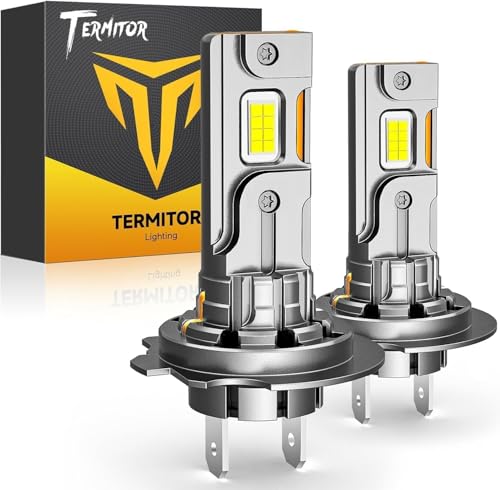
[10X Brighter & High CRI Crystal Light] Featured with 24 high-power chips for stable luminous flux output, these FAHREN H7 Gauges Light Kit produce 10X brighter illumination than stock bulbs. Boasting a high-CRI 6500K cool white beam, it upgrades dim factory yellow lights to boost light penetration and road visibility, delivering even light distribution, clearly capturing road details.

【Experience a 1200% Brighter Night】 Transform your drive with our advanced H7 light bulbs. Each H7 light bulb combo, equipped with 12 high-performance chips, delivers a blinding 70,000 lumens per set. Powered by the latest upgraded Z10 technology, it provides unparalleled road illumination—turning night into day for a safer, more confident, and utterly superior driving journey.
Locating and Accessing the Headlight Assembly
Access to the H7 bulb assembly begins by opening your vehicle’s hood and identifying the headlight housing from the engine bay’s rear perspective. Locate the protective rubber cap or plastic cover obscuring the bulb socket—common in European models like BMW, Volkswagen, and Audi. Remove any obstructing components, including fuse box covers or nearby connectors, to gain adequate clearance.
Pull back the dust cover to expose the H7 socket. Note the alignment tabs or flat-side indicators ensuring proper bulb orientation during installation. Verify socket type: Type 1 features a spring lock mechanism, while Type 2 allows direct pull-out without retaining hardware. Inspect the housing for headlight alignment markers and confirm sufficient maneuvering space. Avoid touching accessible glass surfaces during inspection to prevent contamination, as oils from bare hands can damage the bulb. Before proceeding, consult your vehicle owner’s manual to confirm the exact bulb size and socket specifications for your particular model, and consider creating additional workspace by turning the front wheels outward if needed. After successful bulb installation, monitor your headlights for signs of oxidation and yellowing that may require future restoration.

Each bundle contain 2 bulbs, 2 55W Platinum ballast, and accessories
【1000% Brighter Than Halogen—Ultimate Night Vision】Experience a revolutionary leap in illumination with our high-density chips, delivering a staggering 110,000LM per set. Engineered to be 1000% brighter than stock halogen lamps, these H7 bulbs provide an ultra-long lighting range and crystal-clear road visibility. Say goodbye to dim yellow lights and drive with the confidence of high-efficiency, stable brightness that cuts through the darkest nights.

Upgrade Canbus Decoder: Xprite H7 LED canbus decoder adopts resistor and capacitor error-free design to provide a more stable and reliable performance. The heavy-duty case enhances heat dissipation and safety protection, ensuring a longer lifespan.
Removing the Dust Cover and Housing Components
Locate the dust cover protecting the H7 bulb socket from moisture and debris intrusion. For dust cover removal, twist counterclockwise if it’s a twist-off design, or pull off by hand if unsecured. Use a screwdriver for screw-secured covers, then set aside to prevent contamination. Some housings lack dust covers entirely.
Next, access the housing components by pressing the tab on the bulb holder‘s side and pulling out. Alternatively, twist the connector to release it. Two spring clips typically secure H7 bulbs—press down the metal clip to release. Some assemblies feature plastic locking mechanisms or spring buckles requiring upward pulling. Certain OEM H7 sockets allow direct halogen bulb extraction from the power socket. For LED installations, detach the base collar before locking into position. To avoid costly mistakes, consult model-specific procedures as headlight assembly designs vary significantly across different vehicle types. Before reassembling, test the bulb to ensure functionality. Ensure the alignment tabs fit correctly when inserting the replacement bulb into the socket.
Disconnecting and Extracting the Old H7 Bulb
With the housing components removed, you’ll now separate the H7 bulb from its electrical connector and physical retainer. First, locate the locking tab on the connector and depress it while pulling straight back—never yank the wires. If the connector resists, apply dielectric-safe contact spray and wiggle gently. Perform a connector inspection for corrosion, melting, or damaged terminals before proceeding. Next, identify your retaining mechanism: metal spring clip, wire retainer, or twist-lock ring. Support the bulb base while releasing the retainer to prevent dropping. Note bulb orientation carefully—this guarantees correct installation later. Withdraw the bulb straight out without twisting unless your vehicle specifically requires rotation. Handle only the metal base to avoid skin oils contaminating replacement glass. If you notice the factory bulb identification number or letter printed on the base, verify it matches H7 specifications before selecting your replacement.

Get the best lighting performance and an increased visibility and comfort on the road compared to basic bulbs

Lights Dim Over Time, Replace In Pairs: Your lights are a pair, one is never turned on without the other. If one bulb burns out, the other isn't far behind. Replace your H7 SilverStar Halogen bulbs in pairs for optimum performance.

【Visual Enhancement】: The OKOENIEO H7 halogen bulbs are 200% brighter than other halogen bulbs, providing drivers with a wider and farther field of vision. Offering a greater visibility, they allow drivers to spot deer, wildlife, falling rocks, or obstacles ahead of time, ensuring safer nighttime driving.
Installing Your New H7 Bulb Properly
Before you seat the replacement H7 bulb, verify its base type matches your vehicle’s socket configuration—some aftermarket LEDs ship with removable collars or adapter rings that must be pre-assembled. Confirm bulb orientation by aligning chips or filament at the 3 o’clock/9 o’clock positions for proper beam alignment. Rotate the bulb until alignment tabs engage the socket notches, preventing off-axis mounting that causes glare. Insert the bulb straight into the reflector focal plane, then secure with the OEM retaining spring or clip. If installing LED conversions, check driver polarity—flip the connector 180° if the lamp doesn’t illuminate. Ascertain the dust cap reinstalls without compressing wiring. Wear clean gloves throughout the installation process to avoid direct contact with the bulb surface, which can leave oils that reduce lifespan. Proper beam pattern quality ensures optimal visibility and safety during nighttime driving. Test beam alignment on a wall surface to verify cutoff and hotspot symmetry before final assembly. Understanding color temperature differences between bulb types can help you select the most appropriate lighting for your specific driving conditions and preferences.
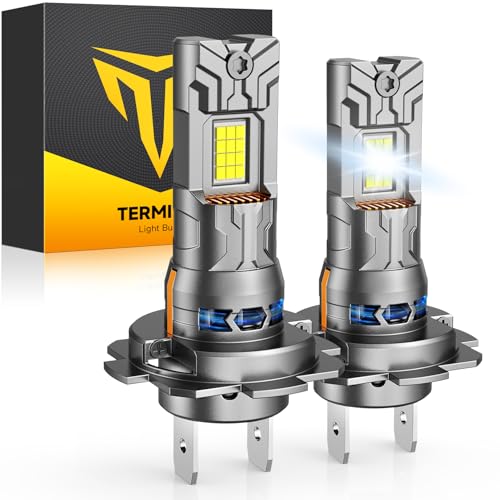
【Superior Night Driving Visibility】Powered by 18 advanced Gen CSP chips, the H7 fog lights are 14 times brighter than OEM bulbs! The 6500K cool white beam significantly enhances contrast, reduces eye strain, and widens your field of vision, providing a safer and more precise driving experience at night. Enjoy unparalleled comfort and clarity on the road!

【900% Super Brighter & 1500FT Visibility】 Powered by 2026 upgraded 16-core LED chips, these H7/H7LL bulbs deliver a massive 70,000 lumens per set. Providing 9X the brightness of standard bulbs and illuminating up to 1500FT down the road, they ensure clearer visibility and vastly improve your night-driving safety.

【High Quality Material】: The automotive LED resistor kit shell is made of high quality aluminum as the raw material. Compared with plastic, the aluminum shell is more robust and wear-resistant, not easy to break, and can better resist external impact and vibration, suitable for all kinds of environmental conditions in the vehicle driving process. Moreover, it has good heat dissipation ability, which can protect the internal electronic components from high temperature damage.
Securing the Assembly and Replacing Covers
Once the H7 bulb seats in the reflector housing, engage the retaining clip to lock it into position. The spring-loaded clamp pulls up to release and pushes down to lock, guaranteeing the bulb remains firmly seated during vehicle operation. Align the metal base properly before clipping to prevent damage.
Next, reconnect the electrical connector to the bulb’s back terminal. Twist the connector clockwise until it locks securely. If the bulb doesn’t illuminate during testing, flip the connector 180 degrees to correct polarity.
When securing assembly components, push the headlight housing forward while pressing the locking lever down. Hard pressure guarantees proper seating in the locator catches. After installation is complete, turn on the headlights to confirm proper functionality of the new bulb. To prevent glare to other drivers, ensure the beam alignment is properly adjusted after installation. It is recommended to change bulbs in pairs to maintain consistent lighting output between both headlights.
Finally, installing covers requires repositioning the rubber dust cap over the housing. Twist or pull it into place, guaranteeing wires seat inside before sealing to prevent moisture ingress.
Testing Your New Headlight Bulb
After completing the installation, verify the bulb functions correctly through systematic electrical testing. Begin bulb testing by setting your multimeter to continuity mode or the 200 ohms range. Touch the probes together to confirm proper calibration with a beep sound. For resistance checks, disconnect the bulb from the wiring harness and touch probes to both contacts on the H7 base. A reading near zero or 1 ohm confirms an intact filament, while “OL” indicates failure. Reconnect the bulb and switch to voltage mode for multimeter usage during live testing. Activate your headlights and probe the bulb contacts. A reading between 11.7-12 volts verifies proper power supply and confirms successful installation. Consider that LED and HID conversions may provide enhanced brightness compared to standard halogen bulbs for comparison purposes. Proper voltage delivery ensures your headlight system operates safely and meets DOT regulations for road use. For optimal performance evaluation, conduct a visual inspection in a controlled environment to assess the beam pattern and light output quality.

800% Brighter Night Vision Powered by advanced chip technology, Marsauto H7 bulbs deliver 8x the brightness of standard halogen bulbs, producing crisp 6500K white light for enhanced visibility and faster reaction time—whether driving at night or in low-light conditions.

The information below is per-pack only
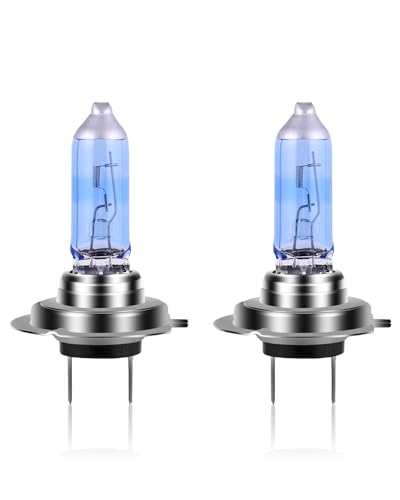
【Super Bright】Our H7 headlight bulb deliver a brightness of more than 1500LM, up to 5000K color temperature, providing the best visibility in foggy and rainy weather, Our headlight bulb filled with more than 45% Xenon gas to be more brighter and whiter, Blue ion membrane filters yellow light and gets SUPER WHITE LIGHT with color temperature up to 5000K.
Common Issues and Professional Tips
While H7 bulb replacement appears straightforward, several technical challenges frequently complicate the process. LED compatibility issues plague 95% of installations, triggering CANbus error codes and dashboard warnings. Your vehicle’s hyper-sensitive system detects resistance mismatches between LED and filament bulbs, requiring CANbus-ready bulbs or parallel-wired load resistors using scotch locks.
Installation challenges include bulbs protruding from tight housings, preventing dust cover reinstallation. Select 1:1 design LEDs matching halogen dimensions exactly, and never omit dust covers—moisture causes premature failure. Install locking collars into housings before inserting bulbs to avoid forcing components. Understanding the color temperature differences between bulb types can help you select the most appropriate replacement for your specific lighting needs. Top-rated LED bulbs are typically engineered to match the brightness levels and lifespan of premium halogen alternatives while maintaining housing compatibility.
If you’re experiencing frequent burnouts (3-6 months), examine failed bulbs for dark spots indicating filament degradation. For persistent CANbus errors despite compatible bulbs, install resistor kits or use OBD-II devices to disable headlight monitoring in hyper-sensitive systems. Radio static when headlights are on indicates electromagnetic interference from LED drivers, which quality bulbs with built-in EMI shielding can resolve.